| If you're used to fully functional jukebox products like those from MusicMatch, Microsoft, and RealNetworks, Studio's CD Audio tool will seem mundane. But while it doesn't compare to these products in flash and features, at least you'll know the files you create using the CD Audio tool will be compatible with Studio. To rip a CD audio track 1. | In the Movie window, place the Timeline scrubber where the audio should be inserted (Figure 11.6).
Figure 11.6. Position the Timeline scrubber where you want Studio to place the ripped CD audio. 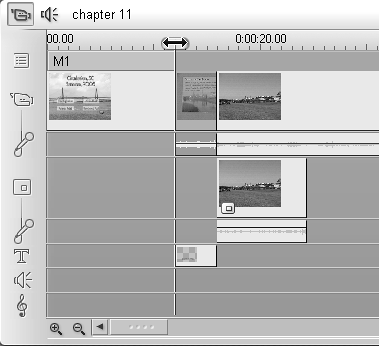
| 2. | To open the CD Audio tool, do one of the following:
- Click the Audio Toolbox icon (Figure 11.1), then click the CD to switch to the CD Audio tool.
- In the Studio menu, choose Toolbox > Add CD Music.
The Audio toolbox opens to the CD Audio tool (Figure 11.7).
Figure 11.7. The CD Audio tool. 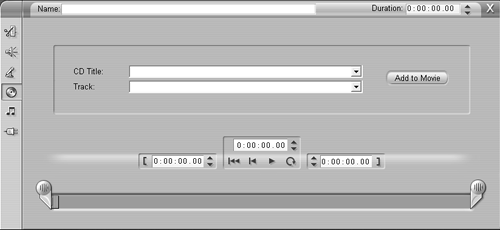
| 3. | Place a CD in the CD drive.
Studio performs one of the following actions:
- If the CD is new, Studio prompts you to enter the name of the CD (Figure 11.8). Enter the appropriate name.
Figure 11.8. Studio tracks your CDs by the title you enter here. 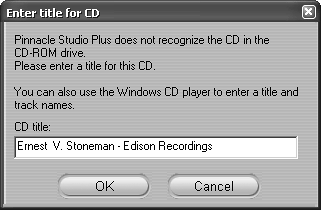
- If you've ripped tracks from this CD previously, Studio automatically recognizes the CD and inserts the name (Figure 11.9).
Figure 11.9. The second time you load the CD, Studio remembers it. 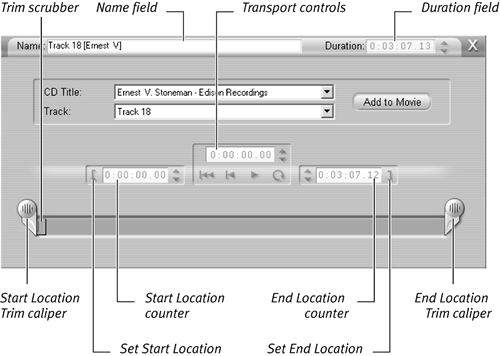
| 4. | Select the desired track.
| 5. | If desired, select the Start and End locations by doing one of the following:
- Slide the Trim calipers to the desired location.
- Type the desired setting in the transport controls or use the Trim scrubber to move to the desired location, and then click the controls that set your Start and End locations.
- Use the Jog buttons next to the Start and End Location counters.
| 6. | Click the Add to Movie button.
Studio rips the CD-Audio track (Figure 11.10) and adds the track to the selected location (Figure 11.11).
Figure 11.10. Studio is capturing the CD-Audio to your hard disk. 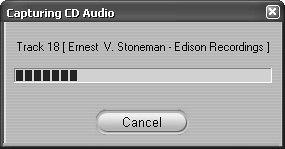
Figure 11.11. Studio adds the captured audio to the music track. 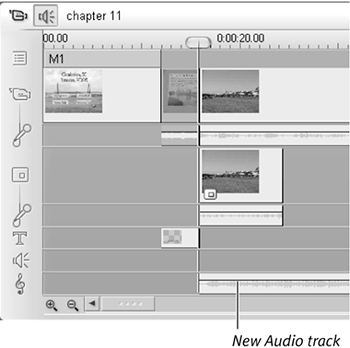
|
 Tips Tips
There's usually some silence at both the start and end of a CD audio clip. It's a good idea to eliminate this before you rip a track; otherwise it's another step with the Audio toolbox (Figure 11.9). If you're a digital audio aficionado, you'll probably be much happier using any of the players from the companies I mentioned in the introduction to this section (MusicMatch's Jukebox, Microsoft's Media Player, or RealNetworks' RealPlayer) to rip tracks from your audio CD. All these programs can search the Internet and name your CDs and tracks, and rip the files for instant use and later reuse. But many people will probably find that the CD Audio tool works just fine. If you use a third-party player, note that Studio can be finicky during import, and might fail to load MP3 files that are not 128 Kbps, or WAV files that are not 16-bit stereo at 44.1 kHz (the standard for CD-Audio). If you use another tool, rip a track or two and see if Studio can load it before ripping your entire soundtrack. And remember, Studio can't load RealMedia files or QuickTime, so don't even think about it.
|


 Tips
Tips