#34 Synching Clips on the Timeline Once your Multi-Camera clips are on the timeline, here's the procedure for synchronizing them and creating the Multi-Camera sequence to edit. If Synchronization Is Grayed Out in the Right-Click Menu Target a video track by clicking the header on the extreme-left side of the timeline. Technically, Premiere Pro synchronizes your clip to the target track. For example, if you choose Clip Start or Clip End as your synchronize point, Premiere Pro synchronizes the starting and ending points of all clips to that of the targeted track. However, sometimes it may actually shift clips around to synchronize them, which can take your carefully synchronized clips out of synch. The best practice is to trim all clips to either a common starting or ending point so they won't shift when Premiere Pro synchs them. At this point, it doesn't matter which track you target, except that without a targeted track, Synchronize will be grayed out in your Right-Click menu (which is how you got there in the first place). |
1. | Drag the clips so that the markers align. With Snap enabled, Premiere Pro will snap them together to ensure alignment (Figure 34a).
Figure 34a. With Snap enabled, Premiere Pro will snap the markers together as you move the clips on the timeline, simplifying the synching process. 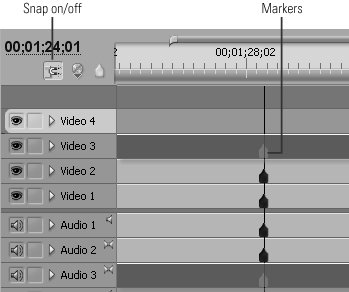
| | | 2. | Click Play in the Program Monitor. Premiere Pro will play all videos in the synch sequence. If any videos are out of synch, the audio will sound fuzzy or you'll hear repeating sections. If this happens, go back to step 1 and re-synch.
Note To fine-tune your clip synchronization manually, zoom in on the audio timeline (Figure 34b) and expand the audio waveforms to find a common event like a drumbeat or clap. Often this is the easiest technique to achieve rock-solid synch. Figure 34b. Zoomed in on the audio timeline, you gain significant accuracy, simplifying the synch process. 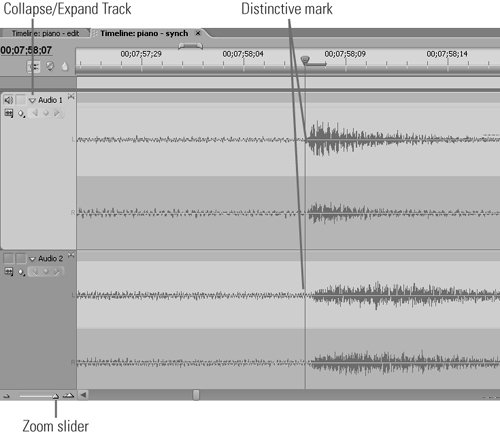
| 3. | Trim all tracks to a common beginning or ending frame to use as the synch point (see step 5).
| | | 4. | Target track Video 1 by clicking the track header on the left of the timeline.
Using Clip End to Synchronize When shooting with multiple cameras, it's not unusual for one or more cameras to start a bit late. In this instance, synchronizing on the end point is your only option, and it works just fine. When you use the Multi-Camera Monitor (#36) to choose your camera angles, clips that aren't available are blacked out. As soon as they appear in the synch timeline, they appear in the Multi-Camera Monitor. |
| 5. | Select all audio and video tracks, right-click, and choose Synchronize Clips from the pop-up menu (Figure 34c).
Figure 34c. Premiere Pro's four Multi-Camera synchronization options. 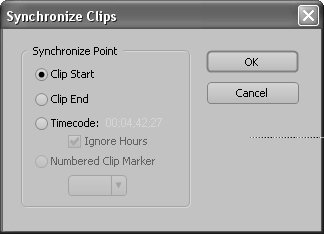
| 6. | In the Synchronize Clips dialog box, select the desired Synchronize Point and click OK.
|
|