#15 Working with Three-point Edits The most fundamental action in editing is adding a section from a source clip to a sequence on the timeline. There are four relevant points to this activity: the In and Out points of the source clip and the In and Out points of the sequence. In a three-point edit, you select any three points and the fourth takes care of itself. For example, in Figure 15a, I set the In and Out points in some crowd shots to insert as B-roll on Video 2 and set the current-time indicator exactly 20 minutes into the concert. These are three of the four points. Figure 15a. These are the three points in the three-point edit: the In and Out points in the Source Monitor, and the current-time indicator in the sequence. 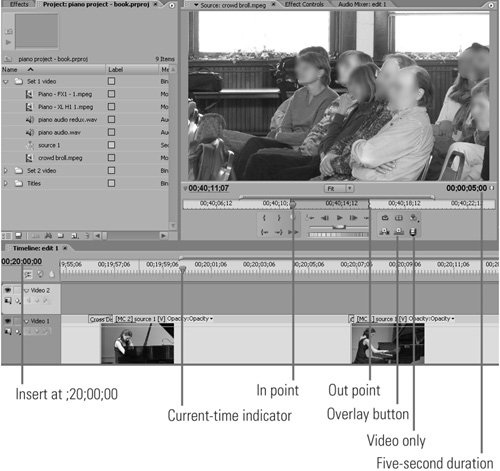
When I click the Overwrite icon, Premiere inserts the 5 seconds of B-roll into Video 2 at the 20-minute mark, where the B-roll ends at precisely 20:04.29, the fourth point of the edit. Now let's address a different problem. Say while you were shooting, the person sitting in front of you abruptly stood up and stretched, blocking your view. Now you've got 4 seconds of video to hide with B-roll. Rather than setting the In and Out points in the Source Monitor, you set them in the sequence using controls in the Program Monitor. Here's how: 1. | Set the In point on the last good frame before your shot was obscured.
| 2. | Set the Out point on the first frame after your field of view was restored. This creates the selection shown in both the timeline and Program Monitor in Figure 15bessentially, the bad video you need to hide with B-roll.
Figure 15b. Now let's mark two points in the timeline and one in the Source Monitor. 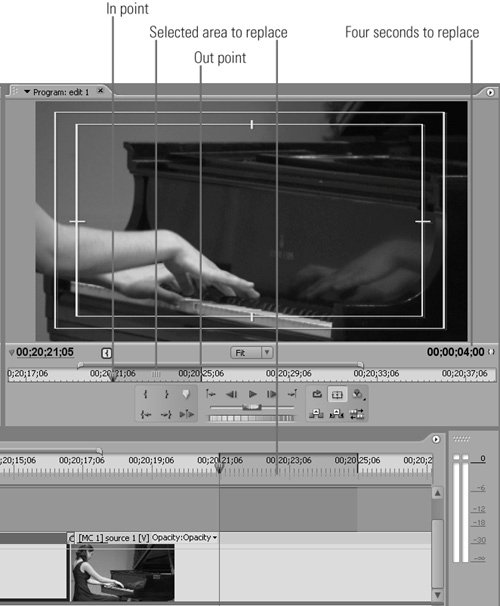
| | | 3. | Next, load your crowd scene into the Source Monitor, and set the In point.
Insert? Overlay? Both? You can perform three-point editing using both insert and overlay editing, but for adding B-roll as I was doing, overlay is definitely the way to go. The sharp-eyed reader will also note that I've got the Toggle Take Audio and Video buttons in Figure 15a set to video only, since I don't want to overwrite the carefully captured audio, just the video. This is a perfect example of when you'd want to use this feature to isolate only the video portion of the clip in the Source Monitor. |
| 4. | Click the Overlay icon in the Source Monitor, and Premiere Pro will automatically fill the selected area in the sequence with B-roll from the Source Monitor (Figure 15c). In this example, we set two points in the sequence and one in the Source Monitor, and Premiere Pro set the fourth.
Figure 15c. Here's the B-roll inserted by Premiere Pro. Note that Premiere Pro clears the In point and Out point in the sequence so you can go on to the next edit. 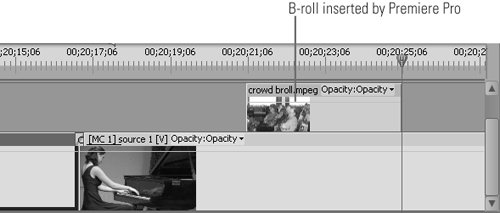
|
B-Roll Just to make sure we're on the same page, B-roll refers to footage that's ancillary to but not the main event. In this project, the main event is the concert, while B-roll is the video of folks watching and hopefully applauding. B-roll serves a lot of purposes, including hiding poor quality A-Roll (when you accidentally kicked the tripod) and helping to retain the viewer's interest. |
|