OracleAS Portal Reports
| | ||
| |
OracleAS Portal Reports
The Reports component of OracleAS Portal gives developers the ability to create great-looking OracleAS Portal Reports. As you will see, developers can change the look of the report according to values queried (or calculated) from the database, and then they can grant power users the ability to modify the query used to drive the report and can even create links in their reports that allow users to click a report and be taken to another OracleAS Portal component.
| Note | Links in OracleAS Portal are discussed in the next chapter. |
When you select the Create New... Report link in the Navigator, you are presented with a page similar to the one used to create our first OracleAS Portal Form (Figure 9-9).
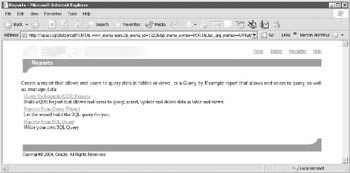
Figure 9-9: The first page of the OracleAS Portal Report Wizard
Choosing from the three different types of OracleAS Portal Reports will depend on your reporting requirements:
-
Query By Example (QBE) Reports Choosing this type of report will not only generate the report itself but will also generate a customization screen along with the OracleAS Portal Report. Power users can be granted privileges that allow them to modify what data is returned to the portlet and to insert/update/delete records in the reports tables.
-
Reports from Query Wizard This type of report is similar to a QBE report except for the fact that the customization page contains many fewer options ”the ability to insert/update/delete records is not available, nor is the ability to change the where clause of the query driving the report.
-
Reports from SQL Query This option allows developers to write their own query that will drive the report.
Table 9-2 shows the different OracleAS Portal Report Wizard pages presented to the developer depending on the type of report chosen .
| Wizard Page | QBE Report | Report from Query Wizard | Report from SQL Query |
|---|---|---|---|
| Report Name and Portal Provider | Step 1 of 10 | Step 1 of 16 | Step 1 of 13 |
| Table(s) or View(s) | Step 3 of 10 (as in the wizard for OracleAS Portal Forms, there doesn't appear to be a step 2 anywhere ) | Step 3 of 16 | N/A |
| SQL Query | N/A | N/A | Step 3 of 13 |
| Table/View Columns | Step 4 of 10 (erroneously labeled Step 5 of 10 on actual wizard page) | Step 5 of 16 | N/A |
| Column Conditions | N/A | Step 6 of 16 | N/A |
| Report Layout | N/A | Step 7 of 16 | Step 4 of 13 |
| Column Formatting | Step 5 of 10 | Step 8 of 16 | Step 5 of 13 |
| Formatting Conditions | Step 6 of 10 | Step 9 of 16 | Step 6 of 13 |
| Display Options | Step 7 of 10 | Step 12 of 16 | Step 9 of 13 |
| Report Layout Editor | N/A | N/A | Step 10 of 13 |
| HTML Code | N/A | Step 13 of 16 | N/A |
| Customization Form Options | Step 8 of 10 | Step 14 of 16 | Step 11 of 13 |
| Report and Customization Form Text | Step 9 of 10 | Step 15 of 16 | Step 12 of 13 |
| Additional PL/SQL Code | Step 10 of 10 | Step 16 of 16 | Step 13 of 13 |
Click the Query By Example (QBE) link to build a QBE report for this example. The first page of the wizard should look familiar. In fact, all of the OracleAS Portal components we can build will have a screen similar to Figure 9-10.
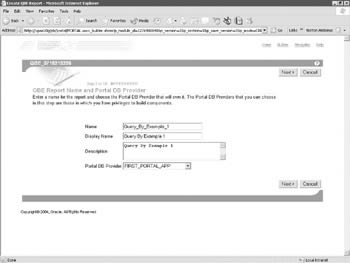
Figure 9-10: The first step of the OracleAS Portal Reports Wizard
Enter meaningful values for your OracleAS Portal Report and click Next >. The next page of the wizard prompts for a table or view that will drive this report. Clicking the small notepad icon to the right of the text box will bring up a list of all tables and views you have access to in the database.
This can be confusing for developers new to OracleAS Portal. We ve already mentioned that when a user is created in OracleAS Portal, an entry is made for that user in Oracle s LDAP implementation, Oracle Internet Directory (OID). No user is created in the database. If no user is created in the database, how can a developer determine what tables and views they have access to? The answer lies in the schema that is associated to the OracleAS Portal provider upon creation of the provider. Any attempt to create an OracleAS Portal Form or Report (or any OracleAS Portal object for that matter) that needs with query the database to see a list of available objects for inclusion on that OracleAS Portal component will talk to the database as the user specified when the OracleAS Portal database provider is defined. For DBA types out there, the list of objects that is presented to the OracleAS Portal developer will reflect those objects in the ALL_TABLES and ALL_VIEWS views. A second point of confusion relates to accessing data on separate instances. Oracle recommends that the infrastructure database not be used for storing any data that is not directly used by Oracle Application Server 10 g to perform its functions. It is considered bad practice to mingle data used by the various Oracle Application Server 10 g components with application data found in your organization. OracleAS Portal accesses data not in the infrastructure database through the use of links, as is demonstrated in the following example.
| Tip | As of OracleAs10g, the Portal Repository can be installed into a new or existing Oracle database, versions 9.2.x or 10g. This is done using the RepCA (Repository Creation Assistant CD, part of the distribution). If your portal will be accessing data from only one database instance, you can install the Portal Repository there and reference the data locally ”this is far superior to using db links. If your portal will be referencing data from multiple Oracle database instances, you will have to use database links. |
As it is common (and good practice) to store your company s production data outside of the infrastructure database, this example will make use of a database link. By default, the Oracle Application Server 10 g infrastructure database is called asdb. On a separate server, I have an older Oracle 9 i AS R2 database running named iasdb. In that database, I have a schema named user1. For this example, we will build an OracleAS Portal Report off of the test1 table owned by the user1 user in the iasdb database. What are the steps to perform this?
First, we must build a database link in the asdb instance. In order for the database link to work properly, an entry is needed in the tnsnames.ora file in the infrastructure home of my Oracle Application Server 10 g installation. In this example, my home for the infrastructure instance on my xpas10g server is C:\IS_HOME, so the tnsnames.ora file that needs modification is in the C:\IS_HOME\NETWORK\ADMIN directory. In the next example, you will see the entry for the Oracle Application Server 10 g infrastructure database (asdb on the xpas10g server) and the new entry for the database link about to be created (iasdb on the 192.168.0.2 server):
ASDB = (DESCRIPTION = (ADDRESS_LIST = (ADDRESS = (PROTOCOL = TCP)(HOST = xpas10g)(PORT = 1521))) (CONNECT_DATA = (SERVICE_NAME = asdb.world))) IASDB = (DESCRIPTION = (ADDRESS_LIST = (ADDRESS = (PROTOCOL = TCP)(HOST = 192.168.0.2)(PORT = 1521))) (CONNECT_DATA = (SID = iasdb)))
For simplicity s sake, I created a public database link called iasdb in the asdb instance:
SQL> create public database link iasdb connect to user1 identified by user1 using
EAN: 2147483647
Pages: 192