Advanced Topics
|
| < Day Day Up > |
|
The previous section discussed the basic information necessary to create a simple dissector. But, as your dissector becomes more complex you will need to implement more advanced features. Ethereal provides many different mechanisms to assist you in making your dissector display and decode packet data in a more informative manner. In this section we will look at some of the more complex tasks that you may want to incorporate into your packet-xxx dissector.
We will also take a quick look at modifying the Ethereal GUI. This process will require you to acquire some knowledge of GTK and some of its features and mechanisms. Since Ethereal’s GUI is generated by using the GTK libraries, you will find that it makes calls to functions that are not included in the Ethereal distribution. These functions are part of the GTK binaries that you downloaded in the GTK developer kit. Documentation on these functions are available at the GTK website at www.gtk.org.
Finally, this section includes a short description of the tap and plug-in implementations in Ethereal. Taps will allow you to build tools that acquire real-time data from Ethereal. The plugin interface will allow you to convert a packet-xxx dissector into a plug-in that can be loaded and unloaded.
When Ethereal Calls Your Dissector
It is important to realize that your dissector can be called multiple times. Every time a display or color filter gets applied to a packet trace, Ethereal will re-dissect the data again. When the user clicks on an item in the decode pane the dissector is again called to dissect that specific packet. Your dissector should evaluate the fd.flags.visited flag in the pinfo data structure to determine if it needs to perform work that has not been performed. Otherwise, you may overwrite data that is necessary to properly decode your packets, for example, adding new conversations into a conversation list that already exists. You should construct your dissector to take into consideration if the initial dissection has already been completed.
Dissector Considerations
When you compose a dissector you may need to consider several factors. If the protocol that needs dissection runs on top of a connection-oriented protocol, you might need to track the request reply packets to ensure they match. Connection-oriented protocols generally guarantee delivery. The underlying protocol will retransmit packets if they are not acknowledged by their peer. So how do you handle retransmissions? Your dissector may also need to handle payloads that exceed the maximum packet size. The actual payload may span several packets and your dissector needs to defragment the data. There are also situations where you might want to store information either in the form of a memory value or across loading of the application. You will most likely encounter at least one of these conditions. This section is meant to provide some advanced topics to help you overcome and develop a way to handle these situations.
Creating Sub-trees
Many times the decoded data should be branched to a separate sub-tree. This practice allows users to see important summary information in the decode window and allow them to expand specific sections of the decode window to see more detail. For example, we may want to branch at a sub-level or a particular item that might contain more data or attributes then you want to normally display (see Figures 9. 10 and Figure 9.11).
![]()
Figure 9.10: Closed Item in Decode Pane
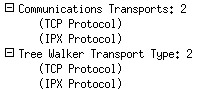
Figure 9.11: Expanded Item in Decode Pane
The user can now click on the Entry Information field within the decode window to expand the item and get more detailed information. Sub-trees are easily implemented with the proto_tree functions.
proto_item *subitem; proto_tree *subtree; subitem = proto_tree_add_text(tree, tvb, offset, -1, "Some Description"); subtree = proto_item_add_subtree(subitem, ett_myprot); proto_tree_add_item(subtree, hf_myvalue, tvb, offset, 4, FALSE); proto_item_set_end(subitem, tvb, offset);
The first step is to declare the proto_item and proto_tree variables.
The proto_tree_add_text function allows us to create a label. This is only one of many good uses of the proto_tree_add_text function. In this example, we pass the tree pointer that was given to us when our dissector was called. We also pass the tvb, offset, and length to the function so that when the user highlights the label in the decode window the remaining packet data will be highlighted. The -1 tells proto_tree_add_text that the length is all remaining data starting from the beginning offset. Finally, the label is passed to the function to describe what this sub-tree actually contains. We could branch from an actual element within the decode window as well instead of creating a label. To do this we could replace the proto_tree_add_text with a different proto_tree_add function. Once the label has been created in the original tree a new item pointer is returned in our sub-item variable.
The next function, proto_item_add_subtree, sets up the sub-tree in the display. It creates the sub-tree so that when we later perform another proto_tree_add function, we can reference the new sub-tree pointer.
The next call is to the proto_tree_add_item function. We pass the pointer for our new sub-tree in this function. This actually places the new element beneath the expandable label we created before. The value will not be viewable in the decode window until the sub-tree label is clicked on and expanded.
The final step in this example is to set the overall length of the proto_tree_add_item with the proto_item_set_end function. This is used when the length of the value being set is unknown. If you are working with items of known length, this function call is not necessary.
Many times you may want to create several branches of sub-trees. To do this, create multiple proto_items and proto_tree pointers. We would create sub-tree 1 and then sub-tree 2, but reference sub-tree 1 as the source tree. A visual display of the multi-level tree view can be seen in Figure 9.12.
item1 = proto_tree_add_text(tree, tvb, offset, -1, "Selector Option"); tree1 = proto_item_add_subtree(item1, ett_myprot); number_of_items = tvb_get_ntohl(tvb, offset); proto_tree_add_uint(tree, hf_num_objects, tvb, offset, 4, number_of_items); foffset += 4; for (i = 1 ; i <= number_of_items; i++ ) { item2 = proto_tree_add_text(tree1, tvb, offset, -1, "Option - %u", i); tree2 = proto_item_add_subtree(item2, ett_myprot); } ![]()
Figure 9.12: Visual Display of Multi-level Tree View
Bitfields
In some cases you may have a value that represents specific information based on what bits are set within the value. Bitfields give the user a visual display of each bit and whether they are enabled within the value, as shown in Figure 9.13.
![]()
Figure 9.13: Visual Display of Bits
Bitfields are implemented through the use of the hf array elements. The following code is an example of the calling function that builds the subtree and summary data.
flags = tvb_get_guint8(tvb, offset); strcpy(flags_str, ""); sep = " ("; if (flags & FLAG1) { strcat(flags_str, sep); strcat(flags_str, "Flag 1"); sep = ","; } if (flags & FLAG2) { strcat(flags_str, sep); strcat(flags_str, "Flag 2"); sep = ","; } if (flags_str[0] != '\0') strcat(flags_str, ")"); ti = proto_tree_add_uint_format(tree, hf_flags, tvb, offset, 1, flags, "Flags: 0x%04x%s", flags, flags_str); flags_tree = proto_item_add_subtree(ti, ett_myprot); The first step is to acquire the value from the tvbuff into the value flags. We then build our initial string and then compare the value of flags with our defined flag bits. If they match, we combine the string with the flag information. Once our summary string has been built we just create our sub-tree and display the data. We now need to display each of the valid bits in a bit view.
proto_tree_add_item(flags_tree, hf_flag_1, tvb, offset, 1, FALSE); proto_tree_add_item(flags_tree, hf_flag_2, tvb, offset, 1, FALSE); { &hf_flag_1, { "Flag 1", "myprot.flag.1", FT_BOOLEAN, 8, NULL, FLAG1, "Is Flag one set? ", HFILL }}, { &hf_flag_2, { "Flag 2", "myprot.flag.2", FT_BOOLEAN, 8, NULL, FLAG2, "Is Flag two set? ", HFILL }}, We display the bitfields by calling the proto_tree_add_item function with reference to our new sub-tree and the bitfield hf element names. Then, in the hf array, we define our new values. The key here is parameters 3, 4, and 6. Parameter 3 declares that this is a Boolean value. This means that we will evaluate this as a true or false condition. Parameter 4 declares that we will display 8 bits. Parameter 6 declares the actual value of the bitmask. You can substitute this value with the explicit mask. In our example, flag 1’s value might be 0x01 and flag 2 might be 0x02.
Unicode Strings
Many times you will run into situations where the actual data contained in the packet might contain Unicode data. Unicode data is normally seen in the hex data window as a two-byte value. For example you might see:
57 00 6f 00 72 00 6b 00 73 00 74 00 61 00 74 00 69 00 6f 00 6e 00 W o r k s t a t i o n
When processing the data, most string conversion utilities will see the second byte of the multi-byte character as a terminating null. You might find that you need to parse the string to acquire single byte character strings. Many of the main string functions within Ethereal now perform this process for you but you might find that you have a situation that requires you to manually perform the conversion. Several dissectors include functions to convert multi-byte character strings to single byte strings. The following code is an example extracted from packet-ncp2222.inc:
static void uni_to_string(char * data, guint32 str_length, char *dest_buf) { guint32 i; guint16 c_char; guint32 length_remaining = 0; length_remaining = str_length; dest_buf[0] = '\0'; if(str_length == 0) { return; } for ( i = 0; i < str_length; i++ ) { c_char = data[i]; if (c_char<0x20 || c_char>0x7e) { if (c_char != 0x00) { c_char = '.'; dest_buf[i] = c_char & 0xff; } else { i--; str_length--; } } else { dest_buf[i] = c_char & 0xff; } length_remaining--; if(length_remaining==0) { dest_buf[i+1] = '\0'; return; } } dest_buf[i] = '\0'; return; }
Conversations
Ethereal conversations are a key component of many protocol dissectors. Each dissector that needs to track conversations will define and maintain their own conversation table. The conversation table gives the dissector the ability to track request and reply packets. You might ask why you would need to track the conversation. What if there is no information contained in the reply packets that identify which request the reply was for? In this case we would need to store the original request packet in memory so that when the reply packet is found we can decode it. For example, the NetWare Core Protocol (NCP) protocol only defines a sequence number on the request packet. But, each request reply sequence is a unique session. Running on top of TCP or Internetwork Packet Exchange (IPX), the request packet will be made from a specific address with a unique port/socket. If we match these conversation components then we can logically assume that the reply packet is a response to the original request. Unfortunately, these may not come in the proper order in a packet trace. The conversation list saves each request conversation within our conversation list. When we encounter a reply packet, we perform a lookup in the conversation list to determine which request the reply matches. If no originating request packet is found, we should display a message in the decode window that the packet could not be decoded due to no request packet being found. Section 2.2.7 of the README.developer document located in the doc directory provides basic skeleton code to setup a conversation table.
Some important steps should not be missed when using conversations lists. This includes the initialization function and the cleanup function that have to be placed in the protocol register routine. Many dissectors include conversation lists. If, after reviewing the section in the README.developer document, you still need a clearer example, refer to other dissectors that utilize this capability.
Packet Retransmissions
Packet retransmissions are common on busy networks. Your dissector should be able to handle such an occurrence if it is going to attempt to handle fragmented packets. If your dissector or protocol does not process fragmented packets, your dissector can treat these packets as normal packets. In most cases a simple conversation list can check for the occurrence of a request packet but if nothing triggers your dissector, it might be a duplicate entry. You may also find that you need to manage another memory table to track a retransmitted packet. However, in other cases, the lower-level protocol might have already detected the retransmissions.
The packet information structure pinfo can provide information for the status of the current packet being decoded. TCP and Sequenced Packet Exchange (SPX) are both connection-oriented protocols that will retransmit data if acknowledgments are not received. Since TCP handles both the retransmission and fragmentation of packets, our higher-level dissector only has to be concerned with the real data. However, in the case of SPX, the higher-level dissector has to trap for retransmissions if it is handling packet fragmentation. The next section discusses how the SPX dissector passes this information on to the higher-level dissectors. It is important for you to understand that a retransmission is a common occurrence on many networks. Your dissector should be able to determine if a packet is a retransmission or a normal packet. In some cases you may choose not to dissect retransmitted packets and just identify the original packet. Just remember that a retransmission can occur at any time. It may consist of a complete packet or an individual fragment.
Passing Data Between Dissectors
The pinfo->private_data element can be used to pass a pointer to a memory table with information regarding the specific packet being decoded. You should first define a structure in your lower level dissector that will hold the information. The following information was extracted from packet-ipx.h and packet-ipx.c:
/* * Structure passed to SPX subdissectors, containing information from * the SPX header that might be useful to the subdissector. */ typedef struct { gboolean eom; /* end-of-message flag in SPX header */ guint8 datastream_type; * datastream type from SPX header */ } spx_info; Then we update the structure and save it to pinfo.
static void dissect_spx(tvbuff_t *tvb, packet_info *pinfo, proto_tree *tree) { spx_info spx_info; /* * Pass information to subdissectors. */ spx_info.eom = conn_ctrl & SPX_EOM; spx_info.datastream_type = datastream_type; pinfo->private_data = &spx_info; Now, in the higher-level dissector we can retrieve this information. This information was extracted from the source file packet-ndps.c:
static void ndps_defrag(tvbuff_t *tvb, packet_info *pinfo, proto_tree *tree) { spx_info *spx_info; /* Get SPX info from SPX dissector */ spx_info = pinfo->private_data; The higher-level dissector can now utilize the information from the lower level dissector to perform logical operations on the packet data.
Saving Preference Settings
It is often important for the user to determine how the protocol dissector might handle specific features of your dissector. For example, the packet fragmentation code can be enabled or disabled by the end user under the protocol preferences dialog. To implement a user configurable setting that will be either used during runtime or saved across multiple loads of Ethereal, you should add the ability to utilize the system preference file.
ldap_module = prefs_register_protocol(proto_ldap, NULL); prefs_register_bool_preference(ldap_module, "desegment_tcp", "Desegment all LDAP messages spanning multiple TCP segments", "Whether the LDAP dissector should desegment message", &ldap_desegment);
This code goes into the proto_register_xxx routine. It creates a new entry in the preference files with the value of the referenced variable myprot_desegment. The following is an example of the entry created in the preference file. Figure 9.14 is an example of how the value will look to the end user when they go to the preferences option in Ethereal and select your protocol. We used the LDAP protocol dissector as our example.
# Whether the LDAP dissector should desegment messages # TRUE or FALSE (case-insensitive). ldap.desegment: TRUE
![]()
Figure 9.14: Example of LDAP Preference
In other cases you may need to keep information relating to a specific packet decode. It is best to utilize a conversation table to handle this type of condition.
Packet Fragmentation
Packet fragmentation can be handled at many different protocol layers. TCP already includes packet reassembly. If your dissector needs to do additional packet reassembly then you can utilize the reassembly functions defined in Ethereal. A good example of how to handle packet reassembly by TCP is located in section 2.7 of the README.developer document in the doc directory. It covers how to handle the packet reassembly when your dissector is running on top of TCP or User Datagram Protocol (UDP).
The files packet-ncp2222.inc, packet-atalk.c, and packet-clnp.c all give examples of how to defragment messages that are fragmented within the protocol you are dissecting. The logic involved in defragmented packets can be very complicated. You will find yourself spending many hours troubleshooting and fine-tuning the defragmentation function.
Value Strings
You will also find times when you read a specific value from the packet datastream that could be defined by many different descriptions based on the value. You will want to present a string to the user indicating what the value actually means. An example of this might be an error return value in a reply packet. The numerical value will indicate which error was being returned. The section 1.7.1 in the README.developer document located in the doc directory lists the match_strval and the val_to_str functions. The first step is to create the array of values.
static const value_string my_values[] = { { 0x00000000, "Value 1" ), { 0x00000001, "Value 2" }, { 0x00000002, "Value 3" }, { 0, NULL } }; It is important to note the final line in the value string of [0, NULL]. This is the termination record for the value_string function. If this is omitted then Ethereal will continually scan memory and may possible generate a bounds error.
You can now utilize the match_strval or val_to_str functions to process the value.
valuestr = match_strval(value2, my_values);
But, you can simplify this process even further by utilizing the VALS capability of the hf arrary.
{ &hf_valuestr, { "This is my value", "myprot.valuestr", FT_UINT8, BASE_DEC, VALS(my_values), 0x0, "My value string", HFILL }} This way we can just utilize the simple tvb_get and proto_tree_add _functions.
value2 = tvb_get_guint8(tvb, 1); proto_tree_add_uint(tree, hf_valuestr, tvb, 1, 1, value2);
The same feature can be utilized to display true or false value strings in the decode pane of the GUI, for example, if you wanted to display “Yes” or “No” based on a true or false value.
typedef struct true_false_string { char *true_string; char *false_string; } true_false_string; Value strings are very important for processing return values that might contain a large number of error codes. The value string gives you the ability to process all of the possible values and return a specific string to identify the actual error. Without this information the end user is forced to research the returned value to look up the return value. In some cases the value may not really indicate a problem, but by providing the string to the end user you will eliminate much frustration and make your dissector even more valuable. Figure 9.15 shows an example of data displayed in the decode pane when utilizing a value string to return a string based on the return value.
![]()
Figure 9.15: Example of Value String Display
The Ethereal GUI
The Ethereal GUI is created through calls to the GTK library. When you develop for the Ethereal GUI you must consider compatibility issues for other builds of Ethereal. This means that you must program for both GTK version 1.2 and versions 2.x. Some of the GTK functions work in both versions but others need to be programmed specifically for the version that Ethereal is built with. The README.developer document located in the doc directory does not contain any information on the modifications to the GUI. As a reference you should use the GTK website at www.gtk.orgas well as other GUI code located in the GTK directory.
The Item Factory
The main menu for Ethereal is created via a GTK item factory. The following information is extracted from the gtk/menu.c source file included in the Ethereal source distribution:
/* This is the GtkItemFactoryEntry structure used to generate new menus. Item 1: The menu path. The letter after the underscore indicates an accelerator key once the menu is open. Item 2: The accelerator key for the entry Item 3: The callback function. Item 4: The callback action. This changes the parameters with which the function is called. The default is 0. Item 5: The item type, used to define what kind of an item it is. Here are the possible values: NULL -> "<Item>" "" -> "<Item>" "<Title>" -> create a title item "<Item>" -> create a simple item "<ImageItem>" -> create an item holding an image (gtk2) "<StockItem>" -> create an item holding a stock image (gtk2) "<CheckItem>" -> create a check item "<ToggleItem>" -> create a toggle item "<RadioItem>" -> create a radio item <path> -> path of a radio item to link against "<Separator>" -> create a separator "<Tearoff>" -> create a tearoff separator (gtk2) "<Branch>" -> create an item to hold sub items (optional) "<LastBranch>" -> create a right justified branch Item 6: extra data needed for ImageItem and StockItem (gtk2) */
The set_menu_sensitivity function enables and disables the availability of menu items based on a specified condition. Generally, you will only need to modify the Ethereal menu if you are creating a tool or making a change to some other portion of the GUI.
When the item factory option is selected, the function listed in Item 3 will be called. In GTK, callback functions are what get called when an item is selected.
Using GTK
When an item is selected, GTK passes a handle to the active selection. These are called widgets in GTK.
void my_widget(GtkWidget *w _U_, gpointer d _U_) { GtkWidget *main_vb GtkTooltips *tooltips; #if GTK_MAJOR_VERSION < 2 GtkAccelGroup *accel_group; #endif
Development Note
Note the _U_ value being defined in the my_widget function. The use of _U_ is to represent an undefined parameter. These values are not used within the function. The process of defining them as _U_ allows the compiler to not fail on the function due to undefined variables. This also eliminates the use of memory for values that you do not intend to use.
When our menu item is selected, GTK passes us the GTK widget pointer and data structure. We then create a new GTK widget for our window.
The GtkTooltips is a value that allows us to store information that will be displayed when the user places his or her mouse pointer over a GTK widget. For example, suppose that we have a button on our window that (when clicked) will change the current display filter to one of our choosing. Although the size of the button only allows us to label it as “Filter”, we can define a tool tip that provides a more detailed description of the button’s function.
The GtkAccelGroup is necessary for GTK version 1.2. It allows for accelerator keys to be used on the keyboard to access menu items.
if (mywindow_w != NULL) { /* There's already a "My Window" dialog box; reactivate it. */ reactivate_window(mywindow_w); return; } mywindow = dlg_window_new("Ethereal: My Window"); SIGNAL_CONNECT(mywindow_w, "destroy", mywindow_destroy_cb, NULL); tooltips = gtk_tooltips_new (); #if GTK_MAJOR_VERSION < 2 /* Accelerator group for the accelerators (or, as they're called in Windows and, I think, in Motif, "mnemonics"; Alt+<key> is a mnemonic, Ctrl+<key> is an accelerator). */ accel_group = gtk_accel_group_new(); gtk_window_add_accel_group(GTK_WINDOW(mywindow_w), accel_group); #endif We first check to make sure our window is not already open. If it is, then we reactivate it. If it is not, then we create a new dialog window. When you create the new window you should create a callback handler to take care of the window being closed by the user clicking the exit button in the upper right-hand corner of the dialog box. The SIGNAL_CONNECT function tells GTK what to do when the specified signal occurs. In this case it is the destroy signal that we are trapping for.
Finally, we initialize the tooltips. Notice that we only perform the accelerator group from GTK version 1.2. Accelerator keys in GTK 2.x are defined when creating the item. We will see this later.
/* Container for each row of widgets */ main_vb = gtk_vbox_new(FALSE, 3); gtk_container_border_width(GTK_CONTAINER(main_vb), 5); gtk_container_add(GTK_CONTAINER(mywindow_w), main_vb); gtk_widget_show(main_vb);
The first step is to create our main window. Next, we create a box on the new window. The gtk_vbox_new creates the new box that we will add to our window. The gtk_container_border_width defines the border for our window. The gtk_container_add now adds our new box to the main window. Finally, the gtk_widget_show forces GTK to paint the information to the screen. The following demonstrates the creation of an OK button on the main_vb window.
/* Button row: OK button */ bbox = gtk_hbutton_box_new(); gtk_button_box_set_layout (GTK_BUTTON_BOX (bbox), GTK_BUTTONBOX_END); gtk_button_box_set_spacing(GTK_BUTTON_BOX(bbox), 5); gtk_container_add(GTK_CONTAINER(main_vb), bbox); gtk_widget_show(bbox); #if GTK_MAJOR_VERSION < 2 ok_bt = gtk_button_new_with_label ("OK"); #else ok_bt = gtk_button_new_from_stock(GTK_STOCK_OK); #endif SIGNAL_CONNECT(ok_bt, "clicked", capture_prep_ok_cb, cap_open_w); GTK_WIDGET_SET_FLAGS(ok_bt, GTK_CAN_DEFAULT); gtk_box_pack_start (GTK_BOX (bbox), ok_bt, TRUE, TRUE, 0); gtk_widget_grab_default(ok_bt); gtk_widget_show(ok_bt); The first section of this code creates a new horizontal button box, adds it to the main_vb window, and forces GTK to paint the new box.
We then check the GTK version and create the new button depending on the version of GTK. Note that GTK version 2.x allows us to specify the icon used for this button. This is how you can create custom icons and incorporate them into Ethereal. We register the callback function for GTK to use when the button is clicked, register the button as the default button, and finally paint the button on the screen.
You can also register widget data to a widget so that when it is selected then the data associated to the widget gets passed to the calling function. For example, in the gtk/find_dlg.c file, a number of defines are set to identify the buttons within the find window.
/* Capture callback data keys */ #define E_FIND_FILT_KEY "find_filter_te" #define E_FIND_BACKWARD_KEY "find_backward"
Next, the keys are registered as data to the dialog with the object_set_data function.
OBJECT_SET_DATA(find_frame_w, E_FIND_FILT_KEY, filter_text_box); OBJECT_SET_DATA(find_frame_w, E_FIND_BACKWARD_KEY, backward_rb);
Finally, when the find_frame_w is selected, the callback function can access the values of the attached buttons by calling the object_get_data function.
filter_te = (GtkWidget *)OBJECT_GET_DATA(parent_w, E_FIND_FILT_KEY); backward_rb = (GtkWidget *)OBJECT_GET_DATA(parent_w, E_FIND_BACKWARD_KEY);
The GTK website contains many examples and a window builder tool that you can download and experiment with. To program in GTK you must know the static defines for predefined items like GTK_STOCK_XXX and GTK_CAN_DEFAULT. All of this information is available from the GTK website.
TAPS
Ethereal implements a tap system to allow for real-time statistics during packet captures. These can also be used by tools that register to the tap interface and command Ethereal to redissect a saved packet capture file. The tap system is documented in the README.tapping document located in the doc directory. Also in the main source directory you will find a number of tap-xxx files you can use for a reference on the tap interface. The file gtk/endpoint_talkers_table.c can be used for an example of how to implement a TAP inside of an included tools menu option.
You implement the tap interface in two steps. The first step is to install the tap into the protocol dissector you would like to get information from. The second step is to add the tap listener to your application. Many of the protocol dissectors included in Ethereal already contain taps. Most likely you will only need to create your tap listener and perform the work you need to do. If you find that a tap is not installed in the protocol you need, the process is simple through the use of only a few lines of code. Please refer to the README._tapping for more information.
Plug-ins
Ethereal also supports the implementation of protocol dissectors as plug-ins. Plug-ins are preferred by some developers because they can be developed and debugged without having to rebuild the whole Ethereal distribution. You can compile and build your plug-in and then copy the binary to the plugins directory under the name of your plug-in. Ethereal ships with a number of plug-ins and each can be loaded or unloaded depending on whether they are installed prior to launching Ethereal. The plugin interface mimics the dissector interface. In fact, plug-ins are first developed as a normal dissector. Then, additional code is added to make the dissector a plug-in. The key part of developing a plug-in is the plugin_init and plugin_address_table_init functions to register the plug-in with Ethereal. The file README.plugins located in the doc directory outlines the steps you need to take to generate a plug-in dissector for Ethereal.
|
| < Day Day Up > |
|
EAN: 2147483647
Pages: 105