Inserting and Playing Sounds and Movies
Microsoft Office Specialist A PowerPoint presentation is usually created to convey a lot of information in a short time to its audience. That information can be in the form of text, graphics, charts , and tables, but it might also consist of sounds and movie clips. In addition to simply conveying information, including a variety of media can make a presentation more interesting and help to hold the attention of an audience.
If a slide s layout includes a content placeholder, you can insert sounds and movies by clicking the Insert Media Clip button in the placeholder. You can also click Movies and Sounds on the Insert menu and choose whether to insert a sound or movie from the Microsoft Clip Organizer or from a file. PowerPoint inserts sounds and movies as objects, which you can then change and edit.
Sounds can be one of PowerPoint s sound effects (which include applause, a cash register, and a drum roll), music or another audio file, or a narration that you record yourself. To hear the sounds, you need sound hardware (such as a sound card and speakers ) installed on your computer and on the computer from which you will deliver the slide show. To play the sound associated with a particular slide, you double- click the Play Animations icon on the Slides tab in the Outline/Slides pane in Normal view. During the slide show, sounds can either play automatically or play only when you activate them with your mouse.
Movies can be digital videos produced with digitized video equipment, or they can be animated pictures , also known as animated GIFs, such as cartoons. (GIF stands for Graphics Interchange Format.) To play a movie, you double-click the movie object. After the movie starts, you can click the movie object to pause and restart it.
In this exercise, you will add sound to a slide transition, insert a sound into a slide, and insert and play one movie clip from the Clip Organizer and another from a file.
BE SURE TO have a sound card and speakers installed on your computer for this exercise. (If you do not have this hardware, you can still follow the steps but you won t be able to hear the sound.)
USE the InsertMedia presentation and the InsertMovie movie file in the practice file folder for this topic. These practice files are located in the My Documents\Microsoft Press\PowerPoint 2003 SBS \CreatingMultimedia\InsertingSound folder and can also be accessed by clicking Start/All Programs/ Microsoft Press/PowerPoint 2003 Step by Step .
OPEN the InsertMedia presentation.
-
On the Slide Show menu, click Slide Transition .
The Slide Transition task pane appears.
-
In the Modify transition area of the Slide Transition task pane, click the down arrow to the right of the Speed box, and click Slow . Then click the down arrow to the right of the Sound box, and click Chime .
Troubleshooting If a message tells you that this feature is not yet installed on your computer, click Yes to install it.
PowerPoint applies the sound to the first slide and plays the sound.
Tip For additional sound selections, click Other Sound at the bottom of the Sound list. Then in the Add Sound dialog box, find and select the sound file you want to add, and click OK.
-
At the bottom of the Slide Transition task pane, click the Slide Show button.
The sound plays during the animation of the first slide.
-
Press the [Esc] key to stop the slide show and return to Normal view.
-
Move to Slide 3, and on the Insert menu, point to Movies and Sounds , and then click Sound from Clip Organizer .
The Clip Art task pane appears with a selection of sounds.
-
In the Clip Art task pane, click Claps Cheers .
Tip If you are connected to the Internet, you can click the Clip art on Office Online button at the bottom of the Clip Art task pane to open your browser and go to the Microsoft Office Online Clip Art and Media Web site, where you have access to hundreds of clip art images, photos, sounds, and movies.
A message asks whether you want the sound to play automatically or only when clicked.
-
Click Automatically .
A small sound icon appears in the middle of the slide.
Tip To make the sound icon easier to see when delivering a slide show, you can enlarge it by dragging its sizing handles.
-
Click the sound icon (not one of its handles), and drag it to the lower-right corner of the slide. Then double-click the sound icon to hear the sound.
The sound plays.
-
Close the Clip Art task pane.
-
Move to Slide 6, and in the content placeholder, click the Insert Media Clip button.
The Media Clip dialog box appears, displaying a selection of movie clips.
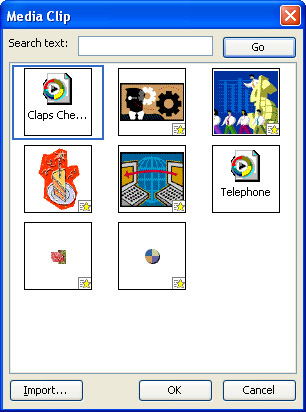
If you are connected to the Internet, you will have more movie clips to choose from.
-
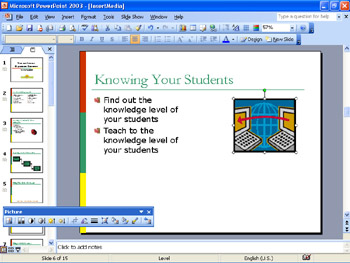
Click the communication, computers movie clip (the two computers with the globe behind them), and click OK .
Tip If you can t locate the specified clip, type communication, computers in the Search text box, and then click Go.
-
The movie clip is inserted as an object in the middle of the content placeholder, and the Picture toolbar appears.
Tip Most of the movies in the Clip Organizer are actually animated GIF files. Like movies, animated GIFs add interest to your presentation. However, you can edit them by using the same techniques you use to edit pictures.
-
Adjust the size and position of the movie clip until it is about the same height as the two adjacent bullet points and closer to the right margin of the slide, giving the whole slide a balanced look.
-
In the lower-left corner of the window, click the Slide Show button.
Slide 6 appears, and the movie clip plays.
-
Press [Esc] to stop the slide show and return to Normal view.
-
Move to Slide 5, and on the Insert menu, point to Movies and Sounds , and then click Movie from File .
The Insert Movie dialog box appears.
-
Navigate to the My Documents\Microsoft Press\PowerPoint 2003 SBS \CreatingMultimedia\InsertingSound folder, and then double-click the InsertMovie file.
-
When a message asks how you want the movie to start, click When Clicked .
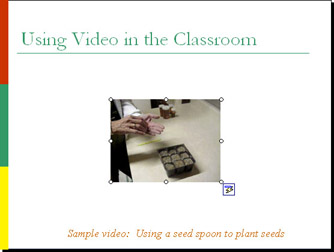
The movie clip is inserted as an object in the middle of Slide 5.
Tip When you insert an object such as a movie, PowerPoint adjusts the layout of the slide to accommodate the type of object. You can control these automatic adjustments by clicking the Automatic Layout Options button that appears below the lower-right corner of the movie object.
-
In the lower-left corner of the window, click the Slide Show button, click to display the slide title, click to display the caption, and then double-click the movie object.
The movie object starts to play.
-
Click the movie object to pause the movie.
-
Click the movie object again to play the rest of the movie.
-
Press [Esc] to end the slide show.
-
On the Standard toolbar, click the Save button to save the presentation.
Close the InsertMedia presentation.
| |
If you are creating a presentation that people will view on their own machines rather than at a speaker-led meeting, or if you are archiving a presentation and want to include the speaker s comments, you can add voice narration to a presentation. To record a narration, your computer must be equipped with a sound card and microphone. (If you don t have the necessary hardware installed on your computer, the Record Narration command on the Slide Show menu might be dimmed.) As you record, you can pause or stop at any time. If you are not satisfied with a narration, you can delete it just like any other PowerPoint object.
To record a presentation narration:
-
On the Slide Show menu, click Record Narration .
The Record Narration dialog box appears, showing the amount of free disk space and the number of minutes that you can record.
Important You can insert narration into slides in one of two ways. Embedding the narration adds the sound objects to the presentation (and increases the size of the file), while linking the narration stores the sound objects in separate files. To insert the narration into slides as an embedded object, click OK to begin recording. To insert the narration as a linked object, select the Link narrations in check box, and click OK.
-
Click OK .
-
Discuss the points associated with the first slide, just as if you were giving the presentation to a live audience, and click the mouse button to advance to the next slide.
-
Repeat step 3 for all the slides.
-
If you need to pause for a while, right-click the mouse button, and click Pause Narration on the shortcut menu.
-
To resume recording, right-click, and click Resume Narration on the shortcut menu.
-
When you have finished the narration, right-click, and click End Show , and then click Save to save your narration.
-
Test the narration by running the presentation in Slide Show view.
The narration plays with the slide show.
| |
EAN: N/A
Pages: 145
- ERP Systems Impact on Organizations
- Challenging the Unpredictable: Changeable Order Management Systems
- The Effects of an Enterprise Resource Planning System (ERP) Implementation on Job Characteristics – A Study using the Hackman and Oldham Job Characteristics Model
- Context Management of ERP Processes in Virtual Communities
- Relevance and Micro-Relevance for the Professional as Determinants of IT-Diffusion and IT-Use in Healthcare