Inserting and Formatting a Table
Microsoft Office Specialist When you want to present a lot of data in an organized and easy-to-read format, a table is often your best choice. PowerPoint makes it easy by including an Insert Table button in its content placeholders. You choose a layout that includes a content placeholder (among your choices is a layout designed specifically for tables), click the Insert Table button, specify the number of columns and rows, and then enter data in the resulting table structure.
A table s structure is a simple two-dimensional organization of rows and columns. The intersection of a row and a column is called a cell . The first row is commonly used for column headings; the leftmost column is ideal for row labels. After you create the table s structure, you type text in the cells just as you would in a paragraph, using the [TAB] key to move the insertion point from cell to cell.
You can customize and format individual cells as well as the entire table. For example, you can merge ”combine ”cells to create one cell that spans two or more columns or rows, and you can split a single cell into two or more cells. Using the buttons on the Formatting toolbar or the specialized Tables and Borders toolbar, you can add color and borders and change text alignment in a table.
In this exercise, you insert and format a table.
BE SURE TO start PowerPoint before beginning this exercise.
USE the InsertTable file in the practice file folder for this topic. This practice file is located in the My Documents\Microsoft Press\PowerPoint 2003 SBS\AddingTable\InsertingTable folder and can also be accessed by clicking Start/All Programs/Microsoft Press/PowerPoint 2003 Step by Step .
OPEN the InsertTable presentation.
-
Move to Slide 9, and double-click the table placeholder.
Slide 9 has already been formatted with the Table AutoLayout. Double-clicking the placeholder displays the Insert Table dialog box.
-
Click the up arrow to the right of the Number of rows box until the number reaches 4 .
-
Click OK .
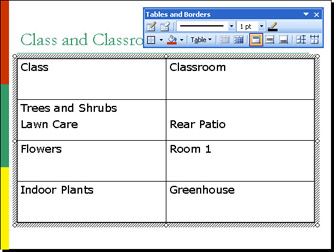
A blank table with two columns and four rows appears, and the Tables and Borders toolbar is displayed.
Troubleshooting If the Tables and Borders toolbar doesn t appear, point to Toolbars on the View menu, and click Tables and Borders.
-
Check that the insertion point is blinking in the upper-left cell of the table. Then type Class , press [TAB], type Classroom , and press [TAB] again.
The insertion point moves to the first cell of the second row.
Troubleshooting If the Tables and Borders toolbar is floating and in the way, drag it by its title bar to a blank area of the slide.
-
Type Trees and Shrubs , press [Enter], type Lawn Care , and press [TAB]. Then type Rear Patio , and press [TAB] again.
-
Enter Flowers and Room 1 in the third row, and Indoor Plants and Greenhouse in the fourth row.
-
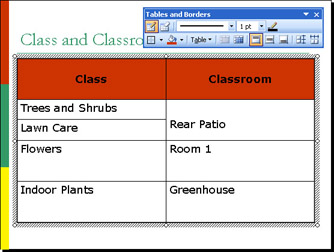
Drag through Class and Classroom to select their cells, and then on the Formatting toolbar, click the Bold button.
The column titles appear bold.
-
On the Formatting toolbar, click the Center button to center the text in the cell, and then on the Tables and Borders toolbar, click the Center Vertically button.
The column titles are centered horizontally and vertically in their cells.
-
On the Tables and Borders toolbar, click the down arrow to the right of the Fill Color button, and click the Red box at the right end of the color scheme.
The cells with the column titles are filled with red.
-
On the Tables and Borders toolbar, click the Draw Table button, and draw a horizontal line between Trees and Shrubs and Lawn Care.
A dotted line appears as you draw the line. When you release the mouse button, the cell is split into two cells.
-
Draw a vertical line in the middle of the cell that contains the text Room 1 .
The cell is split into two cells.
-
On the Tables and Borders toolbar, click the Eraser button, and then click the vertical line you just drew.
The two cells merge back into one cell.
Tip To add a column or row to a table, click in a cell adjacent to where you want to insert the column or row, click Table on the Tables and Borders toolbar, and then click Insert Columns to the Right, Insert Columns to the Left, Insert Rows Above, or Insert Rows Below. To delete a column or row, click anywhere in a column or row, click Table on the Tables and Borders toolbar, and then click Delete Rows or Delete Columns.
-
On the Tables and Borders toolbar, click the Eraser button to turn off the tool.
-
Click a blank area of the slide (not in the table) to deselect the table.
-
On the Standard toolbar, click the Save button to save the presentation.
CLOSE the InsertTable presentation.
| |
Microsoft Office Specialist If you have already created a table in Word, you can insert that table into a PowerPoint slide as an embedded object instead of retyping it. For best results, the Word document containing the table should contain no other text.
| See Also | For more information about embedded objects, see Inserting an Excel Worksheet, below. |
To insert an existing Word table:
-
On PowerPoint s Insert menu, click Object .
-
In the Insert Object dialog box, click Create from file .
-
Click the Browse button, navigate to the storage location of the Word document containing the table, double-click the file name , and click OK .
-
The table is embedded in the slide as an object.
-
Double-click the table object.
-
Word s menus and toolbars replace PowerPoint s. You can now use Word to format and otherwise manipulate the table.
-
Drag the object s handles to size its frame to fit snugly around the table, and then click outside the object to return to PowerPoint.
-
You can then move and size the object in PowerPoint to make sure it is readable and attractive.
| |
EAN: N/A
Pages: 145