Working with Forms
Microsoft Office Specialist: Create and modify forms using various form controls
So far, you have used tabular lists and tables to display certain types of information in an organized manner. You could create invoices, purchase orders, or similar documents using these techniques, but there s an even easier way. You can create a document called a form . You can then fill in the form by pressing the Tab key to skip over the labels (text entries that don t change) and jump to the form fields (areas that need entries).
| |
We didn t point it out at the time, but in Chapter 3 when you used a Word template to create a memo and the Fax Wizard to create a fax cover sheet, you were actually working with forms. Both of those documents used a form for their header information.
| |
Adding a Form Field
When you re creating a form, you can use three basic types of form fields: text form fields, in which you enter different types of text and numbers ; check box form fields, which can be selected or deselected; and drop-down list form fields, which let you choose from a list of options. Let s experiment with creating forms by continuing with the business travel expenses form for In The Bag. Follow these steps to create form fields using the toolbar buttons :
-
With the insertion point at the bottom of the Travel Expenses Form document, press Enter twice to add some space between the letterhead and the form you are about to create.
-
Right-click the toolbar row, and click Forms on the shortcut menu.
The floating Forms toolbar opens.
-
If you want, dock the Forms toolbar below the Standard and Formatting toolbars .
-
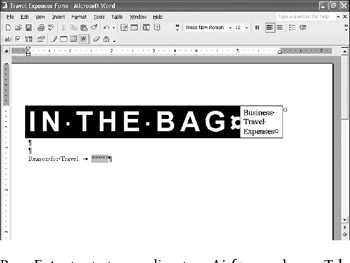
Type Reason for Travel: and press Tab .
-
On the Forms toolbar, click the Text Form Field button.
Word inserts the field at the insertion point, as shown here:
-
Press Enter to start a new line, type Airfare: , and press Tab .
-
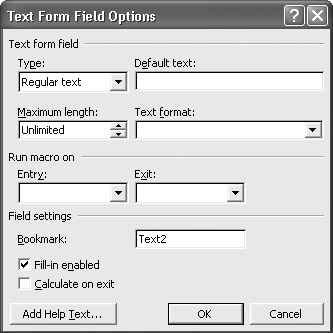
Click the Text Form Field button to insert a field. Then click the Form Field Options button.
The Text Form Field Options dialog box shown here opens:
-
Click the down arrow at the right end of the Type box, and click Number on the drop-down list.
-
Click the down arrow at the right end of the Number format box, and click the fifth option (the one that starts with a dollar sign).
-
Click OK to close the dialog box and apply your changes.
-
Click an insertion point after the new field, press Tab , type Payment Method: , press Tab again, click the Drop-Down Form Field button, and then click the Form Field Options button.
-
Type Corporate CC in the Drop-down item box and click Add , type Personal CC and click Add , and then click OK .
Word displays the first item in the list as the default ”in this case, Corporate CC .
-
Press the Right Arrow key to move the insertion point to the end of the new field, and press Enter to add a blank line.
-
Move the pointer into the selection bar to the left of the Airfare line, and when the pointer changes to a hollow, right-pointing arrow, click to select the line.
-
Click the Copy button to copy the line, press Ctrl+End to move the insertion point to the blank line at the bottom of the document, and click the Paste button twice.
-
Change the second instance of Airfare to Meals and the third instance to Hotel .
| |
To add a check box field to a form, on the Forms toolbar, click the Check Box Form Field button.You can then click the Form FieldOptions button to change settings such as the size of the check box or the default value (whether it is selected or deselected by default).
| |
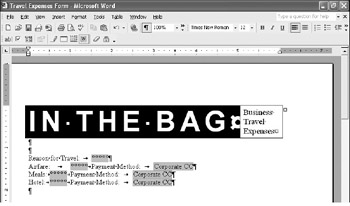
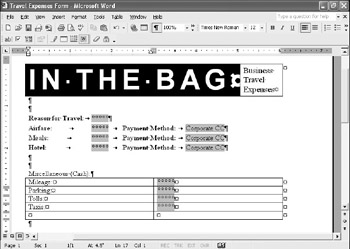
Your form now looks like the one shown in this graphic.
Adding Help Text
The travel expenses form is taking shape. You can use ordinary text editing techniques to edit the form s labels, but if you want to edit the form s fields, you must use the Form Field Options dialog box. Follow these steps to edit some of the fields to include help text that will appear in the status bar when the fields are selected:
-
Click the Reason for Travel form field once to select it, and then click the Form Field Options button on the Forms toolbar.
-
In the Text Form Field Options dialog box, click Add Help Text .
Word displays the dialog box shown in this graphic:


Using AutoText for help To speed up the entry of often- used help text, you can createAutoText entries, or you can select from a variety of standard help text options to have the corresponding text appear in the status bar. See page 42 for information about creating AutoText entries.
-
Select the Type your own option, type Enter the name of the show or conference in the text box, and then click OK twice.
The help text will not be displayed in the status bar until you protect the form.
Information about: Document protection, page 150
-
Right-click the Airfare field, and click Properties on the shortcut menu to display the Text Form Field Options dialog box for this field.
-
Click Add Help Text , select the Type your own option, type Enter the total dollar amount in the text box, and then click OK twice.
-
Repeat steps 4 and 5 to add the same help text to the Meals and Hotel fields.
-
Double-click the first Payment Method field to open the Drop-Down Form Field Options dialog box.
-
Click Add Help Text , select the Type your own option, and then type Click the down arrow to display the payment method options . Click OK twice to enter the changes.
-
Repeat steps 7 and 8 to add the same help text to the other two Payment Method fields.
-
Save the document.
Formatting a Form
Microsoft Office Specialist: Set and modify tabs
Information about: Tab stops, page 126
Now that you have the fields set up the way you want them, you can format the form to spruce up its appearance, as well as make it easier to read. The form fields are separated by tabs that are sitting at the default tab stops, and the tab settings need to be adjusted so that the fields line up. But before you do that, you should take care of any other character and paragraph formatting. To format the text of a form, you use the same techniques as in any other Word document. Follow these steps:
-
Select the Reason for Travel: label (but not the field that follows it), and click the Bold button. Repeat this step for all the other labels.
-
Select the entire form (but not the letterhead), and on the Format menu, click Paragraph .
-
In the Spacing area, change the Before and After settings to 3 pt , and click OK .
-
With the entire form still selected, click the Tab button until it displays a left-aligned tab, and then click the 1 ½-inch mark on the ruler.
More about tabs When you manually set a tab using the ruler (or using the Tabs command), the tab takes effect for the paragraph that contains the insertion point or selected paragraphs only. To remove a custom tab, point to it, hold down the left mouse button, and then drag the tab away from the ruler. Double-clicking a tab on the ruler opens the Tabs dialog box, where you can customize that tab. For example, you can change its Alignment or Leader setting.
Word inserts a left-aligned tab stop on the ruler and moves the text appropriately.
-
Click the 2 ¾-inch mark on the ruler to set another tab stop, and then set a final tab stop at the 4 ¼-inch mark.
The space between the fields is a little too wide. But instead of starting over, you can adjust the tab stops on the ruler.
-
With the form still selected, point to the tab at the 2 ¾-inch mark on the ruler, hold down the left mouse button, and drag the tab to the left to the 2 ¼-inch mark.
Word adjusts the position of the Payment Method label.
-
Repeat step 6 to move the tab at the 4 ¼-inch mark to the 3 ¾-inch mark on the ruler.
-
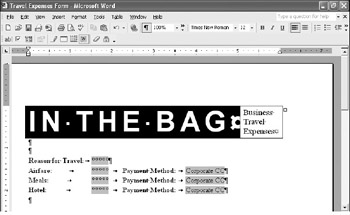
Press Ctrl+End to release the selection.
The form now looks like the one shown in this graphic:
Adding Calculations to a Form
Information about: Performing calculations in tables, page 136
Forms like the travel expenses form often involve calculations. Why perform them manually when you can have Word do them for you? If you enter the values to be calculated in a table, Word can use cell references to perform the calculations. Let s experiment by adding a table of miscellaneous cash expenses that need to be totaled:
-
With the insertion point at the bottom of the Travel Expenses Form document, press Enter twice to provide space between the upper portion of the form and the table you are about to add.
-
Type Miscellaneous (Cash): and press Enter .
-
Click the Insert Table button, hold down the mouse button, and drag through two columns and five rows in the table grid.
-
In the first cell, type Mileage: , press Tab to move to the second cell, and on the Forms toolbar, click the Text Form Field button.
-
Click the Form Field Options button, and change the Type to Number and the Number format to the fifth option (the one with the dollar signs). Then click OK .
-
Click an insertion point in the first cell of the second row, and type Parking: . Press the Down Arrow key, and type Tolls: . Press the Down Arrow key again, and type Taxis: .
-
Copy the form field in the Mileage row, and paste it into the second column of the Parking, Tolls, and Taxis rows.
Your table now looks like the one shown in this graphic:
Now it s time to add the formula that will total the miscellaneous cash expenses.
-
Click an insertion point in the first cell of the last row. Type TOTAL: and press Tab .
-
On the Forms toolbar, click the Text Form Field button, and then click the Form Field Options button.
-
In the Type drop-down list, click Calculation .
-
Click an insertion point after the equal sign (=) in the Expression text box, and type SUM(B1:B4) .
This expression (formula) tells Word to total the values in the first through fourth cells of the second column (B).
-
In the Number format drop-down list, click the fifth option, and then click OK .
Let s finish up the form with some simple formatting:
-
Select the title above the table, and click the Bold button.
-
Select the first column of the table, and make it bold.
-
Move the pointer to the border between the two columns, and drag to the left to about the 1 ½-inch mark so that the form fields in the table are left-aligned with the form fields in the upper section of the form. Then drag the right border of the second column to about the 2 ½-inch mark.
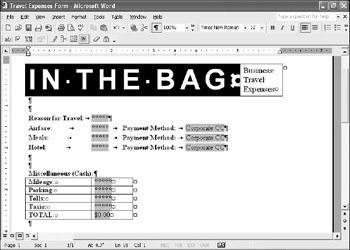
The form now looks as shown in this graphic:
-
Before moving on to the next procedure, save the form.
Protecting a Form
Microsoft Office Specialist: Create forms and prepare forms for distribution Protect documents
Once you create a form, you will usually want to save it as a template so that you can access it at any time and fill in the appropriate information, just as you did in Chapter 3 with the memo template. But before you can save the form as a template, you must protect the document so that only the fields can be changed, not the form s labels or structure. Protect the Travel Expenses Form document now by following these steps:
Information about: Using Word s templates, page 78
-
On the Forms toolbar, click the Protect Form button.
-
Try to click an insertion point in the letterhead or labels, or in front of an empty paragraph mark.
You can no longer change text in the document unless it appears in a form field.
Saving a Form as a Template
Microsoft Office Specialist : Save documents using different names and file formats
If you save a form with blank fields as a template, you can create a new form based on the template and fill in the blanks at any time. Try it now:
-
Turn off the Forms toolbar by right-clicking it and clicking Forms on the shortcut menu.
-
On the File menu, click Save As . Then in the Save as type drop-down list, click Document Template .
Word changes the Save in location to a subfolder, called \Application Data\Microsoft\Templates , of your Documents and Settings user account folder.
-
Click Save to save the Travel Expenses Form template in the default location.
-
Close the template.
| |
You can protect a document in several ways by using the Protect Document command on the Tools menu. In addition to protecting everything on a form but its fields, you can select the Forms option and then click the Sections button to protect only sections of the form. You can also protect a document from changes by other people but allow them to add comments by selecting the Comments option. You can allow changes to the document but tell Word to keep track of them by selecting the Tracked changes option. And you can assign a password of up to 15 characters that must be entered before Word will unprotect the document. (Note that passwords are case- sensitive).
| |
| |
If you want to accumulate the items entered in multiple copies of a form in a database, you can save just the data by clickingOptions on the Tools menu, clicking the Save tab, selecting the Save data only for forms check box, and clicking OK. Then on the File menu, click SaveCopy As to have Word create a comma-delimited text file (a text-only file with each item enclosed in quotation marks and separated from adjacent items by commas) that is ready to be imported into a database.
| |
Filling in a Form
You now have a travel expenses form template available for use at any time, but you have yet to see how the form works. Let s create a form based on the template now and fill in some information for a fictitious trade show in Denver. Follow these steps:
-
On the File menu, click New .
-
In the New Document task pane, click General Templates to display the Templates dialog box. Then double-click the Travel Expenses Form icon.
Word opens the form with the Reason for Travel field highlighted.
-
Save the document by clicking Save As on the File menu, typing Denver Show Expenses as the file name, and clicking Save .
-
In the Reason for Travel field, type Denver Show , and press the Tab key.
Word skips over the Airfare label and moves to its field.
-
Type 610 , and press Tab .
Word automatically formats the number as currency, as you specified earlier when you created the form field.
-
A corporate credit card was used for the plane tickets, so press Tab to leave Corporate CC as the payment method.
-
In the Meals field, type 175.50 , and press Tab .
-
Click the down arrow to the right of Corporate CC , click Personal CC in the drop-down list, and then press Tab .
-
In the Hotel field, type 420 , press Tab twice to leave the payment method as-is, and then type the following numbers in the appropriate form fields, pressing Tab to move from one field to the next:
Mileage: 65
Parking: 25
Tolls:
Taxi: 25.5
-
Press Tab after entering the last amount.
Word moves to the beginning of the document, skipping the TOTAL field, which currently contains $0.00 .
Updating a Calculation
Does the fact that your TOTAL field still reads $0.00 mean that the calculation field isn t working? Not at all. Word simply has not been told to update the field. You could attach a macro to this field to prompt updating, but the topic of macros is beyond the scope of this course. (Check the Microsoft Word Help file if you re interested.) You can accomplish the same thing by making a simple adjustment in the Options dialog box and printing the form, so let s take this easier route:
-
On the Tools menu, click Options and then the Print tab.
-
In the Printing options area, select the Update fields check box, and click OK .
-
On the File menu, click Print , and then click OK to print the form.
After you print the form, the number in the calculated field is displayed on the screen and in the printed document.
-
Save and close Denver Show Expenses.
Creating a New Form Based on a Template
Microsoft Office Specialist : Create forms and prepare forms for distribution
You ve seen how to create and fill in a Word form, but what if you want to create another form that is similar to an existing one? It s simple. As a demonstration, let s quickly customize the business travel expenses form to create a form that tracks marketing project expenses. First you will save a copy of the original template, and then you will customize it as necessary. Follow these steps to copy and change your original form:
-
Open a new document based on the Travel Expenses Form template.
-
On the File menu, click Save As , and change the Save as type setting to Document Template .
Word changes the Save in setting to the default Templates subfolder.
-
Type Project Expenses Form as the new template s file name, and click Save .
-
Display the Forms toolbar by right-clicking the toolbar row and clicking Forms on the shortcut menu.
-
Click the Protect Form button to turn off form protection.
You can now customize the letterhead and labels for the new form.
-
Select the words Business Travel in the form header, and replace them with Marketing Project . (Adjust the column width if necessary.)
-
Change Reason for Travel to Project , and then continue changing the labels as shown:
Change
To
Airfare
Radio
Meals
Printing
Hotel
Magazine
Miscellaneous (Cash)
Miscellaneous Expenses
Mileage
Freight
Parking
Office Supplies
Tolls
Design Costs
-
Change all Payment Method labels to Payment Terms .
-
Select the Taxis row of the table, and on the Table menu, click Delete and then Rows .
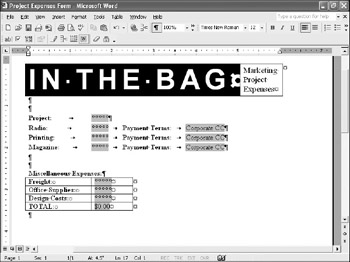
The form now looks as shown in this graphic:
Now you need to adjust some of the form fields.
-
Because you have deleted a row from the table, double-click the TOTAL form field, change the cell reference in the Expression text box from B1:B4 to B1:B3 , and click OK .
-
Double-click the first Payment Terms form field, and with Corporate CC selected in the Items list, click Remove . Click Remove again to delete Personal CC from the list.
-
In the Drop-down item text box, type Net 30 , click Add , type Net 60 , click Add , type Net 90 , click Add , and then click OK .
-
Select the second Payment Terms form field, and delete it. Then copy and paste the first Payment Terms form field to the second Payment Terms field.
-
Repeat step 13 to update the last Payment Terms form field.
-
Double-click the Project form field, click the Add Help Text button, change show or conference to project , and then click OK twice.
-
Click the Protect Form button, and turn off the Forms tool- bar.
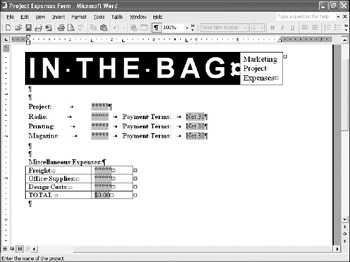
Your form now looks something like the one shown in this graphic:
-
Save and close the template.
-
If you want, open a new document based on the Project Expenses Form template, and try filling in the form.
-
Close any open documents before moving on to the next topic.
EAN: N/A
Pages: 74