Publishing Documents on the Web
If you want to publish your documents as web pages that can be distributed via the Internet or your organization s intranet, you first have to convert them to HyperText Markup Language (HTML) so that they can be viewed in a web browser. Not all Word formatting can be handled by web browsers, so during conversion, elements such as columns and headers and footers seem to drop out. However, a feature called round-trip editing allows you to open a converted HTML document in Word with all the original Word formatting in place. As a result, it s easy to update your web pages in Word, and you never have to deal with the underlying HTML coding.
Previewing a Document as a Web Page
Microsoft Office Specialist: Convert documents into web pages
Now let s preview how the flyer will look if you publish it as a web page. (You need to have a web browser installed on your computer to be able to preview a web document.) Follow these steps:
-
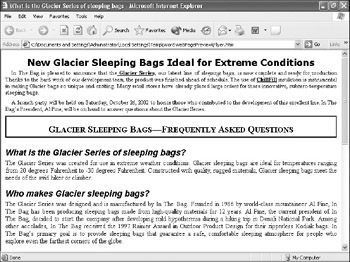
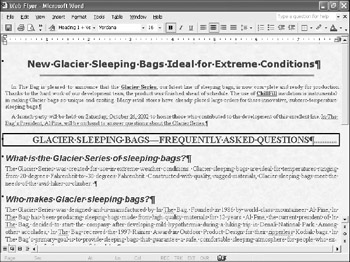
With the Flyer document open on your screen, on the File menu, click Web Page Preview .
Word makes a temporary copy of the document, codes it with HTML, starts your web browser, and displays the copy of Flyer as shown in this graphic (we ve maximized the browser s window):

Using the Web Page Wizard If you want to create a personal or business web site for display on the Internet or an intranet, an easy way to get started is to use the Web Page Wizard. Open theNew Document task pane and click General Templates to dis- play the Templates dialog box.Click the Web Pages tab and double-click the Web PageWizard icon. On the wizard s pages, select the type and style of page you want to create. After the wizard creates the web page, you can insert your information and edit and format it without having to work with the under- lying HTML coding.
-
Scroll though the web page, checking how each component has been converted.
-
Click your browser s Close button to exit the program and return to Word.
Creating a Web Document
Microsoft Office Specialist: Convert documents into web pages Create and edit web documents in Word
With Word s web publishing tools, you can easily create a great- looking web page from scratch or convert an existing document into a web page without any prior knowledge of HTML. Here, we ll take a look at how to convert an existing file to HTML format so that it can be viewed on the Internet or on an intranet. Let s get started:
Information about: Saving files, page 21
-
On the File menu, click S ave as Web Page .
Word displays the Save As dialog box.
-
Type Web Flyer as the name , and click Save to store this version of the document in the My Documents folder on your hard disk.
-
If Word tells you it can t convert some of the flyer s features to HTML, click Continue .
Word then displays the flyer in Web Layout view, as shown in this graphic:
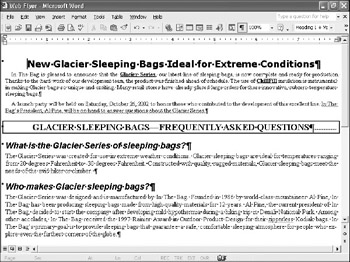
As you can see, the flyer looks pretty much as it did when displayed in Web Page Preview.
| |
Editing a web document that you have created in Word is no different than editing any other document. When you open the web document, Word interprets all the HTML coding and displays the formatted document as if the coding didn t exist. You can make editing and formatting changes to the document and then save it in the usual way.
Information about: Borders and Shading dialog box, page 90
| |
Enhancing a Web Document
Once you have converted a document to a web page, you can apply formatting that is supported by web browsers to jazz it up. You can add lines and change colors to suit onscreen viewing. Follow these steps to add some enhancements to the web version of the flyer:
-
Click an insertion point at the beginning of the first text paragraph in the flyer (after the heading).
-
On the Format menu, click Borders and Shading .
-
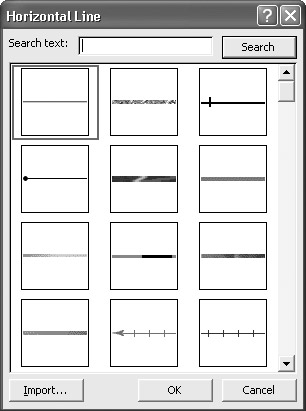
At the bottom of the Borders tab, click the Horizontal Line button.
Word displays this dialog box:
Discussion comments You can use the Web Discussions feature to insert comments in web documents or other documents that can be viewed in a web browser. The comments are viewed in the document but are stored on a separate discussion server. To discuss a document, on the Tools menu, click Online Collaboration and then Web Discussions. If the Add or Edit Discussion Servers dialog box appears, select the discussion server you want to use by typing its name in the Type the name text box. If necessary, select the Secure connection required (SSL) check box. Then click OK. To start an inline discussion (one that discusses a particular part of a document), click an insertion point in the appropriate location. On the Web Discussions toolbar, click the Insert Discussion in the Document button. Type a subject name for the discussion and then type the discussion text. When you finish, click OK to insert the text in the Discussion pane at the bottom of the window. To start a general discussion (one that discusses the entire document), click the Insert Discussion about the Document button instead.
-
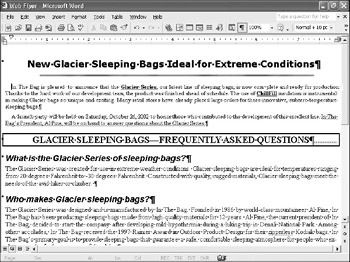
Click the first style in the fourth row, and click OK .
Word inserts a graphical horizontal line that separates the paragraph from the title above, as shown in this graphic:
Now let s dress up the background.
-
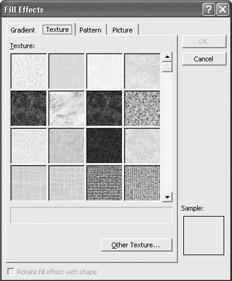
On the Format menu, click Background , and then click Fill Effects to display the Fill Effects dialog box.
-
Click the Texture tab.
Word displays the options shown here:
Web page themes You can apply a coordinated design to the web pages you create. On the Format menu, click Theme, select a theme in the Choose a Theme list to preview its main components in the pane on the right, and click OK when you find an appropriate design.
-
Click the third option in the first row, and click OK to apply that texture to the background of the flyer.
-
Press Ctrl+A to select all the flyer s text.
-
On the Formatting toolbar, click the Font Color button s down arrow, and click Dark Red in the second row of the palette.
-
Click anywhere to release the selection, and save your changes.
The results are shown in this graphic:
Inserting a Hyperlink
Microsoft Office Specialist: Insert and modify hyperlinks to other documents and web pages
You might want to add hyperlinks to your web documents so that viewers can quickly and easily move to related pages. Hyperlinks are often used to link to other web addresses or to e-mail addresses. However, they also have other uses. For example, if a web document references a particular budget spread- sheet, you can create a hyperlink to the spreadsheet so that viewers can open it with a single click. As a demonstration, you will add a hyperlink to In The Bag s e-mail address. Follow these steps:
-
Press Ctrl+End , and select the e-mail address in the last paragraph of the flyer.
-
On the Insert menu, click Hyperlink .
The quickest way to turn this address into a hyperlink is to click the Insert Hyperlink button on the Standard toolbar, but in this case, you want to customize the link s settings.
-
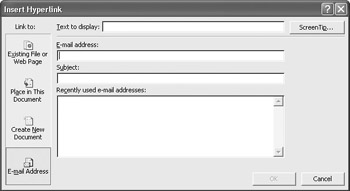
In the Insert Hyperlink dialog box, click the E-Mail Address icon on the Link to bar.
Word displays these options:
-
In the E-mail address text box, type mailto:custserve@bag.tld .
Word also enters the address in the Text to display box.
-
Replace the entry in the Text to display box with In The Bag Customer Service , and click OK .
Word formats the selected text as a hyperlink by changing the text color to blue and underlining it. (When creating a web page from scratch, you can type an e-mail address, and Word automatically creates the hyperlink for you.)
Viewing the HTML source If you know HTML, you can view and even edit the code and text by clicking the HTML Source command on Word s View menu.Word then starts the HTML SourceEditor program in a separate window, which displays the HTML coding of your web page. ClickExit on the File menu to return to the formatted version of the document in Word.
The Web toolbar When you click a hyperlink in a Word document, Word displays the Web toolbar, which you can use to easily access the Internet or your intranet. (You can also display it by right-clicking any displayed tool- bar and clicking Web on the shortcut menu.) You can use the Back and Forward buttons to move back and forth through recently opened documents or web pages. If you want to mark a page as a favorite so that you can easily access it later, display the page, click the Favorites button on the Web toolbar, click Add to Favorites, and then click Add. To open that page later, click the Favorites button to display your Favorites list and select the page from the bottom of the list. To search the Web, click the Search the Web button. If you want to move directly to a file or web page, type in the path or address in the Address box and press Enter to jump to the file or page.
You can turn text in your Word document or web page into a hyperlink to a specific file. Select the text, and on the Standard toolbar, click the Insert Hyperlink button. In the Link to bar, click the Existing File or Web Page icon, and then type the path of the file or click the Browse for File or Browse the Web button in the Look in area to navigate to the file s location. When you locate the appropriate file, click OK. When you click the hyperlink, the originating program starts, opens the file, and displays the Web toolbar. Click the Back button on the Web toolbar to return to the web page.
-
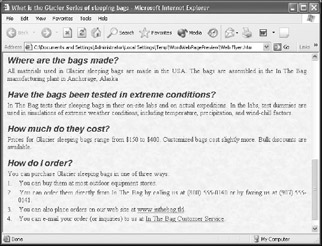
Before you publish your web page, preview it in your web browser by clicking Web Page Preview on the File menu.
In Internet Explorer, the hyperlink looks as shown in this graphic:
-
Close the web browser, and then save and close Web Flyer .
Obviously, the web page you have created is very simple, and it could be dramatically enhanced with graphics, colors, background images, video, and other elements. (Bear in mind, though, that these elements can greatly increase the download time of your web pages.) We will leave it up to you to explore on your own if you want to know more about creating web pages.
EAN: N/A
Pages: 74