Working with Bulleted Lists
Bulleted lists provide a simple way for you to display information in a concise , easy-to-read fashion. Publisher has already inserted a bulleted-list placeholder in the flyer for you; you just need to fill in the list with your own text. When you re finished with that, you ll want to format the list so that it looks just the way you want it.
Filling In a List
The text frame on the left at the bottom of the flyer contains four bulleted items that are waiting for your text. Follow these steps to fill in the bulleted list:
1. Scroll to the bulleted-list frame, and then click the frame to select it.
This frame is set up for two columns , but you want only one.
2. Double-click the border of the text frame to display the Format Text Box dialog box, click the Text Box tab, and then click Columns .
3. In the Columns dialog box, change the number of columns to 1 , and click OK twice to remove the multiple-column format.
4. Press Ctrl+A to select all the bulleted items. Then type the following, pressing Enter after each line except the last to add a new bulleted item:
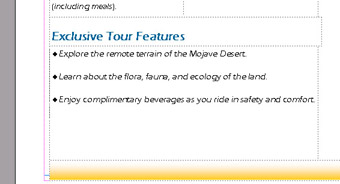
Explore the remote terrain of the Mojave Desert.
Learn about the flora, fauna, and ecology of the land.
Enjoy complimentary beverages as you ride in safety and comfort .
Changing the Bullet Character in a Bulleted List
| Information about | Inserting special symbols, page 84 |
The plain round bullet characters in the new bulleted list look a little boring for a flyer about travel, so let s make them a little more exciting. Follow these steps:
1. With the bulleted-list frame still selected, press Ctrl+A to select all the bulleted items, and then click Indents and Lists on the Format menu.
Publisher displays the Indents and Lists dialog box, as shown in this graphic:
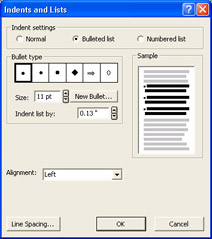
You can choose one of the six suggested bullet shapes or click the New Bullet button to select other options.
2. Click the diamond shape, and then click OK .
The bullets change, as shown in this graphic:
| |
In the Indents and Lists dialog box, you can change a bullet s size , indent, and alignment settings, as well as its character. You can also click the New Bullet button to select a different bullet symbol. (The New Bullet dialog box works like the Insert-Symbol dialog box.) To switch to a numbered list, select the Numbered list option in the Indent settings area. The dialog box changes to display numbered list options, such as the number format and the separator type (the separator is the character immediately following the number ”a period, for example). To convert the list to regular text, select the Normal option in the Indent settings area and click OK.
| |
Converting Existing Text to a Bulleted List
You can quickly convert existing text paragraphs to a bulleted list by selecting the paragraphs and then clicking the Bullets button. You can then use the Indents and Lists dialog box to customize the list. Let s get some practice by inserting some new text and converting it into bullets.
1. In the main body-text frame, click an insertion point after the exclamation point following dates! at the end of the second paragraph, and press the Enter key to insert another line.
2. On the new line, type Currently sold out: (include the colon after out ). Press Enter again, type October 23 , press Enter , and then type November 4 .
3. Select both the October 23 and November 4 paragraphs, and then click the Bullets button on the Formatting toolbar.
Publisher converts the paragraphs into bulleted items, inserting the diamond character you previously set for the bullets.
| Information about | Numbered lists, page 71 |
EAN: N/A
Pages: 76