The Active Directory Schema
| The schema in the Active Directory is stored in the directory. The schema comes preconfigured with the types of objects that you need in order to set up a Windows server and manage a network of computers. However, the Active Directory is flexible and extensible in that you can modify the existing objects to use new attributes, or you can create new object classes that contain almost any kind of information. In addition to the typical objects that you will use to manage the directory and user and network resources, the directory contains hundreds of other objects that are used for many of the applications that interact with it. The directory should not be thought of as simply a glorified user database. You can create objects that are used by application programs. Sharing information between different applications can become much easier if the same configuration database is being used. Rather than having a conversion utility of some sort to transfer information between different applications, they now can be written, using the application programming interfaces provided for the Active Directory, to store that information in the directory database. Modifying the Active Directory SchemaYou can add objects or attributes to store data in the directory that is shared by different applications so that you do not need duplicate databases scattered around that get out of sync with constant updating. Extending the schema to include additional employee information, such as vacation schedules, sick time, and pay rates, can allow payroll applications to share the same data with other employee management software. The accounting and legal departments always can be sure they are working with the same set of data if there are no duplicate databases being used that can become unsynchronized because of an application failure or a simple user error. The MMC snap-in that you use to examine or modify the schema is called the Active Directory Schema Snap-In. Unlike other MMC snap-in tools, such as the Active Directory Computers and Users Management Snap-Ins, this one is not found under the Administrative Tools option in the Start menu, by default. The reasoning behind that is simple: Tools that are used to add or modify user or computer accounts probably will be used frequently by the network administrator. Making changes to the schema probably will be performed only on rare occasions, such as when a new object or attribute is needed by the development of a new directory-aware application. In just about every book or article you read about modifying the Windows Registry, you are cautioned that making changes can be a dangerous thing. One little mistake in a Registry edit can render a server unbootable. You should take editing the Active Directory Schema just as seriously. First, look through the directory to see whether an object class already exists that you can use before you begin creating new object classes (or attributes for that matter) on-the-fly. Installing Administration ToolsAfter you've installed Windows 2000 Server (or Advanced Server), or versions of Windows Server 2003, you can install, using the same source CD, the Windows Administration Tools. To install these additional tools, you must be logged in to the server as an administrator. Note Before you can install the Windows Server Administration Tools, you first must exit any other tools that are included in the Administrative Tools folder. For example, if you are running the MMC Snap-In Active Directory Computers and Users Management, exit the application before beginning to install these additional tools. If you do not, the results of the installation will be unpredictable. The installation might succeed, or it might not. If it does, the tools might not work correctly after you've finished the installation. As with any application installation, it's also a good idea to exit any other programs that are running on the computer before you begin to install these additional administration tools. You can use the same source and steps described in the following text to install the administrative tools on Windows 2000 Professional (though there a few differences in the dialog boxes). And if you're running Windows XP, you can download from www.microsoft.com the adminpak.msi, or install the tools from the Server 2003 CD. Note, however, that the admin pak may not run on Windows XP. If this is the case with your version of XP, search the Microsoft Web site (www.microsoft.com) and download the patch named q329357_WXP_SP1_x86_ENU.exe. For more information about this, see the Knowledge Base article 329357. When you are ready to install the additional tools from the Windows Server 2003 CD, follow these steps:
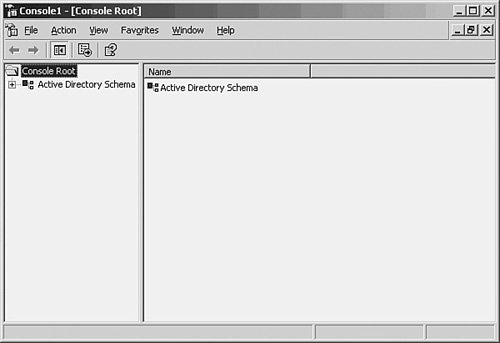
After you've installed the additional tools, you can run the Microsoft Management Console and add the Active Directory Schema Snap-In. Adding the Active Directory Schema Snap-In to the MMCAdding snap-ins to the MMC is simple. For Windows 2000 Server and Windows Server 2003, simply click Start, Run, and then enter mmc /a in the Open: field. Note that there is a space after mmc before the /a switch. Click OK. When the MMC Console screen appears (shown in Figure 30.3), with only the Console Root in the left pane, use the following steps: Figure 30.3. You'll need to add a snap-in to the empty MMC.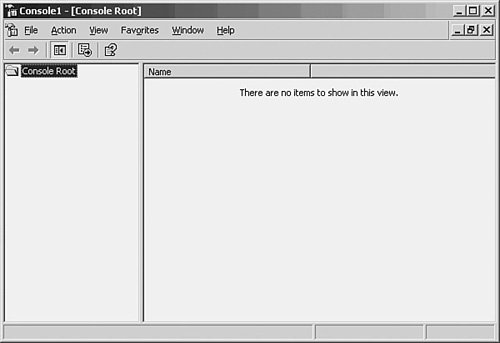
You can now start using the snap-in. However, if you think you might want to use it again soon, click on File and then Save. This saves the console as a tool in the Administrative Tools folder so that you won't have to go through all this trouble again. Note that the default filename is Console1.msc. It would probably be more helpful to choose a name such as Modify Schema.msc so that you will recognize this new MMC snap-in utility in the future. Before You Use the Active Directory Schema MasterBefore you begin to use the Active Directory Schema Snap-In, you should be aware of two important concepts. First, remember that a domain tree exists in a forest. The forest can contain a single domain tree, which is a single contiguous namespace, or it can contain multiple domain trees. Throughout a forest, however, a single domain controller is in charge of making changes to the schema that is shared by the forest. This domain controller is known as the Schema master domain controller. You can connect to this domain controller to make changes to the schema, or you can enable any domain controller to be the schema master. Second, each object in the schema is uniquely identified by an object identifier, which is nothing more than a dotted-decimal number issued by some naming authority. Each attribute in the directory also is uniquely identified by an identifier. If you are operating in an environment where you will only use the Active Directory for internal network use and will never need to interact with any other LDAP/X.500 directory, you can more or less create your own object identifiers. However, consider what happens if your business acquires another business and you both use directory-based networking systems. To import or export information from one directory to another, or simply to join a domain tree from another business you've acquired, all your object IDs must be unique, and you should obtain them from a responsible source. In the United States, the registration authority for this is the American National Standards Institute (ANSI). Other countries have an equivalent registration authority. The national registration authority issues the root object IDs for an enterprise. To obtain unique object IDs from Microsoft, refer to http://msdn.microsoft.com/library/en-us/netdir/ad/obtaining_an_object_identifier_from_microsoft.asp?frame=true. Using the Active Directory Schema Snap-InUsing the Active Directory Schema Snap-In is not complicated. Being sure that you know how objects and attributes are related to each otherand the organization of your domain tree and the forest in which it residescan, however, be quite complicated. You'll probably remember that in the movie The Wizard of Oz, there's a sign on the Yellow Brick Road that says "I'd go back if I were you." Don't proceed unless you fully understand the changes you are about to make. Because the schema applies to the entire forestthat is, to every domain tree and every domain in every domain treeyou can potentially not only render a single computer nonfunctional, but make the entire network unusable if you are not sure about the changes you are going to make. Note This section is intended to demonstrate how an administrator can use the Active Directory Schema Snap-In to modify the directory schema. You also can modify the schema by using LDAP Data Interchange Format (LDIF) scripts and by writing programs using tools supplied by Microsoft. Both of these methods are beyond the scope of this chapter. However, you can find out more about them by visiting the Microsoft Developer's Network Web site at http://msdn.microsoft.com. When you are ready to make modifications to the schema, you must be logged in using an account that is a member of the Schema Admins group.
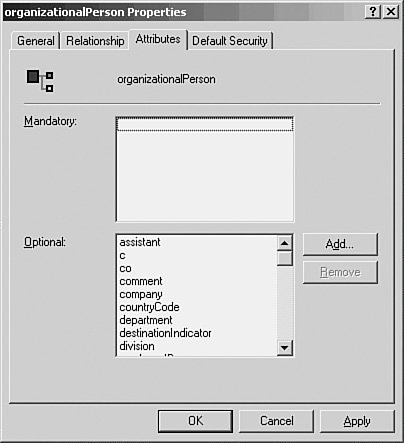
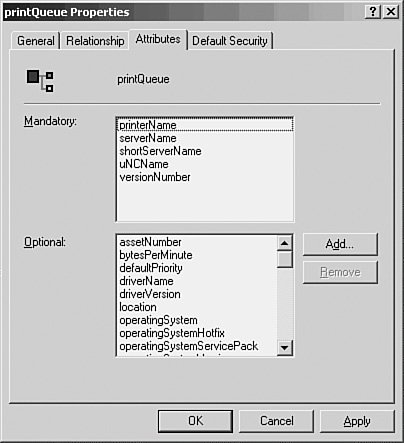
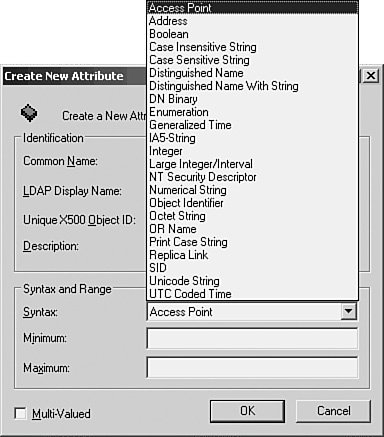
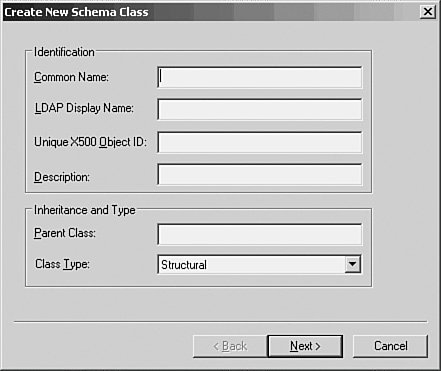
To begin, right-click Active Directory Schema in the MMC console that you created. From the menu that appears, click The Schema May Be Modified on This Domain Controller. This makes this domain controller the schema master. Double-click on Active Directory Schema in the left pane of the MMC and you'll see that the schema has two folders under it: Classes and Attributes (see Figure 30.6). Figure 30.6. You can expand the tree structure to show the classes that currently exist in the Active Directory.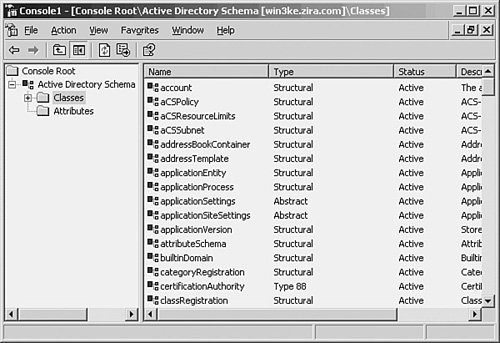 If you double-click on Classes, the tree structure will expand to show you the classes that already exist in the Active Directory (also shown in Figure 30.6). Many of these have unfamiliar names and should be an indication to you of how complex the Active Directory really is and why you should educate yourself thoroughly before making any changes to it. Likewise, if you double-click on the Attributes folder, you'll get a display of all the attributes available in the Active Directory (see Figure 30.7). In this figure, you can see that the attribute named accountExpires, which can be used, for example, in a user account object, has a syntax of Large Integer. Other attributes have different syntaxes, as shown in this figure. Figure 30.7. The list of attributes that make up objects can be displayed using this snap-in.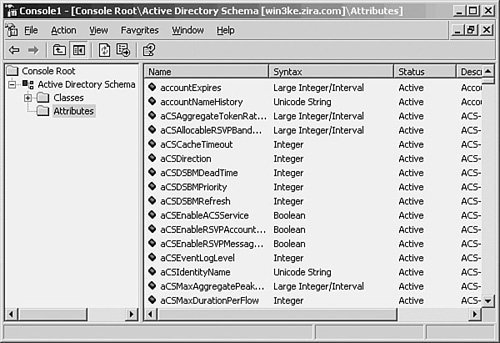 You can view the details about a particular object or attribute by double-clicking on it or by right-clicking and selecting Properties from the pop-up menu. For example, Figure 30.8 shows the Properties sheet for the OrganizationalPerson object class. This is the object type that is used to store user accounts in the Active Directory. Notice that there are no mandatory attributes for this object, but there are a large number of optional attributes. Figure 30.8. The Properties sheet shows the attributes for this object. In Figure 30.8, you can see that for each object you can have attributes that are either optional or mandatory. All objects in the directory of a particular class must each have values for all the attributes required by the object class. The optional attributes can be used if you need them. In the case of the OrganizationalPerson class, there are no required attributes. This is not the case with all classes, however. For example, in Figure 30.9, you can see that the PrintQueue class has five mandatory attributes that will be created for any object you create using this class. Additionally, there are various optional attributes you can also add to an object you create using this class. Keep in mind that classes and their attributes are merely templates. When you create an object in the Active Directory, you choose what class to use, and an object is created. The class that the object is derived from is not changed. Figure 30.9. The PrintQueue object contains both mandatory and additional attributes. In Figure 30.7, you saw a partial list of the attributes that are defined in the directory. You can use the scrollbar to scroll through the entire list to locate attributes. When you modify or create a new object in the schema, you can select from these attributes or create a new attribute. To create a new attribute, right-click on the Attributes folder in the left pane of the MMC and select New and then Attribute. A warning will pop up letting you know that adding an attribute is permanent, and you will not be able to delete it later. However, you will be able to "disable" the attribute if you no longer want to use it. Each attribute has a particular syntax associated with it, which defines the type of data that the attribute can hold. Figure 30.10 shows the dialog box associated with creating a new attribute with the syntax field expanded. As you can probably determine from this, modifying the schema requires that you fully understand what you are doing. Figure 30.10. It's easy to add new attributes using the Schema Manager. Caution Even though I said it earlier in this chapter, it bears repeating: Modifying the schema is not a task that should be delegated to an uninformed employee or done simply for convenience. It is easy to add new objects and attributes whenever you want. However, if you are not intimately familiar with the directory, you might find that over time, you have added superfluous duplicate entries. If the same information can be stored in more than one attribute, it makes searching the directory much more difficult because you have to know all the duplicate attributes to search. Disabling an object or attribute from the directory is also not something that should be done casually. If your organization creates internal application programs that are written to use ADSI to interface with the directory, you should be sure to implement a program that tracks changes to the schema so that you can always quickly ascertain the uses of a particular customized object or attribute. As when editing the Registry, you should be extremely careful when making changes to the Active Directory schema. Plan your changes in advance, create a checklist of what you want to do, and then perform the steps methodically. If another class or attribute can be used to store the data you need to place into the Active Directory, consider that choice instead of creating additional classes or attributes. You can add a new Schema object class almost as easily as you can modify an existing class. To add a new class, right-click the Classes folder in the left pane of the MMC Active Directory Schema Snap-In, right-click on Classes, and select New and then Class. After a similar warning message appears, click Continue. The Create New Schema Class dialog box appears (see Figure 30.11). Figure 30.11. You can create a new object class in the Active Directory using this dialog box. As you can see, you'll have to supply a common name (CN), an LDAP display name, and a unique object ID for the class. If you want to create a class that is similar to an existing class, you can use the Parent Class field under the Inheritance and Type section of the dialog box to specify the class from which your new class will inherit a set of attributes that have already been defined. You can use the Class Type drop-down menu to specify the type of class you are creating. The next dialog box allows you to enter the mandatory (required) and optional attributes for the class you are creating. When you've finished selecting these attributes, click the Finish button. |
EAN: 2147483647
Pages: 411