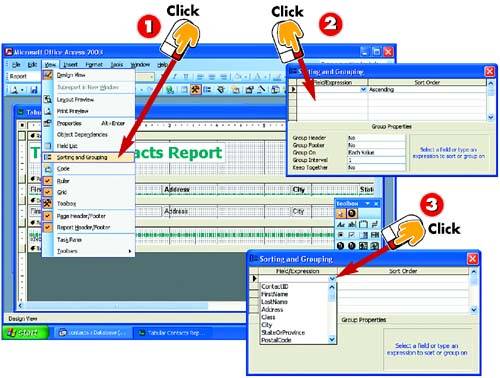
After you open the report whose contents you want to sort or group in Design view, open the View menu and choose Sorting and Grouping .
The Sorting and Grouping dialog box opens. Click the first cell in the Field/Expression column; a down arrow appears.
Click the down arrow in the Field/Expression column and select the field on which you want to group. For example, to group by state, select the State field.
INTRODUCTION
If you used a wizard to create a report and did not select a sort order or grouping option, you can do so at any time by following the steps in this task. You might decide to sort or group data if, for example, you want to print a list of clients sorted by state or a list of products by product type.
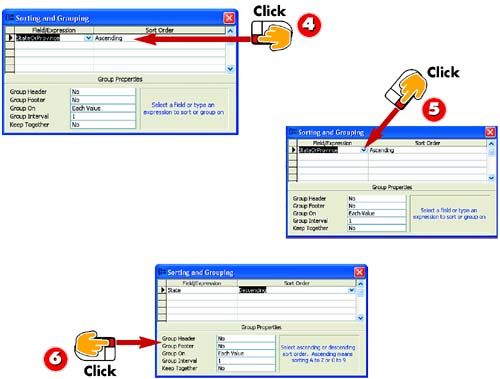
The default sort order is ascending . If you prefer to sort in descending order, click the first cell in the Sort Order column. Then click the down arrow that appears.
Click the down arrow in the Sort Order column and choose Descending from the list that appears.
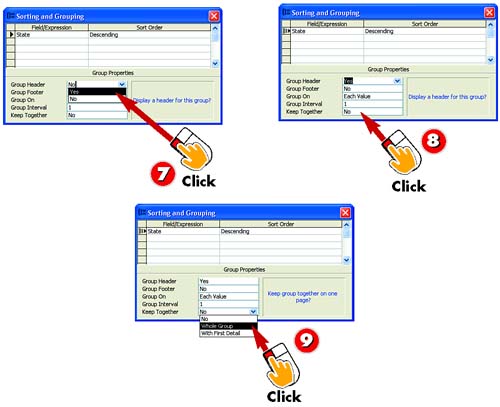
If you want to display a header (or footer) for each group, click either the Group Header or Group Footer field; a down arrow appears.
TIP
Group Headings
The report will be grouped in order, but the order might not be apparent unless you add a group header as well as a label to identify that group. For example, if you grouped by state, you could add the state field (not the label) so that at the start of each new state you would see the state in the group header.
Click the down arrow that appears in either the Group Header or Group Footer field and choose Yes from the list that appears.
If you want to keep the entire group together (that is, with no page breaks), click the Keep Together field; a down arrow appears.
Click the down arrow in the Keep Together field and choose an option for keeping the fields together: Whole Group or With First Detail.
TIP
Setting Other Properties
You can change other properties of the group. For example, use the Group On property to select the value or range of values that starts a new group.
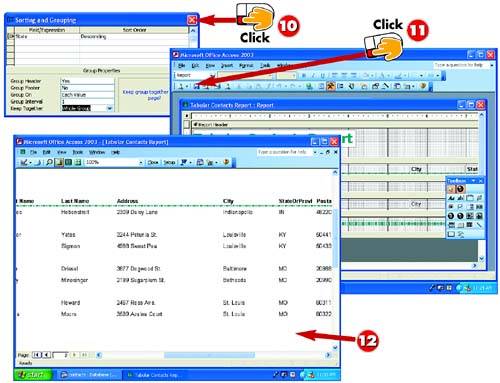
Click the Sorting and Grouping dialog box's Close button to close it.
You see the report design, including new header/footer sections if you added a group header/footer. Click the Save button on the Standard toolbar to save the report design.
To see the results of the grouping, preview the report. (For more information about previewing, see the task "Previewing a Report" later in this part.)
TIP
Using Expressions
This example uses a simple group, but you can create more complex groups by using expressions . For example, you can group products by price (all products less than $50, $50 “$100, $100 or higher, and so on). Part 6 provides some information about using expressions to group data; you can also consult Access's online help for more information.