Adding Printers with Print Center
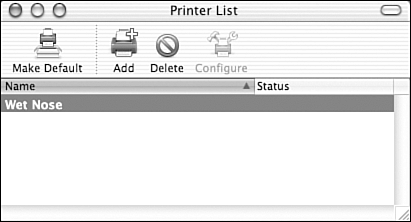
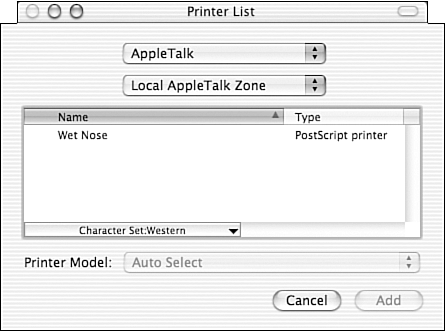
| In Mac OS X, the Print Center application (located in the Utilities folder of the Applications folder on your hard drive) maintains and manages everything printer related . When you start the Print Center application, it opens a small window listing all the available printers that have been configured on your system. For example, in Figure 9.1, one printer is configured for my computer. Figure 9.1. Print Center shows a list of the printers configured on your system. If a printer is set as the default printer, its name appears in bold type. You can make a different printer the default by choosing its name in the list, and then selecting Make Default (Command+D) from the Printers menu. Obviously, switching between printers isn't of much use until you set up a printer or two on your system. To do this, first click the Add button at the top of the Printer List window. A printer selection sheet appears, similar to the one in Figure 9.2. Figure 9.2. Use the Add Printer sheet to configure any connected printing devices. At the top of the dialog box is a pop-up menu that offers several different ways in which you can find and connect to your printer:
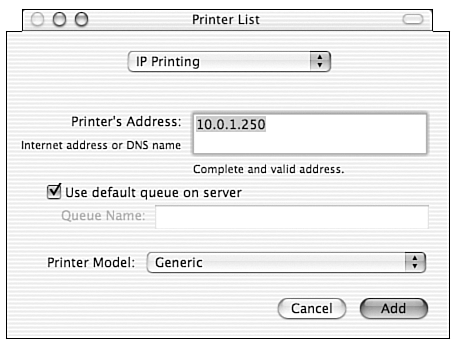
Below are the four main ways of connecting any manufacturer-specific drivers that have been installed on the system, such as Epson and Lexmark. If you're using one of these printers, you should select the corresponding option here. If you choose AppleTalk or USB, Print Center attempts to locate potential printers that your machine can access and automatically displays them. To finish adding a printer, select it from the list of detected devices. Mac OS X then attempts to automatically detect the type of printer you've chosen and select the appropriate driver. Sometimes, however, you must use the Printer Model pop-up menu at the bottom of the dialog box to manually pick a printer type. Finally, click Add to add the selected printer to the Print Center listing. IP printers are configured a bit differently. If you choose IP printers in the pop-up menu, you're asked for information on where the printer is located and how to connect, as shown in Figure 9.3. Figure 9.3. IP printers require additional configuration. Talk to the printer's administrator to determine the IP address and queue name for the remote device. Many times you can choose to use the default queue and simply enter an IP address. Because of the nature of IP connections, you must manually choose a printer model. Click Add to finish adding the printer.
Now that you've learned to set up printers, let's look at how to print a document. |
EAN: 2147483647
Pages: 349