Using the Shape Tools
| Using the various shape tools, you can create rectangles, ellipses (circles and ovals), lines, polygons (shapes with flat sides such as diamonds), and even custom shapes such as musical notes, dog paw prints, and word balloons. When you create a new shape, it's placed on a new layer by default. You can override this setting whenever you want to place more than one shape on a layer. You might want to group shapes this way to make them easier to format and place within an image. You can also combine shapes on one layer to create a single shape. Or you can choose to display only the area where the shapes intersect, or to exclude this overlapping area. For example, if you draw a square and then add a second square that overlaps it partially, using the option to display only the area where the two shapes intersect, that intersecting area will be the only portion of the two squares that is retained. If you draw the second square using the exclude option, the only portions retained will be the areas where the shapes do not overlap. To draw a shape, follow these general steps:
Changing the StyleThe preceding steps describe how to draw a single shape using the current settings, which will typically draw the shape without a border, and filled with the color shown in the tool color swatch (which initially matches the foreground color ). But as you can see on the Shape tool's option bar (shown in Figure 26.4), there are many settings you can adjust. Some settings you can change after the fact, as you will see later in this section. But first, let's take a look at the settings you might change before you draw your shape. Figure 26.4. Set your options before drawing your shape. The simplest option to change is whether or not the shape has a different style, such as a border of some sort , a shadow, or a textured fill. You select a style from the Style list (before or after drawing a shapethe Style setting affects the current selected shape, but if none is selected, it affects the shape you're about to draw), which is located toward the right end of the Options bar, as shown in Figure 26.4. Initially, the style is set to None, which means you'll get a shape filled with the tool color, and with no border. Click the down arrow on the Style list to reveal a group of styles, such as the Bevel styles, which add a bevel edge to a shape. You can display a different group of styles by clicking the right arrow at the top of the palette and choosing another set from the menu that appears. To return to drawing shapes without a style, select Remove Style from the menu.
Setting the Geometry OptionsYou might also want to change the Geometry Options before (but not after) drawing a shape. These options control how a shape is drawn, and can help you draw a shape with more precision. The Geometry Options vary with the type of shape you've chosen from the left side of the Options menu. To display them, click the Geometry Options down arrow at the end of the shapes group, as shown in Figure 26.4. The only way to explain the Geometry Options is to take them one shape at a time. The Rectangle, Rounded Rectangle, and Ellipse tools share similar Geometry Options:
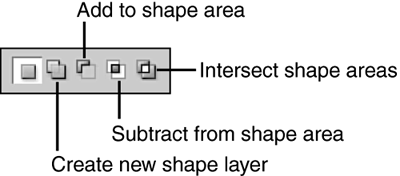
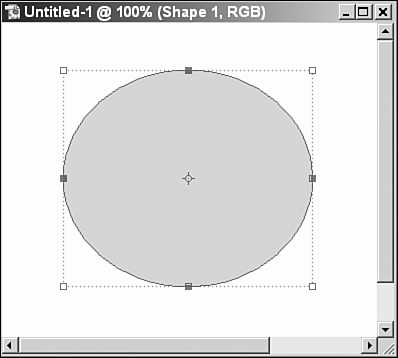
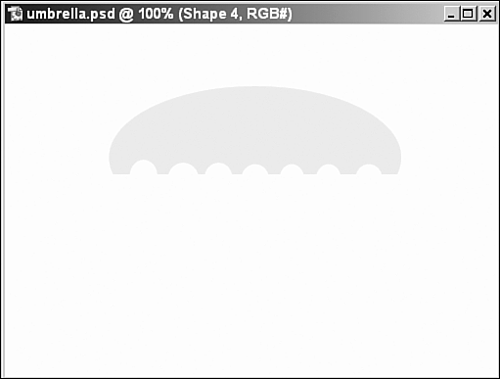
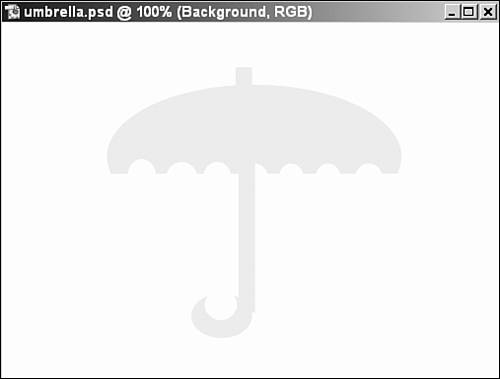
The Rounded Rectangle tool has one other option on the Options bar itself, and that's Radius. The value you enter here determines the curve at the corners of the rectangle you draw. The Polygon tool has its own set of Geometry options. The Radius value sets the exact distance from the center of the polygon to its corners; by changing this value, you can draw a polygon of an exact size. The Smooth Corners option renders a polygon with rounded corners rather than sharp angles. To draw a star, select the Star option. Then set related options: Indent Sides By sets the angle of the points by forcing the sides to fit the proportion you enter, and Smooth Indents adjusts the angle of the points even further, to lessen the inside angles. The Polygon tool has one other option, displayed on the Options bar but not on the Geometry Options palette: the Sides value. As you may have guessed, this tells Elements how many sides of equal length you want your polygon to have. As you can see from the Geometry Options for the Line shape shown in Figure 26.4, you can add an arrowhead at the beginning or end of the line by choosing Start or End, or both. After turning on either arrowhead, set the arrowhead's width and length, which are proportionate to the width and length of the line itself. Curve the sides of the arrowhead by entering a Concavity value other than zero. The Line tool has one other option as well that is not shown on the Geometry Options palette, but appears on the Options bar: the Weight option, which controls the thickness of the line. Fat lines, by the way, are filled with the tool color. Now that you know a bit about drawing each type of shape, let's discuss the other settings on the Options bar. Drawing Additional ShapesAfter drawing one shape, you may want to draw another. After all, most shapes are actually made up of many ellipses, rectangles, lines, polygons, and so on. To change to a different shape tool so you can draw a different shape, click the shape's button (located at the left end of the Options bar). Then change any Geometry Options you want, and change any additional settings we've already talked about. You're now ready to click in the image and drag to draw the new shape. Before you do, however, you might want to consider how that shape will affect the other shapes in your image. The shape area buttons on the far right of the Options bar (see Figure 26.5) require a bit of explanation before you use them. The first button on the left is Create New Shape Layer. If this is selected (which it normally is by default), a new layer will be created automatically when you draw the shape. If you choose any other option, you'll draw the new shape on the current shape layer. The next button, Add to Shape Area, dictates not only that the shape you draw will appear on the current shape layer, but that the two shapes will be treated as one shape for the purposes of formatting, resizing, moving, and so on. If you select Subtract from Shape Area, the second shape will not be filled and the area where the two shapes overlap will be removed from the original shape. Think of this option as cutting away part of the original shape with a shape tool. Figure 26.5. Use these buttons to control how a new shape affects other shapes. If you select Intersect Shape Areas, only the intersection of the two shapes is filled. If the second shape doesn't intersect the first, neither shape is filled. The last button, Exclude Overlapping Shape Areas, is the exact opposite ; the area where the two shapes intersect is left unfilled, and other non-overlapping areas are filled. There's one last thing you need to consider before you draw additional shapes: the fill color. When you draw your first shape, it's filled with the tool color shown in the color swatch at the right end of the Options bar. Initially, this color is set to the foreground color, but you can change it before you draw the shape in any of the ways discussed earlier. When you're ready to draw additional shapes, do not change the tool color or the style. If you do, you'll change the fill color or style of the shape you just drew. Instead, draw the shape, and then, while it's still selected, change the color and/or style as desired. Creating a Custom ShapeTo create a custom shape, such as a rabbit, choose the Custom Shape tool from the Shape tools list. On the Options bar, open the Shapes list, and a palette of default shapes appears. If the shape you want to draw is not shown, click the right-pointing arrow to open a menu of other shape groups. To draw a rabbit, for example, click the arrow and select Animals. Then click the rabbit shape in the palette. After selecting the custom shape you want to draw, set other options as desired, such as the color and shape area options. Then drag in the image to create a shape. Selecting a ShapeUse the Shape Selection tool (the arrowhead pointer located to the left of the shape buttons on the Options bar) to select a shape so you can move, copy, delete, rotate, or resize it. Just click the tool and then click on the shape you want to select. Handles (small squares) appear around the selected shape, as shown in Figure 26.6. Drag the handles outward or inward to resize the shape. Dragging a corner handle maintains the aspect ratio (the width in relationship to the height). To change only the horizontal or vertical width, drag a side handle. To resize a shape by a certain amount (that is, to scale it), enter the appropriate values in the boxes on the Options bar. You can enter a value in the Set Horizontal Scale box, and click the Maintain Aspect Ratio button to automatically adjust the Vertical value by a proportionate amount. When you're done, set the check mark to commit the change. Figure 26.6. Handles appear around the selected shape(s). Click the center handle (which looks like a cross) to move the shape. If you want to move all the shapes on a layer together, use the Move tool instead. Click the Move tool, then click anywhere on the shape layer. Drag the selection to move the shapes as a group. You can also rotate a selected shape using the techniques you learned in Chapter 23, "Using Basic Tools in Elements." Task: Create an UmbrellaWe'll use the Shape tools to create a small object: an umbrella. Start a new image using default size, RGB color, and a white background.
|
EAN: 2147483647
Pages: 349


