Making Selections with the Magic Wand
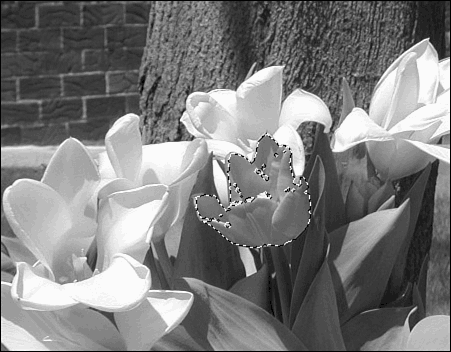
| The Magic Wand is, in many ways, the easiest of the selection tools to use. It selects by color, and can be set to select all pixels of a particular color or range of colors in the entire image, or only those pixels that qualify and are adjacent to each other. It's the perfect tool for tasks such as selecting the sky, prior to turning it from gray to blue, and for what I'm attempting in Figure 23.7, which is to select the big red tulip, without selecting the smaller one tucked in back, or any of the yellow ones. Figure 23.7. Selecting the red tulip took about eight clicks, because there were many shades of pink included. Here, I'm almost done. The Magic Wand's tool Options bar has check boxes for Antialiased and Contiguous selections, and for selecting through all layers or just the top one. These are obviously going to be useful, but the truly important option is to set a degree of tolerance for the wand. With zero tolerance, you'll select only the few pixels that are identical to the one you clicked the wand on. (If Contiguous is checked, the selected pixels must also be touching each other.) If you set a very generous tolerance, perhaps as much as 100, you will find yourself selecting much of the image with just one click. That's probably not what you wanted to do. Try a tolerance between 10 and 35 for tasks such as picking up the red tulip. After setting the options you want, simply click on a pixel of the color you wish to select. Don't forget that you need to keep the Shift key pressed to add to your wand selections, just as you do when drawing multiple marquees. When you accidentally select more than you wanted, Undo or Command/Ctrl-Z will immediately subtract the last pixels you selected.
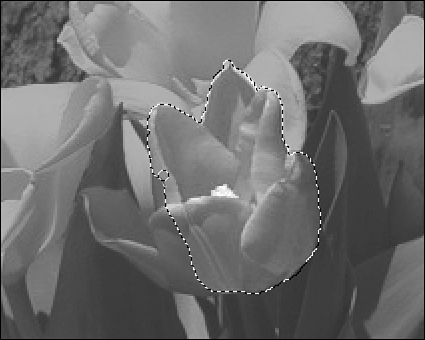
Using the Selection Brush ToolIf you have a steady hand, and possibly a drawing tablet and pen instead of a mouse, you might find the easiest selection method, at least for some things, is to paint over them with the Selection Brush tool. It looks like a paintbrush, and in some circumstances works like one. To understand what it does, you need to think of making a selection as a way of isolating the part of the picture you're working on, from the parts you don't want to change. With the Selection Brush, you can either select the area you want to work with, or select the area you don't want to use by covering it with a mask. Using the Selection Brush is like using any other brush. You have a choice, however, as to whether you are painting to mask the area around an object, or to select the object itself. The Options bar for the Selection Brush is shown in Figure 23.8. If you choose Selection from the Mode list, the area you drag over adds to the selection. If you choose Mask instead, the area you drag is subtracted from any existing selection (adding to the mask, or the area you don't wish to affect). What this actually means is that, when you choose the add icon, with your first brush click the image completely covers it with a layer of mask. Each subsequent brush stroke adds to the selection by erasing some of the mask. Select the brush type, size, and hardness of the edge from the lists on the Options bar. Then drag to select or mask part of the image. Figure 23.8. Select the options you want to use with the Selection Brush.
In Figure 23.9, I have changed the mask color to blue for better contrast with the red flower, and I'm in the process of selecting it with the paintbrush. It's very easy to make an accurate selection this way, especially if you enlarge the image and work with a small brush. Figure 23.9. In Photoshop, this feature is called Quick Masking. Selecting and Deselecting AllIn addition to the selection tools, there's another quick and easy way to make a selection. To select the entire image, rather than dragging a marquee around it, or clicking the Magic Wand repeatedly, just type Command/Ctrl-A to select all. To deselect whatever is selected, use Command/Ctrl-D. If you want to clear the image and start over, select all and press Delete. To erase part of the image, draw a marquee the size and shape you want to erase, and press Delete. Memorize these commands. They will save you tons of time. If you reach a point at which Elements seems to freeze or doesn't do what you want it to, try pressing the deselect keys. You may have accidentally selected a single pixel, and not noticed it. |
EAN: 2147483647
Pages: 349