Using the DataList Control's Properties You'll want to format the contents of your DataList control, setting fonts, colors, and borders; to make that easier, the DataGrid control supports a named style for each template. (For example, the ItemStyle element in the page's HTML contains the formatting information for the ItemTemplate element; the AlternatingItemStyle element corresponds to the AlternatingItemTemplate element, and so on.) Although you can set each individual property for each template, that can get tedious. Instead, you'll most likely want to start with the automatic formatting provided by the control. In this section, you'll add these features to your DataList control: Format the DataList control, setting up different colors for items and alternating items. Add a visible border around the cells. Display multiple columns of cells. To get started, follow these steps: -
With EmployeeInfo.aspx open in the page designer, right-click the DataList control. -
Select Auto Format from the context menu. From the dialog box shown in Figure 19.7, select one of the predefined formats. We've selected Colorful 4, but you can select whichever you like. Click OK when you're done, to dismiss the dialog box. Figure 19.7. Select a predefined format from the Auto Format dialog box.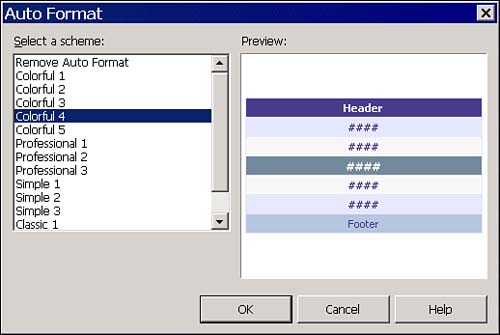
-
Right-click on the DataList control again and then select Property Builder from the context menu. -
On the General tab of the datEmps Properties dialog box, find the Repeat Layout section. Set the Columns property to 3 and the Direction property to Horizontal. Figure 19.8 shows the dialog box after you've set the properties. Figure 19.8. Select the repeat layout on the General page.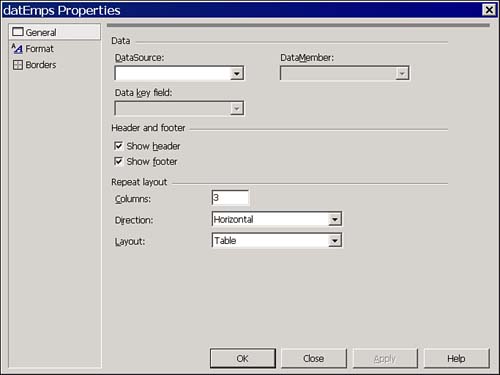
-
On the Format tab, you can peruse (and perhaps change) formatting settings for each of the items within the DataList control. You don't need to change any of the settings now, but Figure 19.9 shows how you can modify colors, fonts, and other formatting settings. Figure 19.9. Use the Format page to modify colors, fonts, and so on.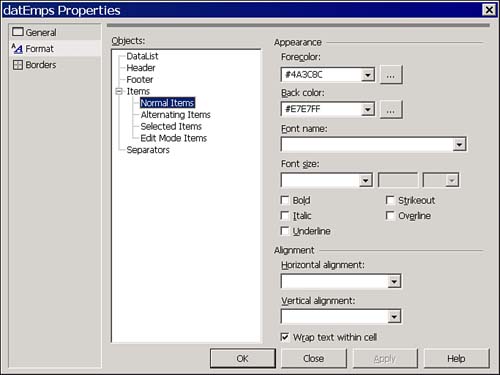
-
On the Borders tab, you can set borders (or grid lines) for each of the cells within the DataList control. You might set values as shown in Figure 19.10. Figure 19.10. Try adding borders, both horizontal and vertical.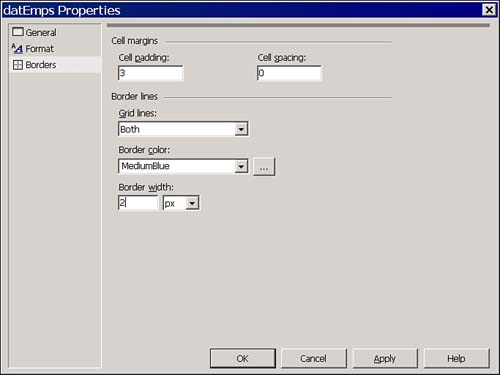
-
Click OK to dismiss the dialog box. You may need to resize the DataList control, both horizontally and vertically, to make it fit the contents the cells. When you're done formatting the control, it should look like Figure 19.11. Figure 19.11. The finished page should look like this in the page designer.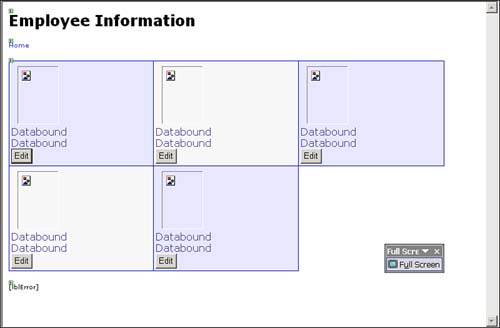
-
Save your project. -
Test the page, verifying that you see the data in a "snaking" format, laid out something like Figure 19.1. |
