No Chunks
This simple sample demonstrates how to move the contents of a file to and from a database using the Stream object. Using the sample should be straightforward.
When you run the sample the form in Figure B-7 appears, displaying only one enabled button: Connect. If you click this button, the sample invokes the Data Link Properties dialog box to prompt you for a connection string.
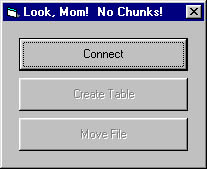
Figure B-7. The No Chunks sample on initial startup.
Once you've built a valid connection string, the sample connects to your database, disables the Connect button, and enables the Create Table button. Clicking this button creates in your database a table that's designed to store the contents of files. I wrote the sample to work with SQL Server, which calls its large binary data type "image." If you're using a database program other than SQL Server, this query might fail; you'll need to check the documentation for your database software and change this query in order to properly create the table. As long as you don't change the field names, the rest of the sample should run just fine.
NOTE
Don't try to store files in text fields. I don't believe I've ever seen this clearly stated in product documentation, but it needs to be said. Even text files contain binary data. Most database systems have separate data types for large amounts of text and binary data. Binary data is not subject to international localizations or ANSI/Unicode conversions, but text data is. So give unto text data types what is text and give unto binary data types what is binary, and there will be much rejoicing.
Once the sample creates the table in which it can store file contents, you'll see the Move File button enabled. Click this button, and the sample will prompt you for a file to move. Select the file, and the code uses the Stream object to move the contents of the file into your database.
Once this operation completes, the code deletes your file and displays a dialog box that lets you know the file has been deleted. At this time you can open Windows Explorer and confirm that the file has been deleted. Close the dialog box, and the sample retrieves the file from your database and informs you when the operation completes. You can then access the file to confirm that it's identical to the original.
Take a look at the code in the Click event for the Move File button. The ADO code is much simpler than any sample code using the AppendChunk and GetChunk methods. (See Chapter 4 for a description of these methods.)
EAN: N/A
Pages: 131