| Let's complete the video to this sequence by making some additional edits. You will edit two video clips as Overwrite edits and two more as Insert edits. You will edit these clips using the drag-and-drop method. NOTE Make sure Snapping is on for these steps.
1. | Drag the daryl cu clip from the Viewer down to the V1 track, and snap it to the end of the tilt down canoe clip. Make sure the downward, Overwrite edit arrow is showing, and release the clip.
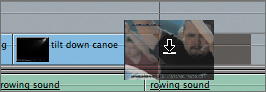
The playhead jumps to the end of the newly placed clip, just as it did when you made Overwrite edits in the previous lesson.
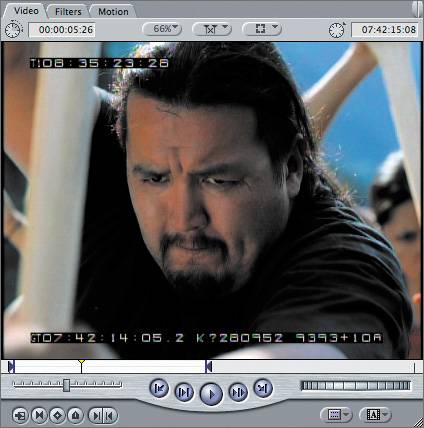
TIP If you release the clip in the Timeline before placing it where you want it to go, you can drag the clip into place as a separate step, as you did earlier in this lesson. If you release it over an existing clip, press Cmd-Z to undo and try again. | 2. | Open the pan to totem clip from the Browser, and play the marked portion. You will use this clip as marked.
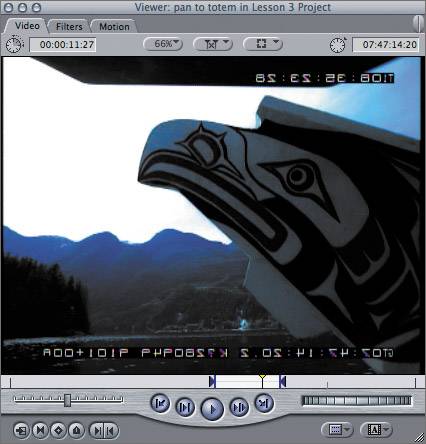
If you look closely at the visual timecode and film key frame numbers in the image portion of this clip, you will see that they are reversed. In order for these two clips to match direction, the pan to totem clip had to be flopped or turned around to face the opposite direction. Also, the black area at the top of the image is a shade attached to the camera. Because the final version of this film screens as a widescreen format, the black area won't show. You will learn to flop clips and add mattes in a later lesson.
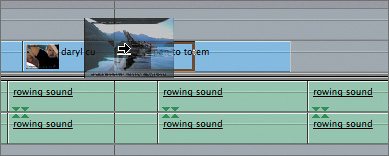
| 3. | Drag the clip from the Viewer to the Timeline as an Overwrite edit, and snap it to the end of the daryl cu clip. Remember, it doesn't matter where the playhead is located for this edit.
|
Let's say you want to add a few more video clips to cover the sound effects on A1 and A2. But after reviewing the pan to totem clip, you decide you would like for that to be the last clip in the sequence. In this case, you will need to insert any additional clips before the pan to totem clip. When you make Insert edits, no matter what method you use, all clips from the insert point on are moved forward the length of the new clip. In the previous lesson, you wanted all the clips to move forward to allow room for the new clip. In this lesson, you want just the video clips to move forward, but not the audio clips. First, you'll try the edit without locking the tracks to see what happens. Then, you'll lock the audio tracks so they won't be affected by the video Insert edit. TIP Snapping should always be active when inserting clips between other clips for the most accurate placement.
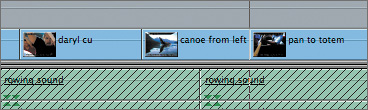
4. | Open the canoe from left clip, and play the marked portion. Drag this clip into the Timeline, and snap it to the edit point at the head of the pan to totem clip. Position the tip of the pointer above the thin gray line in the V1 track. Make sure you see the Insert edit visual clues the forward pointing arrow and the hollow clip and then release the clip.
Inserting this clip at this location moves all clips on all audio and video tracks forward by the clip duration. This is not what you want in this case.
| 5. | Press Cmd-Z to undo the last action in this case, the Insert edit.
Another track control in the Timeline is the Track Lock control. Locking a track keeps it from being affected by an editing function, such as inserting the clip in step 4.
| 6. | In the Timeline, click the Track Lock controls for the A1 and A2 tracks.
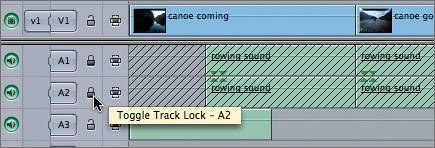
Diagonal lines appear on these audio tracks, indicating that they are locked and cannot be changed.
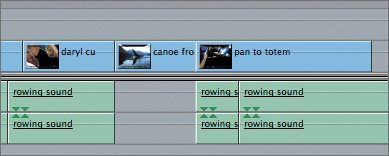
TIP You can also press Shift-F5 to toggle the locks off or on for all audio tracks. | 7. | Now repeat step 4, and play this area of the sequence.
The clip is inserted after the daryl cu clip, and only the pan to totem video clip is moved down the length of the new clip. The playhead has repositioned itself after the new clip. This is where you will insert the next edit.
| 8. | Open the daryl slo-mo clip, and play the marked portion.
The speed of this clip has been slowed to half its normal rate. You will learn to change the speed of a clip in a later lesson.
NOTE This footage was originally shot on super 35mm film and transferred to tape. You may see some film artifacts, such as frame duplication, in this clip. | 9. | Drag the daryl slo-mo clip to the V1 track, and insert it after the canoe from left clip.
NOTE You can also insert a clip right in the middle of another clip. For example, you might decide to break up the action of a long clip by inserting a different image for a few seconds in the middle. The long clip will be split into two parts, and the second part will be pushed down the length of the newly inserted clip. | 10. | Play the sequence from the beginning.
In later lessons, you will learn to trim and adjust clips already in the Timeline.
|
TIP Don't forget to press Shift-Z to see the entire sequence in full view, or Option-+ or Option- (Option-minus sign) to zoom in or out of the Timeline.
|