| The beauty of the nonlinear editing process is that you don't have to make all of your editorial decisions in a linear fashion, editing one clip after the other in the sequence. For example, if you are editing an interview, you might edit all the questions from the interviewer into the sequence and then go back and insert the answers from the person being interviewed. When you insert a clip into the sequence, all clips in all tracks following the new clip are moved forward the length of the clip. Inserting a clip lengthens the sequence by the length of the clip. 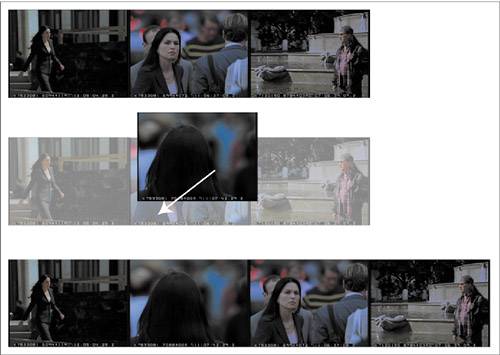
As in Overwrite editing, you will use the same three methods of making an edit, and you will use the location of the playhead to determine where a clip will be inserted. 1. | From the Browser, open the 97A-out of bldg clip, and play it.
You will use the clip as marked. Since the marked portion does not include the musical group playing, you will edit just the video portion of this clip.
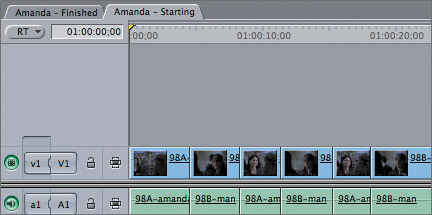
| 2. | In the Timeline, move the playhead to the beginning of the sequence, where you will insert the new edit.
| 3. | Click the a1 source control to disconnect it from any destination track. Repeat this with the a2 source control.
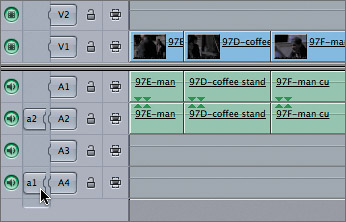
When the source controls are disconnected from the destination tracks, no source audio will be used in the edit.
| 4. | As you did with the first Overwrite edit, click and drag the Viewer image to the Canvas Edit Overlay, but don't release the mouse.
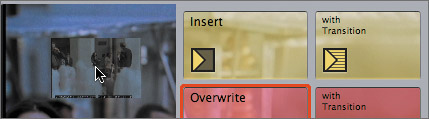
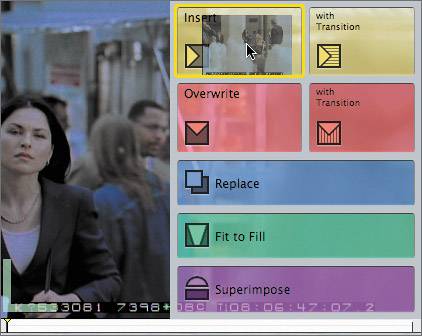
The Insert section is yellow, and its icon is an arrow pointing to the right. This indicates that all the following clips in the sequence will be moved forward to allow room for the new clip you are editing.
| 5. | Drag the clip to the yellow Insert section, and when the section becomes highlighted, release the mouse.
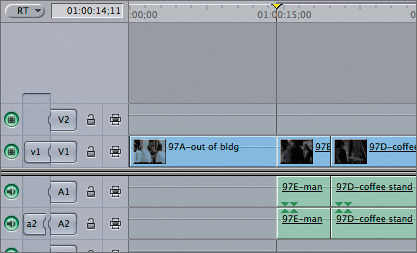
In the Timeline, just the video portion of the clip is inserted before the first clip in the sequence. All the other clips are moved down to allow room for the new clip.
| 6. | Open the 97E-man clip, and play from the In to the Out.
You will edit the audio and video of this clip as marked at the current playhead location.
| 7. | Click the a1 and a2 source controls to reconnect them to the A1 and A2 destination tracks. You may need to drag the a1 source control to the A1 destination track.
| 8. | Click the yellow Insert button in the Canvas.

The clip is inserted at the playhead location, and all the remaining clips in the sequence are moved down, including the voice-over clip on A4.
| 9. | Open the 97D-coffee stand clip. Edit this clip as an Insert edit at the current playhead location.
| 10. | Open the 97F-man cu clip. Insert the marked portion into the sequence by using the F9 keyboard shortcut.
| 11. | If necessary, press Shift-Z to see the entire sequence. Press Home to go to the head of the sequence and play it.
This completes the dialogue portion of this sequence. You can follow the steps in the next section to continue adding the voice-over and sound effect clips to this sequence.
|
Project Practice To complete this sequence, edit the remaining clips using the following steps or by referring to the Amanda Finished sequence. 1. | Open the city sounds.aif clip from the Audio bin, and create a 20-second duration. Edit this clip to the A3 track at the head of the sequence as an Overwrite edit. Remember to bring the audio level down to about 15 before you edit it into the sequence.
| 2. | Open the VO _12 clip, and set an In and Out around the narration. Edit this clip as an Overwrite edit to the A4 track about 2 seconds in from the head of the sequence.
| 3. | Open the VO_13 clip, and set an In and Out around the narration. Edit this clip as an Overwrite edit to the A4 track at the end of the previous voice-over clip.
| 4. | Open the 98A-Amanda clip, and mark about a 3-second duration to use as a cutaway. Edit it as an Overwrite edit at the edit point between the two 98B-man clips.
|
TIP If you want to continue practicing marking and editing, create a new sequence and open it in the Timeline. Use different clips, such as the two slo-mo clips or different dialogue selections, to build a new sequence.
|