| As you've seen, you mark audio clips the same way you mark video clips. However, audio is displayed differently in the Viewer and utilizes audio meters to reference audio volume levels. Working with audio is an important part of the editorial process and is covered in more detail throughout this book. 1. | In the Audio bin in the Browser, open the VO_13 clip, and play it.
| 2. | Look beneath the waveform area, and find the zoom control and zoom slider.
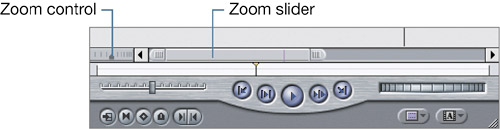
These controls zoom and magnify the waveform display in the Viewer just as they magnified the sequence in the Timeline.
| 3. | Drag the zoom control all the way to the left, and watch the playhead as you drag.
When you zoom into a clip or a sequence as far as possible, the representation of time is expanded. The black bar next to the playhead indicates the width of a single frame.
| 4. | Click in the middle of the zoom control, and drag the zoom slider left and right to see another area of this clip.
| 5. | Press Shift-Z to see the entire audio clip in full view.
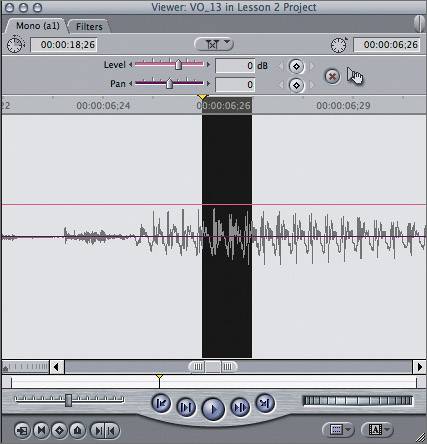
| 6. | Above the waveform display is a ruler area, like the one that appears in the Timeline. Click and drag the playhead in this area.
The playhead here and the one in the scrubber bar move in tandem as you scrub through the audio.
| 7. | Play this clip again, and look at the audio meters in your interface.
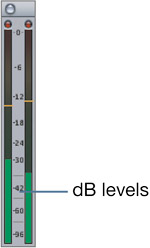
TIP Depending on your computer, the audio meters may appear beneath the Tool palette or to the side. If you don't see this window in your interface, choose Window > Audio Meters, or press Option-4 to open it. The tiny numbers between the two audio meters represent dB, or decibels. That is the unit of measurement for audio. A good rule of thumb is to have the narration average around 12 dB on the audio meters. However, depending on the level of the original media file, this may mean raising or lowering the audio level on the clip in the Viewer.
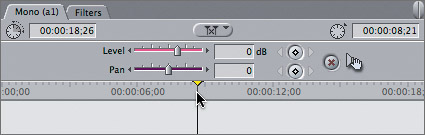
| 8. | From the Audio bin, open the city sounds.aif clip. Play a few seconds, and look at the volume level for this clip in the audio meters.
This sound effect should fall much lower in volume to blend under the dialogue and voice-over clips.
| 9. | Drag the Level slider to the left until you see 15 in the Level field. You can also enter 15 directly in the Level field, and press Return.

When you change the audio level, you see the pink volume line move in the waveform display. If you entered a new number in the Level field, you won't see the volume line change until you press Return.
|
NOTE These dB numbers represent a change of volume up or down relative to the original sound level of this clip. You will work with other sound options in later lessons.
|