| The key to organizing a Final Cut Pro project is to sort clips and elements into bins, just as you would organize computer documents by placing them in folders. You can also place bins within bins, just as you would place folders within folders. Organizing your material into bins will streamline your editing process, making it easier to find and access project elements. Creating and Naming Bins The first step to organizing your project is to create new bins to sort your elements. You will create three new bins to organize the current project, one each for clips, audio, and sequences. Typically with Final Cut Pro, you can accomplish the same task several ways. You will create three bins using three different methods. 1. | Click in the Browser window to make it active.
| 2. | Choose File > New > Bin.
A new bin appears in the Browser with the default name Bin 2.
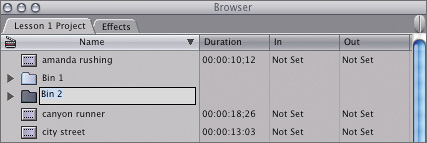
NOTE A default sequential number always appears in the name of new bins, sequences, and projects. Since this project already has a Bin 1, the new bin is named Bin 2. | 3. | If the bin name is already highlighted, type Clips.
| 4. | Press Return or the Tab key to accept the name. If you need to correct it, click the text of the name itself, not the bin icon, to highlight the name again.
When you press Return, the newly named bin is placed in its appropriate alphabetical order.
TIP If you want to change a bin name, but the bin is not highlighted, click once to select the bin, and once again on the name to highlight the text. Pressing the Enter key is another way of highlighting the name of a selected item. | 5. | To create another bin folder, press the keyboard shortcut Cmd-B.
| 6. | Name the bin Audio, and press Return to accept the name.
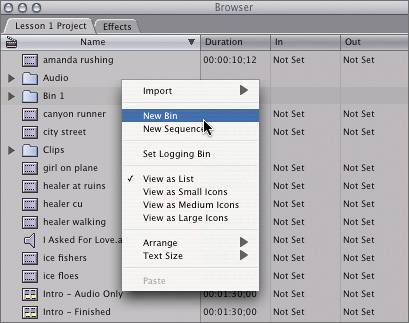
| 7. | To create the third bin, Ctrl-click the Browser gray area under the Name column and choose New Bin from the shortcut menu. You can also right-click using a two-button mouse.
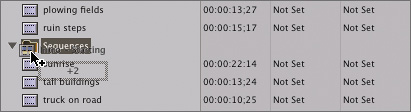
| 8. | Name this bin Sequences.
| 9. | To remove the bin labeled Bin 1, click once to select it and press Delete.
|
Organizing Clips in Bins You've created three bins to organize the different elements in this project. Now you will select the elements and drag them into their appropriate bins. 1. | Drag the I Asked For Love.aif audio clip (speaker icon) to the Audio bin. When the Audio bin becomes highlighted, release the mouse button. Do the same with intro narration.aif and lightness bells.aif clips.
NOTE Whenever you drag and drop an item in Final Cut Pro, make sure the tip of the Selection tool pointer touches the target destination, in this case the bin icon or name. 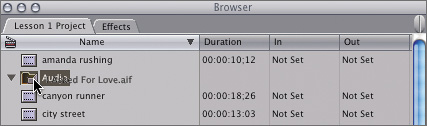
| 2. | To select items next to each other (contiguous), such as the three sequences, click the first sequence, Intro Audio Only, and Shift-click the third sequence, Intro Starting.
| 3. | Drag one of the selected sequences to the Sequences bin.
As you drag these sequences together, the name of only the sequence you clicked shows, as well as the number of other items you're dragging.
| 4. | When the Sequences bin becomes highlighted, release the mouse.
| 5. | Select the largest group of remaining contiguous clips by clicking to the left of the first clip and dragging diagonally until the pointer touches all the clips you want to select. Then, drag these clips into the Clips bin.

NOTE Dragging diagonally to select clips is often referred to as marqueeing, as in "drag a marquee around these clips." | 6. | Select the group of four clips on the bottom of the list, then hold down the Command key and click each of the remaining clips once to add them to the current selection. Drag them as a group into the Clips bin.
NOTE You can select any number of noncontiguous clips by holding down the Command key and clicking a clip to select or deselect it. All the project elements are now neatly tucked away in their bins.
| 7. | To save these organizational changes, press Cmd-S.
|
TIP How you organize your project is a personal choice. When others will be working on the same project, make sure the organizational structure is clearly defined.
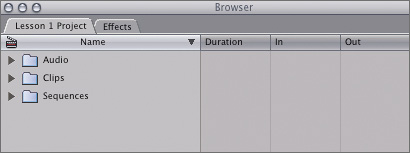
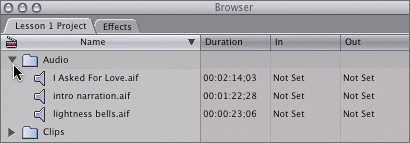
Viewing Bin Contents Although this arrangement looks neat and organized, you can't see your clips or sequences to access them. Let's look at different ways to display the contents of a bin so you can get to your material easily. 1. | Click the disclosure triangle next to the Audio bin to display its contents. Click the disclosure triangle next to the Sequences bin to display the sequences in that bin.
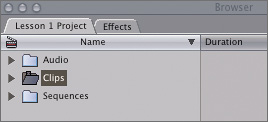
| 2. | Click the disclosure triangle next to the Audio bin to hide the contents of that bin. Hide the contents of the Sequences bin.
| 3. | Double-click the Clips bin.
This opens the bin as a separate window, which you can move anywhere in the interface.
| 4. | Drag the window by its title bar and position it away from the Browser.
In the Browser, the Clips bin icon changes to an open folder, indicating that the bin is open as a separate window or tab.
| 5. | In the Clips bin window, click the Close button in the upper-left corner to close this bin window, or press Cmd-W.
In the Browser, the Clips bin icon changes back to a closed folder.
| 6. | To view the contents of the Clips bin a different way, hold down the Option key and double-click the Clips bin.

This opens the bin as a separate tab next to the Lesson 1 Project tab.
TIP Opening a bin as a separate tab is a helpful way to view and access clips without placing an additional window in the interface. | 7. | To change the view of the Clips bin, Ctrl-click in the gray area under the Name column and choose View As Medium Icons. Click the Clips bin tab and then the Lesson 1 Project tab.
Each bin can be set to a different view option.
| 8. | Ctrl-click the Clips tab, or right-click it with a two-button mouse. Choose Close Tab from the shortcut menu.
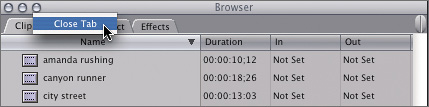
This returns the Clips bin to its closed bin configuration in the Lesson 1 Project tab area.
| 9. | Now display the contents of the Clips bin by clicking the disclosure triangle next to it.
| 10. | In the upper-left corner of the Browser window, click the Zoom button.
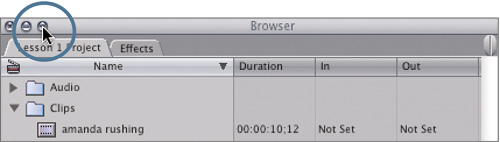
When viewing bin contents as a list, you have access to over 60 columns of information in the Browser window. This may include information Final Cut Pro knows about an item (number of audio tracks, frame size, frame rate, and so on) or descriptive information you enter for further clarification, such as scene and take numbers. These columns will be covered in a later lesson.
| 11. | Click the Browser Zoom button again to return to the default Browser layout.
NOTE If you resize an OS X window manually after clicking the Zoom button, clicking that button again will take you back to the most recent size, not the original window size. | 12. | To resize the Browser dynamically, move the pointer between the Browser and Viewer windows until you see the vertical resize arrow. Drag right to expand the Browser.
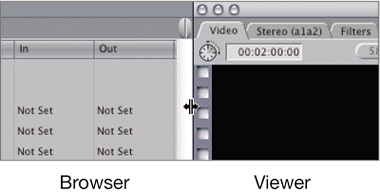
As the Browser expands, the Viewer and Canvas become smaller to allow for the change in Browser size. The windows in the interface can all be dynamically resized by dragging the resize arrow left and right or up or down (between the Timeline and upper windows).
|
TIP To get back to your standard layout, choose Window > Arrange > Standard, or press Ctrl-U.
|