| Depending on your project, you may need to record a voice-over to your sequence, perhaps to try out a narration or simply to provide a track you can use for timing purposes as you cut video for a documentary or news story. To record a voice-over in Final Cut Pro, you can use a digital camera or other audio recording device, such as a USB microphone, PCI card, or internal micon a laptop computer. Recording an audio track this way creates a new clip directly in the Timeline. To create the voice-over clip, you will use the Voice Over tool. 1. | If you are using an external microphone or camera mic, connect the device to your computer.
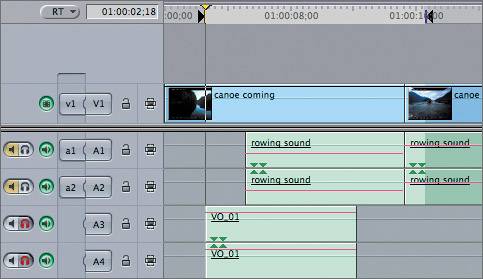
| 2. | In the Timeline, click the Canoe Club Mix sequence tab. Mute the A3 and A4 tracks so you won't hear the existing narration.
You will record yourself saying what the narrator says in the clip.
TIP Recording a rough narration allows you to begin editing, even if the final narration script has not been recorded or captured. A rough voice-over track is often referred to as a scratch track. | 3. | Move the playhead to the beginning of the VO_01 clip, where you will start recording the voice-over. Press I to create an In point. In the Canvas Duration field, enter 1400, and press Return.
This sets an Out point a little farther than the original narration clip, and gives you some extra pad as you record.
NOTE If there are no In and Out points, the voice-over clip begins recording at the playhead location and continues until the end of the sequence. | 4. | Choose Tool > Voice Over to open the Voice Over tool window.
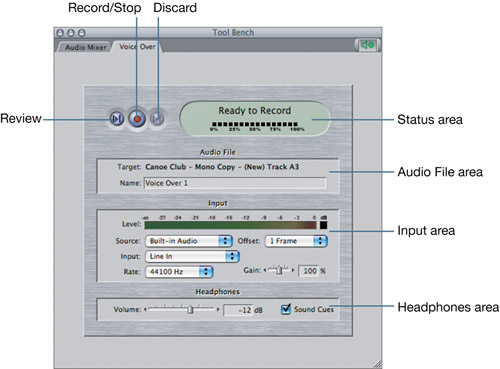
If Final Cut Pro does not detect a recording device, a warning window appears. If Final Cut Pro detects a microphone source, the Voice Over tool appears as a tab in the Tool Bench window. Notice the Audio Mixer tab is still open in this window as well.
The Voice Over tool is divided into four areas: Status, Audio File, Input, and Headphones.
 | 5. | In the Audio File area, look at the Target information and track destination. Then, in the Timeline, drag the a2 source control to the A6 destination control. Look again at the Target information.
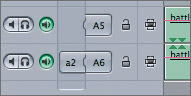
TIP If you don't see an a2 source control in the Timeline track control area, open a clip with audio into the Viewer, and source controls will appear. With the a2 source control patched to the A6 destination track, the target for the new voice-over is A7. This track will be created automatically after you record the voice-over.
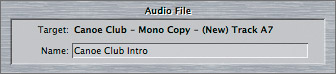
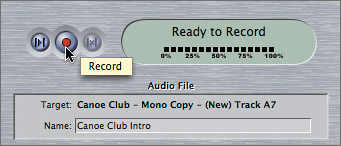
NOTE The Voice Over function records only one channel of audio, or mono audio. It does not record in stereo. | 6. | In the Audio File area, type Canoe Club Intro as the name for this voice-over track.
| 7. | In the Input area, choose the correct source from the Source pop-up menu. If it's DV, choose 48000 Hz from the Rate pop-up menu and 3 Frames from the Offset pop-up menu.
NOTE Final Cut Pro will display a default Input configuration based on the audio recording device it detects. A recording offset amount is included as one of the default settings. If your device does not support 48000 Hz, you won't see that as an option. | 8. | Start talking to set the Headphones level as well as the Gain level in the Input area.
TIP If you use headphones for this process, you can hear the other audio in the sequence as you record the narration without recording the other audio tracks. | 9. | Select the Sound Cues check box.
This will cause beeps to sound during the five-second countdown before recording, and once again as a signal prior to the Out point.
If you're not using headphones and you have Sound Cues selected, the beeps will be picked up and recorded as part of your clip. Deselect the Sound Cues option, and instead watch the Starting countdown in the Record area to see when recording begins and ends.

|
When you are sure you are ready to record, look for the Ready to Record signal in the Status area. Here's what will happen. You will click the Record button. The playhead will immediately jump backward five seconds for the pre-roll, while the Ready to Record window will turn yellow and count down from five. It will then turn red and begin recording. When you are finished reading the narration line, click the black Stop button. 10. | Click the Record button, and record the following line:
"Over at the western edge of the hemisphere, skimming across a deep water inlet of the Puget Sound, I see my northwest relatives, the Salish Canoe Club."
The recording ends at the Out point, and the new voice-over clip appears in the Timeline.

| 11. | Play the clip back by clicking the Review button or playing the sequence in the Timeline.
Each time you record a new version, or take, a new clip is placed in another track in the Timeline and is labeled with the next highest take number.
TIP If you want to stop a recording in process, or if you don't have an Out point, click the Stop button. You can also click the Discard button to discard an unwanted track. This step cannot be undone. 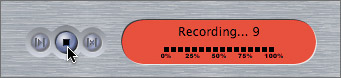
|
|