| The Viewer is where you have screened and marked your clips before editing them into the sequence. But you can also use the Viewer to make adjustments to clips already in the Timeline. You can drag edit points as you did earlier in this lesson. You can also select the Ripple tool and use that in the Viewer as well. 1. | In the Browser, open the Dad with Cutaways sequence and play it.
This is the same sequence as Dad Finished, but with the second clip deleted. You should already have the default Selection tool as your pointer.
| | | 2. | To open a clip into the Viewer from this sequence, double-click the over and over again clip in the Timeline. As with clips in the Browser, you can also select a clip in the Timeline and press Return to open it.
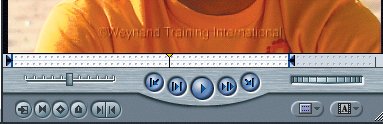 The clip opens in the Viewer, and the In and Out points used for this clip in the sequence appear in the scrubber bar. The scrubber bar now displays two lines of dots like film sprocket holes. This is the visual indication that you are working with a clip that has already been edited into the sequence.
| 3. | Play the clip, and stop the playhead after Jim says, "... I first took him down to the beach."
| 4. | Move the pointer over the Out point in the scrubber bar. Look for the pointer to change to the left-right resize arrow you saw when you dragged the edit point in the Timeline.
 | | | 5. | Drag the Out point of this clip to the left, to the playhead location.
As you drag the Out point, you scrub through the clip's audio; you'll hear a digital version of the audio, which might be helpful in trimming.
 In the Timeline, a gap is left by the trim amount, just as it is when you drag the clip's edit point directly in the Timeline.
| 6. | Now drag the Out point back to the right as far as you can.
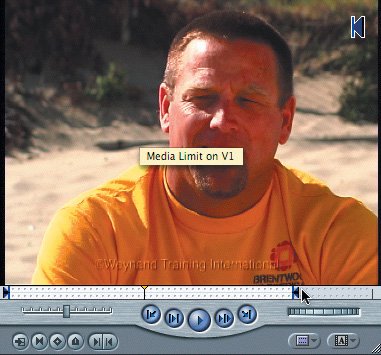 A Media Limit note appears to let you know you are up against another clip in the Timeline. You couldn't drag over another clip in the Timeline, and you can't do it from the Viewer, either.
| 7. | Select the Ripple tool in the Tool palette, or use the keyboard shortcut RR to select it.
| 8. | Now move the pointer into the Viewer scrubber bar and then over the Out point.
When the pointer is moved over the Out point, it changes to the Ripple tool.
 | 9. | Drag the Out point to the same playhead location you used before.
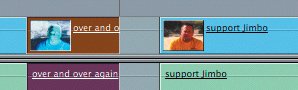
In the Timeline, after you complete the trim and release the mouse, the following edits are rippled and pull up to cover the gap.
|
Project Tasks In order to set up for the next exercise, you will edit two video cutaways to cover the video jump cuts in the following sequence. To do this, you will use the Replace edit function. 1. | In the Timeline, make sure the Dad with Cutaways sequence is still open, and close all other sequences. Press A to change to the default selection tool.
| 2. | From the Cutaways bin, open the high 5 clip into the Viewer, and place the playhead 25 frames from the head of the clip.
| 3. | Since you want to edit just the video, look at the Timeline track area to make sure that is the only patched track.
| 4. | Place the playhead on the first frame of the second clip in the sequence, over and over again.
| 5. | Drag the clip from the Viewer into the Canvas, and drop it on the Replace section in the Edit Overlay. Play the edit.
| 6. | Open the back up again clip from the Cutaways bin into the Viewer, and park the playhead at 8:17.
| 7. | In the Timeline, move the playhead to the first frame of the fourth clip, pick up from school.
| 8. | Drag the clip from the Viewer to the Canvas, and drop it on the Replace section. Play the edit.
| 9. | Press Cmd-S to save your project.
Note The DVD that comes with this book includes an Advanced Trimming PDF that covers additional trimming methods. |
|