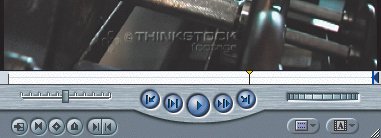
| Now that you have looked at your source clips in the Viewer, you are ready to make edit decisions. The editing process begins with deciding which portion of a clip you want to use in the sequence. Once you determine this, you mark the starting and ending points of the desired portion of the clip. These are your edit points. You will draw from the clips you previously screened. They can be opened from the Recent Clips pop-up list or from the Browser. As you screen a clip in the Viewer, you will mark starting and stopping points within the clip to identify only the portion you want to use in the sequence. The starting point is referred to as the In point, and the stopping point is the Out point. Occasionally, you may choose to use a clip in its entirety. In the next lesson, you will edit your marked clips into a sequence. But for now, you will practice different ways to mark a clip. As with many Final Cut Express operations, there are several ways to mark the edit points of a clip before editing. Marking with Buttons The Mark In and Mark Out buttons are located in the Viewer window below and to the left of the Play buttons. On the Mark In button is a triangle that faces in toward the material you want to use. On the Mark Out button is a reverse triangle that faces backward toward the material you want to use. 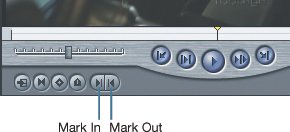 Clicking either button will place an edit point in the scrubber bar wherever the playhead is located. 1. | From the Browser, open the skater glasses on clip into the Viewer and play the clip.
Note The Duration field reflects the full length of the clip when there are no edit points present. | 2. | Drag the playhead to just before the woman puts the sunglasses on her face.
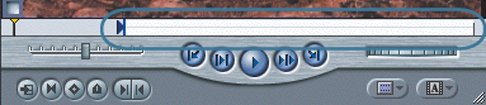
Tip Scrubbing through a clip to find a specific point is sometimes a more efficient way of screening and marking than taking the time to play the full clip in real time. | | | 3. | Click the Mark In button in the Viewer to mark an In point at this location.
 A new In point appears in the scrubber bar where the playhead is located. Notice, too, the In point in the image area.
| 4. | Play the clip to where the woman's right hand comes down and goes out of the frame, and then stop the clip.
| 5. | If necessary, drag the playhead to a different frame, or use the arrow keys or jog wheel to adjust your location.
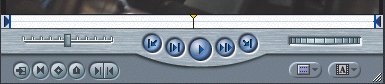
| | | 6. | Click the Mark Out button to mark an Out point at this location.
 A new Out point appears in the scrubber bar where the playhead is located. The Duration field reflects the length of the marked portion of the clip, and the scrubber bar grays out the portion of the clip that will be unused.
| 7. | Click the Play In to Out button to see only the marked portion of your clip.
 Note You will practice different ways to view the marked portion of clips later in this lesson. |
At this point, you might normally edit the marked clip to the sequence. But you can also mark several clips at one time and then edit them to the sequence in a later step. Let's continue practicing marking clips. Marking with Keyboard Shortcuts Once you learn some of the keyboard shortcuts in Final Cut Express, you may find that using them speeds your editing process. When marking edit points, all the keyboard shortcuts that relate to the In point use the letter I. All the shortcuts that relate to the Out point use the letter O. 1. | Open the sword twirl clip in the Viewer, and play it until the woman's body starts to come into the frame. Adjust with the right and left arrow keys to choose the precise frame you want.
| | | 2. | Press the I key to mark an In point at this location.
Tip Choose the Mark menu to remind yourself of the keyboard shortcuts. 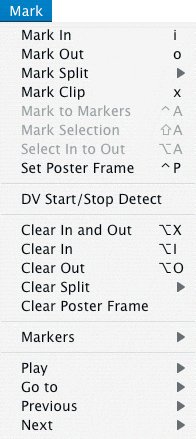 | 3. | Play the clip again, and press O to mark an Out point after the woman lands in her stance.
Note In marking, you can play clips at normal speed and mark while the clip is playing. This is called marking on the fly. Or you can drag the playhead to the specific frame you want and then mark an edit point while the clip is stopped. | 4. | To play the marked portion of the clip, click the Play In to Out button or press Shift-\ (backslash).
| 5. | To save the edit points you've created, choose File > Save Project, or press Cmd-S.
|
You may wonder what has happened to the skater glasses on clip you previously marked. Click the Recent Clips pop-up menu and select the skater glasses on clip. All edit points are saved along with that clip in this project unless you remove them and resave. Marking One Edit Point When you are editing a clip to the sequence, Final Cut Express will default to using the first frame of the clip if no In point has been set and the last frame of the clip if no Out point has been set. 1. | Open the mountain bikers forward clip and play it.
| 2. | Mark an Out point about halfway through the clip.
With no In point marked, this clip will begin with the first frame.
 | 3. | Open the mountain bikers clip and play it.
| 4. | Mark an In point about one second into the clip.
With no Out point marked, this clip will continue until the last frame.
 |
Marking Durations from an In Point Sometimes, rather than marking a specific action point to edit, you may choose to set a duration or an amount of time that you want to use that clip. For example, if there is a locked-down shot of some ongoing activity, such as a waterfall, the actual start or stop point may not be as critical as the amount of time you want to use the shot. 1. | Open the skater skates forward clip and play it.
| 2. | Press Home to move the playhead to the beginning of the clip.
Note If you press Home while the clip is still playing, the playhead will move to the Home position and then the clip will continue to play. To move to the head of the clip and stay there, press the spacebar to stop playing and then press the Home key again. | 3. | Mark an In point at the head of the clip by pressing the I key.
| 4. | Click in the Viewer Duration field and type 200 for a 2-second duration of the clip.
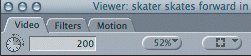 Tip You can also type this number with a period following the 2 to represent zero frames. Substituting a period for double zeros is acceptable throughout Final Cut Express. | 5. | Press Tab or Return to enter the amount.
Note An Out point is automatically created in the scrubber bar two seconds from the In point. If you change your mind about the duration, just enter a new one in the Duration field and press Tab or Return. The Out point will adjust automatically.
|
Marking Durations from an Out Point You can also use a duration from the end of a clip or from a Mark Out point if, for example, you just want to use the last three seconds of a clip. In this situation, you are actually backing up the location of the playhead by a specific duration. At that point, you can enter an In point. 1. | Open the dumbbell cu clip or select it from the Recent Clips pop-up menu.
| 2. | Press the End key or drag the playhead to the end or tail of the clip.
| 3. | Press the O key to mark an Out point.
Note It is not necessary to have an Out point at the end of this clip because the default Out is the end of the clip. But sometimes it's helpful to have an edit point as a visual reference. | 4. | With the mouse pointer in the image area, type 300 or 3. (minus 3 period).
| 5. | Press Tab or Return.
 The playhead is backed up three seconds from the Out point.
| 6. | Press I or click the Mark In button to set an In point at this location.
| 7. | Click the Play In to Out button to play the marked portion.
|
Marking the Entire Clip There are times when you want to use the full length of a clip in the sequence. Using the entire clip doesn't require any edit points at all. In fact, Final Cut Express defaults to using the entire clip if no edit points are present. But again, it can be helpful to have the edit points as a visual reference. 1. | Open the golfer hits ball clip and play it.
| 2. | Mark the entire length of the clip by clicking the Mark Clip button in the Viewer.
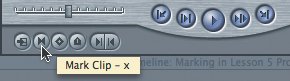 In one step, and regardless of where the playhead is located, this button marks an In point at the first frame and an Out point at the last frame of the clip.
 | 3. | Open the blue ocean dumbbells clip and play the whole clip.
| 4. | To mark this entire clip using the shortcut, press the X key.
Note In and Out points remain unless changed or deleted. |
Marking and Dragging Edit Points Another way to mark your edit points is to mark the entire clip and then drag an edit point to where you want to begin or end the clip. As you drag an edit point in the scrubber, you can see the frames you are passing through in the Viewer image area. Dragging an edit point is another way of scrubbing through the clip. 1. | Open the blue sky dumbbells clip and play it.
| 2. | Drag the playhead to the center of the clip.
| 3. | Press X to mark the entire length of the clip.
| | | 4. | In the scrubber bar, drag the In point until the two dumbbells come into view, and release the In point.
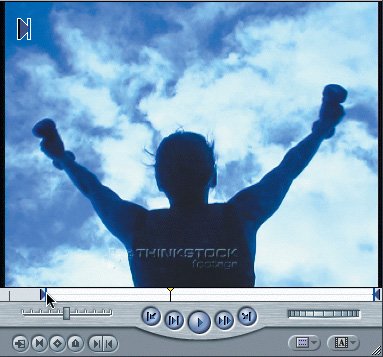 Note As you drag either edit point, the Viewer displays the changing edit point and the Duration field automatically updates to reflect the new distance between the In and Out points. However, when you stop dragging an edit point, the image in the Viewer reverts back to the frame where the playhead is located. | 5. | Drag the Out point from the right until the woman puts her arms down.
|
Using Location Numbers There may be situations when you or someone else has screened clips and written down In and Out points for you to use in editing. When edit points have been selected through a separate screening process, you can go directly to those specific locations and set the edit points without having to scrub through the clip material. 1. | Open the overhead dumbbells clip and play it.
The number in the Viewer Location field changes to reflect the current location of the playhead.
| 2. | Click in the Location field and type 4:04.
 Tip When typing a timecode number, it is not necessary to type any preceding zeros before the first real digit or the colons or semicolons that separate the numbers. Final Cut Express will add those automatically. (However, it is helpful to use the colon in print so that the number can be read more easily.) You could simply type 404 in step 2 and get the same result. | | | 3. | Press Return.
The number is displayed in the Location field, and the playhead goes to this location.
| 4. | Mark an In point at this location.
| 5. | This time, with the Viewer window active and your pointer anywhere in the window, type 10:24.
As you type, the numbers are automatically entered in the Location field.
Tip Typing a number in the Viewer, Canvas, or Timeline window automatically enters the number as a new location in that window's Location field. | 6. | Press Tab or Return.
| 7. | Mark an Out point at this location.
| 8. | Play the marked clip.
|
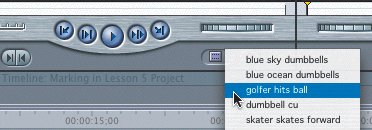
Removing Edit Points Once you set edit points in a clip, they stay with the clip until you remove them. Removing unwanted edit points from a clip is a very easy process and uses the same keys that marking doesI, O, and X. 1. | Click the Recent Clips pop-up menu and select the golfer hits ball clip.
 | 2. | Press Option-I to clear the In point.
| | | 3. | Press Option-O to clear the Out point.
| 4. | Open the blue sky dumbbells clip.
| 5. | Press Option-X to clear both the In and Out points at the same time.
|
|