Working with Video Generators


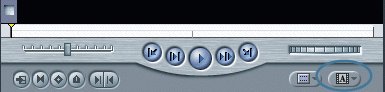
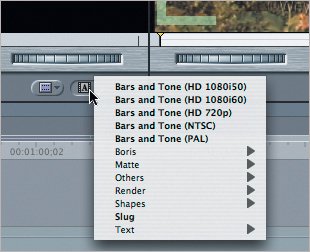
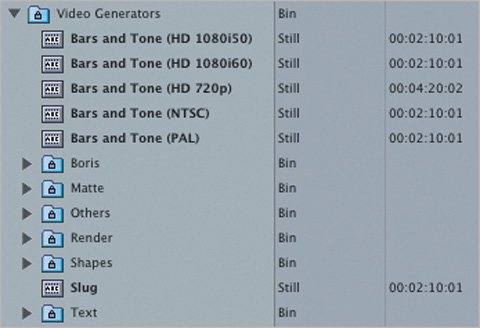
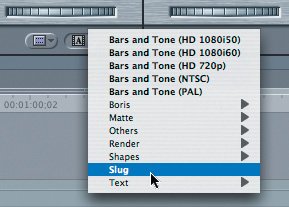
So far, you have been working with footage that was shot with a camera and captured as clips to edit. But now you will work with different types of clips that are generated from within Final Cut Express. Clips that are made within the program are referred to as generator clips. There are different types of video generators, each generating a different type of clip, such as text or a color background or matte. Some generator clips might stand alone; others might be used in conjunction with the video clips you captured. None of the generator clips have audio, except for Bars and Tone and Slug, which have special purposes explained later in the lesson.

Selecting Video Generators

Like filters and transitions, video generators can be selected from two different places: one is the Effects tab in the Browser; the other is a pop-up menu in the Viewer.
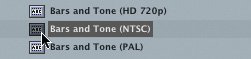
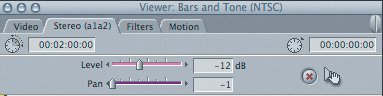
1.

Find the Generator pop-up menu button in the lower-right corner of the Viewer. It is to the right of the Recent Clips pop-up menu button.

2.

Click the Generator pop-up menu button to see the list of options.

The video generators appear as a list with submenu arrows next to those generators that have additional options.

3.

Slide down to Text and look at its submenu options, but don't select any just yet. Move the mouse away from the pop-up menu.

4.

Now click the Effects tab in the Browser.

5.

Display the contents of the Video Generators bin.

These are the same options as in the Generator pop-up menu in the Viewer. But here, submenu items are organized by bin, and individual items are represented by clip icons. There are two new clip icons used for generated items.

Using a Color Reference

When you walk into an electronics store and look at television monitors, it is sometimes difficult to find two monitors that have the same color qualities. In fact, the color in each seems to be set a little differently. In the video world and in television broadcasting, a color reference is used to ensure that the edited piece or sequence will look exactly as intended regardless of what monitor is used. This color reference also has a tone attached as a sound reference.

If you are going to be the only person looking at your video, you can easily adjust your own television set to make your edited piece look the way you want. You can add more color or brightness, or adjust the color hue. But if your final tape will be viewed on someone else's monitor, or even by a professional, you will want to add the color and sound reference at the beginning of your sequence. This will allow outside viewers to set up their own television monitors appropriately before viewing your sequence.

This color/sound reference is called Bars and Tone, sometimes colored bars and tone, or just color bars, and is created as a generated item within Final Cut Express. If you are going to use color bars, they are usually the first thing seen on a tape before your sequence plays. Therefore, they would be the first edit in your sequence.
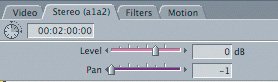
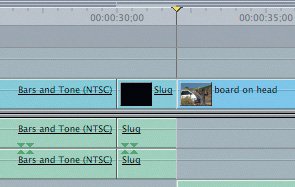
1.

In the Browser Effects tab, select the Bars and Tone (NTSC) clip.

Tip

As you edit Bars and Tone to your own sequences, choose whichever standard or format matches your source material and project settings. Since the media for this exercise was captured in NTSC, that is the correct option for this step.

2.

Press Return to open the selected clip into the Viewer, or double-click its clip icon, just as you would with a normal video clip.

The image in the Viewer is made up of a group of individually colored bars that set a reference for video color, including saturation (amount of color), hue, luminance (brightness), and black.

3.

Play the Bars and Tone clip in the Viewer.

The color bars do not change. Neither does the constant 12 dB tone. You use this constant tone as a reference to set proper monitor or recording levels.

4.

Click the Viewer Stereo (a1a2) tab to see the volume level.

5.

Although the clip opened with a marked duration of 10 seconds, enter 30 seconds (type 3000 or 30.) in the Duration field, and press Tab or Return.

6.

In the Timeline, park the playhead at the head of the sequence and make sure the source tracks are patched to the V1, A1, and A2 destination tracks.

7.

Drag the clip into the Canvas and let it go in the Insert section of the Edit Overlay to place it before the sequence begins.

The Bars and Tone clip is edited at the beginning of the sequence, and all other sequence clips are moved down 30 seconds, the length of the clip.

Adding Slugs

Final Cut Express plays through any gap in a sequence as though it were black video. But you may not want to leave a gap or hole between clips. You may prefer putting something in the gap as a filler clip. This can be done using the slug generator. A slug is one track of black video and one set, or two tracks, of stereo audio. However, there is no recorded audio on the tracks.

You can use a slug clip when you want to hold a place for another clip in the sequence. Maybe someone is working on a great graphic for you, but it isn't ready to edit just yet. You can place a slug clip where you want the graphic to go, to hold its place. In this sequence, you want two seconds of black after the color bars clip has finished playing. You can either move all the clips in the sequence down two seconds and leave a two-second gap, or insert a two-second slug after the color bars.

1.

In the Viewer, click the Generator pop-up menu button and choose Slug.

2.

Play the Slug clip in the Viewer.

This is a two-minute clip of black video and stereo audio tracks.

3.

Click the Stereo tab to view the volume level for the Slug clip.

The volume level is at 0 dB. Pan is at its default setting.

4.

Click the Video tab and enter a two-second duration for the Slug clip in the Duration field.

Slugs have a 10-second marked duration just like Bars and Tone.

5.

In the Timeline, make sure the playhead is parked at the end of the Bars and Tone clip.

6.

Drag the Slug clip from the Viewer into the Canvas Edit Overlay as an Insert edit. Play the clip.

The audio/video Slug clip is edited into the sequence and plays back as black video with no sound.


Apple Pro Training Series Final Cut Express HD
Apple Pro Training Series: Final Cut Express HD
ISBN: 0321335333
EAN: 2147483647
Year: 2006
Pages: 174
Authors: Diana Weynand

flylib.com © 2008-2017.
If you may any questions please contact us: flylib@qtcs.net