| Soft proofing works on the assumption that the gamut of the display is generally greater than that of the printing device or process. For soft proofing to work for your prints to closely match what you see on your display you'll need a calibrated display and high-quality profiles for your printer or printing process. Without those, it is difficult to get an accurate soft proof. Generating a Soft Proof Using Photoshop Note  | Soft proofing of artwork and page compositions is covered in Chapters 7 and 8. |
Adobe Photoshop includes a soft-proofing feature that provides advanced control over the onscreen simulation of colors. You can soft proof an image for any device for which you have a profile, including printing presses. 1. | Launch Adobe Photoshop CS2.
Note | If you have set Photoshop's RGB working space to a profile other than Adobe RGB (1998), the Photoshop Embedded Profile Mismatch dialog box will appear when you open the files. Select the Convert Document's Colors to the Working Space option and click OK. |
| 2. | Choose File > Open and navigate to and open the file Red Tulips.jpg in the Chapter 6 folder of the book's project files, located at the book's Web site.
Figure 6.1. 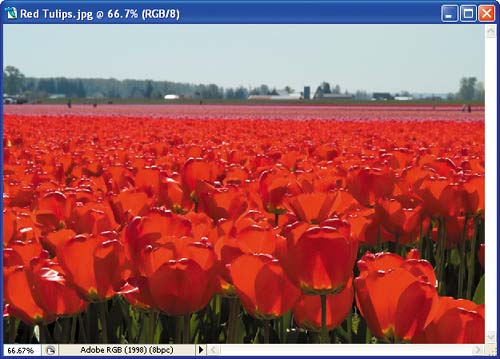
| 3. | Choose View > Proof Setup and view the items in the submenu.
Figure 6.2. 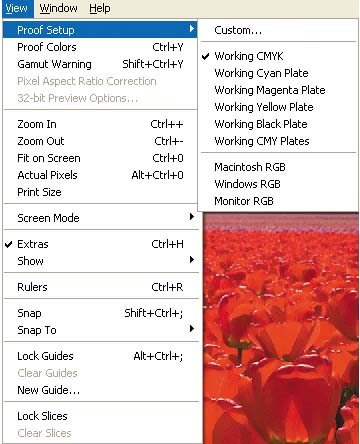
Photoshop offers a number of soft proofing presets, including:
Custom, which lets you create a soft proof for your particular device. Working CMYK, which simulates the output device that has been selected as the CMYK working-space profile setting in the Color Settings dialog box. Working Cyan, Magenta, Yellow, Black, and CMY Plate, which preview one ink or all the inks used on press, based on the CMYK working-space profile. These presets are useful when you're preparing images for press. Macintosh RGB and Windows RGB, which simulate the appearance of the image on a Macintosh or Windows display. These presets are useful when you're preparing images for the Web. They are available only when you're soft proofing RGB images. Monitor RGB, which displays the image using the current display profile and essentially reproduces the image the same way that an application that doesn't support color management would.
| 4. | Choose the Custom option. The Customize Proof Condition dialog box appears.
Figure 6.3. 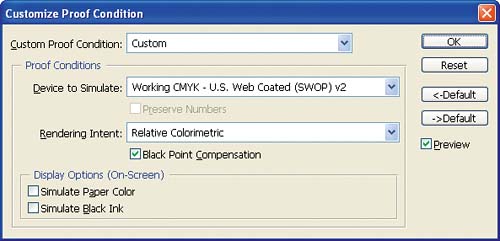
This dialog box is where you choose the output device you want to simulate on the screen and determine the settings for the soft proof. You can also save your settings as a preset.
| 5. | Choose a printer profile from the Device to Simulate drop-down menu.
I chose SP2200 Prem.Luster 1440.ICC for my Epson Stylus Photo 2200.
Figure 6.4. 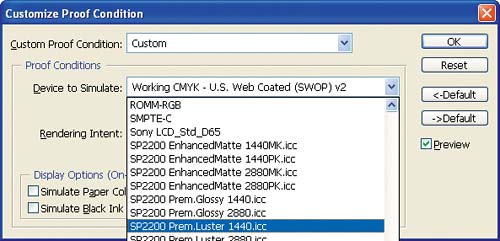
Photoshop displays a list of profiles for RGB, CMYK, and Grayscale devices, including working spaces, organized by profile class.
If you select a profile that is in the same color mode as the document's working space, the Preserve Numbers option becomes available. If you are using an RGB image, the active option will appear as Preserve RGB Numbers to reflect the color space of the image; if you are using a CMYK image, it will read Preserve CMYK Numbers. The Red Tulips.jpg image is an RGB image, as is the profile for my Epson Stylus Photo 2200. So the option becomes available, as Preserve RGB Numbers.
| 6. | If Preserve Numbers is available, deselect it.
Figure 6.5. 
Preserve Numbers reduces the accuracy of the soft proof of the selected device.
| 7. | Choose Intent > Relative Colorimetric.
Figure 6.6. 
The rendering intent determines how colors that are out of gamut for the selected device are mapped to in-gamut colors. Relative Colorimetric, which is suitable for photographic images, compares the highlight of the source color space to that of the destination color space and shifts out-of-gamut colors to the closest reproducible color in the destination color space. It preserves more of the original colors in an image than does Perceptual intent.
Tip  | Check the Preview box to immediately see the effect of a selection on the open image. |
| 8. | Make sure the Black Point Compensation option is checked.
This instructs Photoshop to adjust the display simulation to give a better preview for the actual black on output.
| 9. | If it's available, select the Simulate Paper Color option.
When Simulate Paper Color is selected, Simulate Black Ink is automatically selected and dimmed.
Figure 6.7. 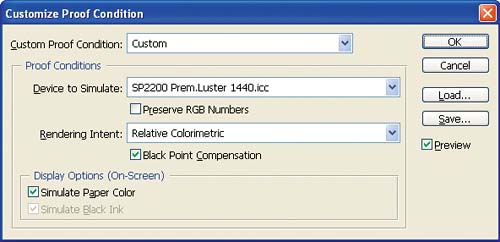
Simulate Paper Color lets you add the color of the paper to the proof. The paper color is often off-white or yellowish. (Photoshop generates this preview by modifying the rendering intent.) Similarly, Simulate Black Ink uses the actual black, which may be a dark gray, in the simulation. These options, which are not supported by all profiles, improve the accuracy of your soft proof.
| 10. | Click Save to save your settings as a preset. In the Save dialog box that appears, give your proof setup an intuitive name. Photoshop automatically saves color settings in C:\Documents and Settings\[user name]\Application Data\Adobe\Color\Proofing.
Figure 6.8. 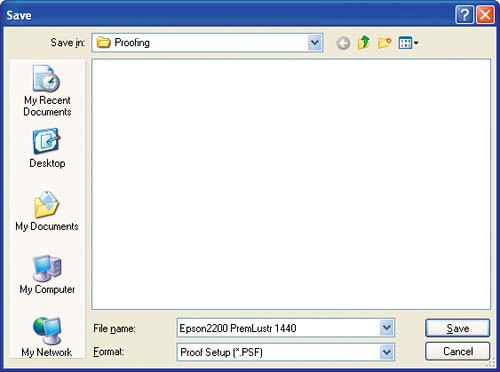
| 11. | Choose View > Proof Setup and choose your new custom preset from the submenu.
Figure 6.9. 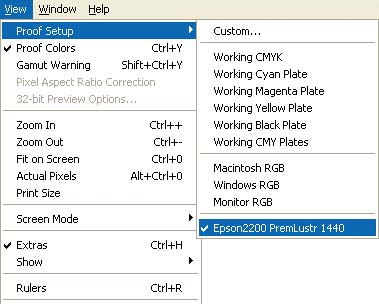
Photoshop displays the image as it will appear on the selected output device.
Figure 6.10. 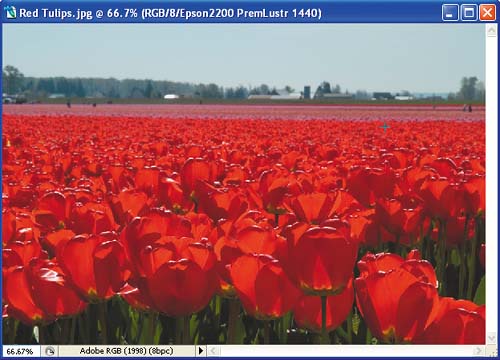
The name of the image in the title bar is appended with the Proof Setup name saved in the soft proof.
It's a good idea to create presets for different paper-and-ink combinations or for different printers so that you can soft proof all your color devices. After creating and saving custom presets, you can easily switch among them.
| 12. | Select View > Proof Colors (or press Ctrl-Y) to toggle the soft proof off and on.
Figure 6.11. 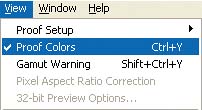
|
Certain profiles will have more dramatic results when they're viewed as soft proofs in Photoshop. For example, with a press profile such as U.S. Web Coated (SWOP) v2, which was used in the printing of this book, the image will look less vibrant and will have less contrast. It's also important to remember that the quality of the soft proof correlates directly to the quality of your display and device profiles. Finally, to get an accurate hard-copy proof, you'll need to know how to configure your print options. We'll discuss that as soon as we perform a gamut check. |