Form Views
| < Day Day Up > |
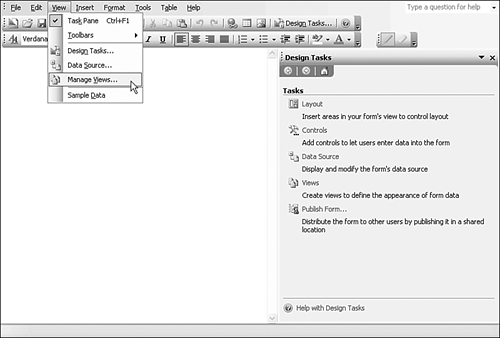
| An InfoPath form may have multiple views. A common scenario is a form with two viewsa Query view to define a query to be made against a data source, and a Data view to accept the results from a query and/or to allow insertion of new data into, for example, a relational database such as SQL Server. Adding a New ViewTo add a new view in design mode, follow these steps:
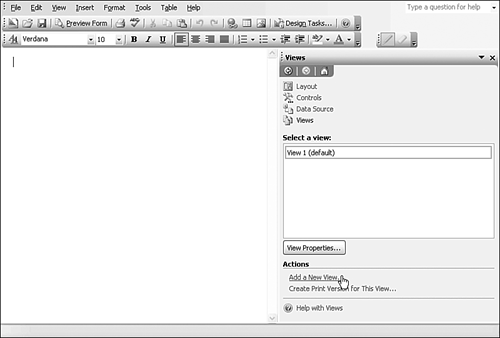
The name of your new viewMy Custom View in the figureis added to the list of available views shown in the Views task pane. A new blank view opens in the form area, ready for you to add layout structures, text, and form controls. Deleting an Existing ViewTo delete an existing view in design mode, select the View menu and click Manage Views. The Views task pane opens. Locate the name of the view that you want to delete in the Select a View area and click on the drop-down arrow. Select Delete from the menu (see Figure 3.9). Figure 3.9. Deleting an existing view. Creating Custom ViewsTo add a custom view to a form template, you use the Views task pane (see Figure 3.10). To display it, press Ctrl+F1 if the task pane isn't already visible, and then select Views from the task pane drop-down menu. Existing views are displayed in the Select a View section of the task pane. Figure 3.10. Adding a New View in the Views task pane. To create a custom view, click on the hyperlink Add a New View in the Actions section of the Views task pane. In the Add View window that opens, enter a name for the custom view and click OK. The name of the newly created custom view will be listed in the Select a View section of the Views task pane, and a blank form area corresponding to the newly created custom view is displayed. You can then customize the form area by laying out its content, adding form controls, and creating bindings to relevant fields in the data source. To test the functionality of a newly created custom view, click on the Preview Form button in the Standard toolbar or press Alt+P. You can close the preview by clicking the Close Preview button in the Standard toolbar or pressing Alt+C. Printing ViewsWhen a user chooses to print in InfoPath, the default action is that the current view is printed. However, the form template designer can create a print view for any view. If a print version for a view exists, it will be printed rather than the pre-existing view. To create a print view, click Create Print Version for This View in the Actions section of the Views task pane. In the Create Print Version window that opens, you can enter a custom name for the print view or accept the default, which is Print Version <Existing View Name> . You can set print settings such as page orientation, margins, and so on for the print view by selecting File, Page Setup. After you have the page as you like it, you can preview the result by selecting File, Print Preview or by pressing Ctrl+F2. |


| < Day Day Up > |
EAN: 2147483647
Pages: 206