Hands On 5: Creating a Modular Flash Website with Movable Pop-Up Windows
Overview
When one thinks of animation, it is hard not to be reminded of the classic Warner Brothers cartoons starring Bugs Bunny, Daffy Duck, the Road Runner, Wile E. Coyote, Elmer Fudd, and Marvin the Martian. And, when you think about these animated cartoons, it's impossible not to remember all the crazy sounds that were so much a part of the show: anvils clanking on heads, zips, swooshes, and nimble violin strings plucking out the sound of a character's tiptoe entrance onto the screen. All these sounds were crucial to the success of the animation; they communicated the things left unsaid by the visual track.
As you know by now, Flash is much more than an animation program. It can be used to create interactive menu systems, games , websites , and more. Are these animations? No, not really, but in the Flash environment, you have to think about everything as if it were an animation. Flash's Timeline structure applies to just about every element of the program, including buttons , Movie Clips, and scenes; even graphics are affected by this structure because they are used in Timelines. Whatever your design goals might be, try to think of every project as a kind of animation.
As in the classic Warner Brothers cartoons, you will get more out of your Flash movies through the creative use of sound, and one of the keys to this is synchronization. This chapter discusses how Flash deals with sound in the context of animations, and how you can get the best results through synchronization of audio and visual events.
Synchronization Options in Flash
Any time you attach a sound to a frame in the Timeline, you must assign a sync option in the Property Inspector (see Figure 24.1). The sync options (short for synchronization ) ”Event, Stream, Start, and Stop ”tell Flash how to play a sound when it is encountered in your movie. Synchronization determines the relationship between the sound (music, sound effects, dialog, and so on) and animated components of your movie.

Figure 24.1: The Property Inspector has a pop-up menu where you can assign the type of sync you wish to use for each sound. Here the sync option is set to Event.
In Flash, a sound can be made to play and loop independently of the animation in the Timeline, resulting in loose synchronization. Or you can have the sound lock the movie's frame rate to keep tight sync between audio and visual tracks. Flash also considers the act of stopping a sound to be a kind of sync, and will allow you to halt playback to match a visual event. Learning how these choices affect your movie is an important part of fine-tuning an animation and getting the most out of your movie's sounds.
Using Event Sync
Event sync is one of the most commonly used means of audio synchronization in Flash. Its name is fairly self-explanatory; this option creates a sound event by responding to an animation event in your movie. When Flash plays a frame that contains an event-synced sound, that sound is cued to play in its entirety, independently of the Timeline. If the Timeline stops playing frames , an event sound will continue to play until it has finished or has run out of loops . Think of an event sound as a kind of cue that you can attach to a Timeline frame.
Event sounds offer a lot of flexibility with your movie because all you have to do is set them in motion and let the sound take it from there. Because event sounds play independently of your animation, you don't have to worry about having enough frames to accommodate the length of the sound. These characteristics make event sounds ideally suited to various applications in a Flash movie:
Buttons Button sounds are usually attached to the Over and Down states of a button animation. When the mouse cursor is moused over a button, a sound is played; when the button is clicked, another sound is played . Because these button events (Over and Down) can happen quickly, it is important to use a sync option that will respond quickly. If a button is moused over or clicked more than once, the Event sync option will cue the sound each time and will mix multiple instances of the sound together. Consequently, this allows you to create interesting layered sound or musical effects with multiple button sounds. To learn more about the specifics of this technique, see the section "Working with Event Sound Effects and Music" later in this chapter.
|
| Note | If you are adding sound to a button and you specifically don't want sounds to layer and overlap, see the explanation of Start sync at the end of this section. |
Sound effects If your movie calls for sound effects, the Event option is definitely the one to use. It allows you to perfectly sync an animation event, such as a basketball going through the hoop, with the sound swish !! Create a new keyframe with an event sound on one of your movie's sound layers . The frame should line up with the correct moment in the animation. When your movie plays back, you will see the ball go through the hoop and hear a gratifying swish!! to make the animation complete. To learn more about the specifics of this technique, see "Working with Event Sound Effects and Music" later in this chapter.
Stingers In film scoring, sudden musical stabs that are played to add dramatic punch are called stingers. For instance, a woman is peacefully sleeping in her bed when the French doors to her chamber mysteriously open you hear nothing. Then suddenly, as the vampire's face appears, you hear a high violin tremolo, and the hairs on the back of your neck stand up straight! This device has been used for years to enhance the dramatic tension of cinematic and cartoon scenes. In the same way that you add sound effects, you can use the Event sync option to cue dramatic musical stingers in your movie.
Using Stream Sync
Stream sync is quite a bit different than the other sync options available to you in Flash. Stream sync locks the movie's frame rate to the playback of the sound and will skip (or "drop") frames if the animation cannot keep the pace. This option makes Flash more like a video-editing application, where the audio and video tracks are locked together to preserve their synchronization. The opposite of event sounds, stream sounds will play only if they have enough frames to accommodate their length. In many cases, you will have to add frames to enable long sounds to play completely. For an illustration of this, see Figure 24.2.

Figure 24.2: The top sound (Layer 2) does not have enough frames to play the entire file. You can tell because the waveform is cut off at the last frame. Notice that the bottom sound (Layer 1) does have enough frames. The waveform ends as a straight, horizontal line similar to what you would see in a digital audio editor.
Due to the nature of the Stream sync option, we recommend that you avoid looping stream sounds if possible. Audio data cannot be reused as efficiently when sounds are set to stream. Flash will add unnecessary extra information to your final movie and create a larger SWF file. The Stream sync option does, however, have some excellent uses:
Scored music If you have long sections of music that are supposed to sync precisely with an animation, the Stream sync option is your best bet. The Stream audio will force Flash to maintain a consistent frame rate and keep tight synchronization between audio and animation events.
Lip sync To create tightly synchronized talking or singing animations, use Stream sync. It allows Flash to maintain a consistent pace and keep the dialog or music in sync with the mouth animation. To learn more about the specifics of this technique, see the section "Creating Lip Sync Animations" later in this chapter.
Multitrack audio All sync options in Flash allow you to play up to eight different sounds simultaneously . If you place each sound on its own layer, you can create a multitrack sound movie. Using the Stream sync option, it is possible to do this in a way that keeps all the tracks (individual sound layers) synchronized perfectly.
Using Start Sync
The Start sync option is very similar to Event sync. When the sound's frame is played, the Start option cues the sound and plays it in its entirety. The only difference is that if another instance of the sound is already playing, the new instance will not be heard . You can use Start sync as a kind of filter to prevent too many occurrences of a single sound.
Start sync is the best choice for buttons in situations where you do not want a button's sound to play more than once. For example, if you attach a sound to the button's Over state frame and use Event sync, the sound will be heard each time your mouse moves over the button. If the mouse crosses over the button frequently, this can cause too many simultaneous instances of the sound. Start sync prevents this because only one instance of the sound is allowed to play at a time.
On the CD For an example of Event sync versus Start sync with buttons, open the file buttonSync.swf in the Chapter 24 folder of this book's companion CD-ROM. Quickly move your mouse over the "Event" button several times. You will hear the sound repeated each time your mouse crosses over the button. (This particular sound is Visor Hum Loop from Window Other Panels Common Libraries Sounds.) The more you do this, the more confusing things can start to sound. Next, do the same with the "Start" button. This time, no matter how often your mouse crosses over the button, you will hear only one instance of the sound. Start sync helps to keep your button sounds tidy.
Syncing Sounds to Stop
The final sync option Flash offers is Stop, and, as you probably guessed, this is what you use to silence a sound's playback. Stop sync is used specifically to silence sounds that were cued via Event or Start sync. To sync the end of a sound:
1. Insert a new keyframe where you would like the sound to end. The keyframe should be positioned so that the sound will stop in sync with an animation event.
2. Select Window Properties to display the Property Inspector. From the Sound pop-up menu, choose the name of the sound you wish to stop from the Sound pop-up menu and then select the Stop sync option. When the Timeline reaches this frame, the sound you have specified will stop.
The Stop sync option works for event and start sounds, but stream sounds must be handled differently. You must make the last frame of the stream sound exactly match the animation event. To stop a stream sound:
1. Find the animation event in the Timeline you wish to sync with the end of a stream sound. The event is usually represented by a keyframe. Remember the frame number where the event takes place.
2. Stream sounds will play only through the number of frames they occupy, so to stop a stream sound, you must determine the number of extra frames and clear them from the Timeline. Find the last frame of the stream sound you wish to stop.
3. Click the last frame of the stream sound, then Shift+click to extend your selection backwards to the frame immediately following the frame that contains the event where you want to stop the sound. For example, if you want to sync the sound to stop at keyframe 20, you would extend the selection to frame 21. Press Shift+F5 and the range of selected frames will disappear from the Timeline. The frames that remain should end at the same frame number as the event to which you synced the sound. The results in the Timeline should look something like Figure 24.3.

Figure 24.3: In this Timeline, the stream sound that starts at frame 1 is stopped to sync with an event in the animation at frame 20.
4. After you have cleared the unnecessary frames, select Control Test Movie to see and hear how the sync works. You can add or subtract additional frames to the sound if the sync needs some tweaking.
Flash Synchronization Techniques
Now that you know how Flash handles animation/sound synchronization, you are ready to dig deeper into the subject and see how these techniques work in the context of your movie. As with many things in Flash, the techniques are simple; the real magic comes through your ability to use them creatively and move beyond the capabilities of the software. The examples presented here should not be seen as absolute answers, but as points of departure for your own wild and creative uses of sound synchronization.
Creating Lip Sync Animations
Many different options are available to you for creating lip sync animations. Depending on the kind of animation you wish to create, Flash allows you to animate with either loose, stylish synchronization or with lifelike accuracy, or with anything in between. A good lip sync animation can make animated characters come to life in your movie.
This technique uses the Stream sync option to force the animation to keep pace with the audio track. Another advantage of this option is that with stream sounds, you can scrub the audio track. When you scrub a track, you use the mouse to move the playback head over the audio waveform and hear what part is synchronized with a particular frame. Scrubbing allows you to test certain sections manually to see how the audio and animation line up.
To create a lip sync animation, it is assumed that you have drawn a character, recorded some dialog, and imported it into your movie. The only quirk to this technique is that your character's mouth has to be on its own layer. The reason is that when you animate a lip sync, you don't use just one mouth graphic. Rather, you use several mouth graphics that have different shapes representing the different mouth positions for the various words and letters in your character's language. The various mouth positions occupy their own keyframes on their own layer, and change to match the character's speech. The character's face and body can be left unchanged.
On the CD In this lesson, all of the media has been created for you. On this book's companion CD-ROM, open the file named lipSync.fla inside the Chapter 24 folder and save it to your hard drive. If you would like to see what you are getting yourself into, open lipSync.swf to see and hear the finished file.

To create a lip sync animation:
1. Using the lipSync.fla file, insert two new layers; name one dialog and the other mouth.
2. Insert a new keyframe (select Insert Timeline Keyframe) in the second frame of the dialog layer. Select Window Properties and choose woofwoofbark.aif from the Sound pop-up menu. Select the Stream sync option. You want to use stream so that the animation will be forced to keep pace with the audio and maintain a tight synchronization.
3. You are now ready to create the animation for the phrase "woof woof, bark." Notice that the waveform looks chunky in some places and flat in others. The dense, chunky areas are where the sound is loudest (see Figure 24.4). If you click the playback head and drag it across the Timeline (scrub the sound), you will hear the audio track play back slowly. This should give you an idea of what "words" fall on which frames in the Timeline.

Figure 24.4: The peaks of the audio waveform show you which places are the loudest, and the valleys represent the quiet sections.
4. Select keyframe 1 of the mouth layer. Drag the closed graphic symbol from the Library to the Stage and place it where the mouth should be. This will start the mouth animation in a closed position. Use the Info panel (Cmd/Ctrl+Opt/Alt+I) to help position the different mouth graphics. Click the middle square marker in the Info panel's Symbol position option. This tells Flash to determine a symbol's X-Y coordinates from the vertical and horizontal center of the symbol.
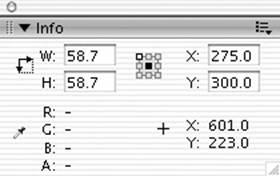
5. Create a blank keyframe (press F7) in frame 2 of the mouth layer and drag the W graphic symbol to the Stage, placing it where the mouth should be ( roughly X = 275, Y = 300). To be sure your alignment is consistent, use either the Align panel or Info panel. The W graphic symbol creates a mouth position to say the letter w and starts the first part of your animation.
6. Create another blank keyframe in frame 3 of the mouth layer and drag the F graphic symbol to the Stage. Add another blank keyframe to frame 4 and drag the closed graphic symbol to the Stage. This completes the first word, "woof."
7. Continue adding blank keyframes and placing symbols on the Stage until the entire phrase is paired with mouth position graphics. It can be fun to experiment with this on your own, but if it becomes frustrating, you can refer to Table 24.1 for a listing of which symbols go in which frames.
| Table 24.1: Frame and Graphic Symbol Combinations for the lipSync.fla Movie | |
| Frame | Graphic Symbol (Mouth Position) |
| 1 | Closed |
| 2 | W |
| 3 | F |
| 4 | Closed |
| 5 | W |
| 6 | F |
| 7, 8 | Closed |
| 9 | B |
| 10 | A |
| 11 | K |
| 12 | Closed |
8. When you have finished, select Control Test Movie to hear and see what the dog has to say! This dialog is short, so the synchronization is not a great issue here. However, when you select the Stream sync option, you can start to work with longer lines of dialog, and the animation will keep the sync.
Lip sync animation is a topic that can grow extremely complex. Although this simple example is just a glimpse of the big picture, all of the important concepts are addressed here. There are several additional steps you can take to become more proficient with this technique:
§ Keep a hand mirror with you when you work so that you can speak the words and watch the position of your mouth as you speak.
§ Don't lose sight of the entire phrase. Some letters and words don't always match with the mouth shapes you think they should.
§ Use temporary gotoAndPlay() statements to isolate and loop specific parts where you need to focus on a word or words.
§ Drawing good mouth shapes is critical! You can read about the art of drawing animation in The Animator's Workbook by Tony White (Watson-Guptill Publications, 1988) or The Animation Book: A Complete Guide to Animated Filmmaking ”From Flip-Books to Sound Cartoons to 3-D Animation by Kit Laybourne (Three Rivers Press, 1998).
§ See the following article at the Gamasutra website to learn about animation from artistic and scientific perspectives: www.gamasutra.com/features/20000406/_lander_01.htm .
Working with Event Sound Effects and Music
Event sounds offer you the greatest amount of freedom and flexibility when cueing your sounds. As a result, it is also the loosest of all the sync options in Flash. This is not necessarily a bad thing. Even though "loose sync" might sound negative, there are actually times when it is especially useful.
Event sync is appropriately named because you pair the sound (music, effect, and so on) with an event in your movie or animation. When the visual event occurs, the sound is triggered. This is, of course, a very tight kind of sync, where both a visual event and a sound happen at exactly the same moment. However, after the initial sound cue, the sync becomes much less clear. Event sounds will play independently of the Timeline and continue to be heard until the entire sound has finished playing or has been stopped explicitly. For example, if you wanted to use the sound of a cymbal crash for a "falling down" animation, the cymbal would continue to ring long after the character's rear end hit the pavement.
Because Event sync sounds will continue to sustain depending on their specific length, you can achieve all sorts of interesting layering effects with multiple sounds in your movie. For example, if a waiter drops a tray full of dishes and glasses , you would hear not one crash! but a flurry of cracks, shatters, and smashes! Depending on how the scene is animated, you can pair a specific sound effect to each event where a bowl, plate, or glass hits the floor. All you need to do is create a separate sound layer for each effect you wish to use. Then, insert a new keyframe that lines up with the animated event you wish to sync, and attach a sound with the Event sync option. As the Timeline plays through the series of animated events, each sound will be cued at the appropriate time. See Figure 24.5 for an example of this in your movie's Timeline. Because each sound is left to play independently, each will continue to ring until the sound is over, creating a great, layered sound effect to enhance your animation. The advantage of this technique is this: Rather than have to create a long sound effect and guess when each element falls into place, you can build the entire effect in Flash and get much better synchronized results.

Figure 24.5: This Timeline shows how event sounds can be paired with animation keyframes to create a layered sound effect.
There are a few things to keep in mind when working with Event sound effects:
§ Event sounds are heard when they are first encountered in the Timeline. To prevent latency, be sure that the sound is trimmed and has no dead space or silence at the start of the sound file. To learn more about trimming audio files, see Chapter 22.
§ If you are layering several loud sounds, you might need to adjust their envelopes so that the sounds aren't distorted when played in your movie. To learn more about working with sound envelopes in Flash, see Chapter 23.
§ Flash can play only eight sounds simultaneously. Look at your Timeline to see if there are any spots where eight different audio layers have active sounds at the same time. If you encounter this in your Timeline, try some re-adjustments to prevent too many overlaps.
§ In the same way that this technique works for sound effects, it can also work for music, particularly sweeping flourishes, melismatic vocal cues, horn and guitar riffs, and so on. Experiment with this technique to see what kinds of interesting musical effects you can create with event sounds.
Syncing Audio with Movie Clips
Movie clips are one of the most important elements in any Flash movie. They can perform their own independent animations, apart from the activity taking place on the main Timeline. Consequently, Movie Clips can be a great asset to the synchronization of sound in your movies. In Chapter 19, you learned about the autonomy of Movie Clips. This is especially relevant when it comes to the playback control and synchronization of sound files. You can create Movie Clips that contain sound files attached to their various frames. Then, by targeting a clip, you are able to control the sound or sounds it holds in its frames. This technique takes you one step beyond playing sounds from your main Timeline and affords a great deal of audio playback control.
On the CD In this example, you will learn how to use Movie Clips to control sound playback. You can take a look at the finished files, which are in the Chapter 24 folder on this book's companion CD-ROM: audioMC.fla and audioMC.swf. To use Movie Clips to sync sounds, there are two steps you must take: create the sound Movie Clip and set up a means of controlling the clip.
To create a Movie Clip that can sync sounds:
1. If you have not done so already, import a sound into your movie. Then select Insert New Symbol, assign the name audio , and check the Movie Clip radio button.
2. Click frame 2 of the audio Timeline and insert a new keyframe; then press F5 to insert an additional frame.
3. Create another new keyframe at frame 4 and add one new frame after it. Finally, add one last keyframe at frame 6. The finished frame construction should look like Figure 24.6.

Figure 24.6: The frame structure for the sound Movie Clip has keyframes at frames 1, 2, 4, and 6.
4. Now that the clip has its basic structure, you can start to fill in its elements. Attach the following statement to keyframe 1:
stop();
This stops the clip from playing any farther in the Timeline; it is ready and waiting at frame 1.
5. Enter another ActionScript statement in keyframe 2:
stopAllSounds();
This will silence all sounds in the movie when this Timeline reaches frame 2.
6. Attach your sound to keyframe 4 and assign the Start sync option. Enter the number of repeats or set the sound to loop. Here you use the Start sync option so that if the sound is already playing, it will not be interrupted or overlapped .
7. Attach the following ActionScript statement to keyframe 6:
stop();
This line is an important part of the Movie Clip because it completes the "cycle" of statements contained in the clip. The clip cues the sound at frame 4; then, as it continues through the Timeline, it reaches the stop() statement at frame 6. The clip's playback halts, but the sound continues. Because the sound was cued with Start sync, it will play independently of any Timeline until it has either finished playing or exhausted its repetitions. If the sound was set to loop continuously, it will play until it is explicitly stopped.
Now that you have completed the Movie Clip, you can create a means to control it in your movie. There are many different ways to do this. Here you will learn both how to make the controls part of the clip itself and how to control the clip from the main Timeline.
To put controls in the clip itself:
1. If you are not already in Symbol Editing mode, select the audio Movie Clip from the Edit Symbols menu ![]() or double-click the clip's icon in the Library.
or double-click the clip's icon in the Library.
2. Insert a new layer in the clip and drag a button onto its Stage. This will serve as your Play button. Attach the following ActionScript statements to the button:
3. on(release){
4. this.gotoAndPlay(4);
}
These statements should make perfect sense: Because the sound file is cued at frame 4, you have to send the Movie Clip to play at frame 4 to start the sound.
5. Drag a new button to the Movie Clip's Stage once again to serve as your Stop button and attach the following statements:
6. on(release){
7. this.gotoAndStop(2);
}
|
| Note | The term this is not absolutely necessary in these examples. It is used to make an explicit reference to the current Timeline. A simple gotoAndPlay(4) or gotoAndStop(2) would work just as well. |
This script sends the Movie Clip back to frame 2. When it gets there, it will encounter the stopAllSounds() function. This will halt the clip's playback at frame 2 and stop any currently active sounds in the movie.
Let's recap what is happening in the clip. When it is first loaded into the movie, it is stopped at frame 1 and no sound is heard (remember, the sound is at frame 4). When it receives a message to go to frame 4, the sound is cued and the clip is told to stop at frame 6. The sound continues to play independently of the Timeline. Then, when you wish to stop the sound, the Stop button sends the clip to halt at frame 2, where it encounters the stopAllSounds() function. This quiets the clip and prevents it from playing any further.
8. These statements complete the controls for your Movie Clip. Exit Symbol Editing mode and return to the main Timeline. Drag an instance of the audio Movie Clip to the Stage of the main Timeline. Select Control Test Movie and experiment with switching the sound on and off.
It's great to be able to toggle the sounds on and off from the clip itself, but it's equally important to be able to control the clip from the main Timeline. To do this, you will need to target the clip specifically so that you can send it to play at the correct frames:
1. Give your audio Movie Clip the instance name soundMC in the Property Inspector. Then, drag two buttons to the Stage of the main Timeline (if there are no buttons in your movie's Library, you'll need to create some). Use one for Play, and the other for Stop.
2. Attach the following statements to the Play button:
3. on(release){
4. soundMC.gotoAndPlay(4);
}
5. Attach the following statements to the Stop button:
6. on(release){
7. soundMC.gotoAndStop(2);
}
Both sets of statements target the soundMC instance with an absolute target path .
8. Select Control Test Movie. You should now be able to toggle the sound with both sets of buttons ”those in the Movie Clip and those on the main Timeline.
When you control a clip from the main Timeline, it's not necessary to have buttons built into the clip itself. If you want, take the buttons out of the clip and leave it in your movie as a sound-only Movie Clip. A Movie Clip does not have to have graphics to work, only frames. In this case, the clip's frames are filled with nothing but actions, keyframes, and a sound cue.
On the CD There are a few additional features in the demo file for this exercise. Check out audioMC.fla in the Chapter 24 folder on this book's companion CD-ROM. Here, the Movie Clip Timeline has frame labels. The ActionScript that controls the audio playback uses these rather than frame numbers . This technique can be helpful if you have a hard time remembering what happens at which frame number. Additionally, the buttons on the main Timeline have their ActionScript assigned via Event Method Handlers. You may find this to be an easier way to keep all the sound-control code in a single location.
Inspirational Design Model
Looking for something to say that would have been really mean and nasty a few hundred years ago? Then pointeth thine browser, fair lads and lasses, to www.wraevn.com/insult . Here thoust can partaketh of Bill Shakespeare's Insult Factory of Fun (see Figure 24.7).

Figure 24.7: Bill Shakespeare's Insult Factory of Fun uses Flash to compose random insults in Old English.
This time-killer was created by composer and sound designer Brandon E.B. Ward. It uses Flash to compose insults in Elizabethan English. After you write an insult on the "parchment," click Shakespeare's head to hear him speak the insult. Note the synchronization of animation and sound effects when the quill is writing. Visit at thine own risk, thou fawning, flap-mouthed puttock!
EAN: 2147483647
Pages: 54