| Let's start by building a simple User control that randomly displays one image from a folder of images (see Figure 7.1). The code for the User control is contained in Listing 7.1. Figure 7.1. Displaying an image with the RandomImage User control. 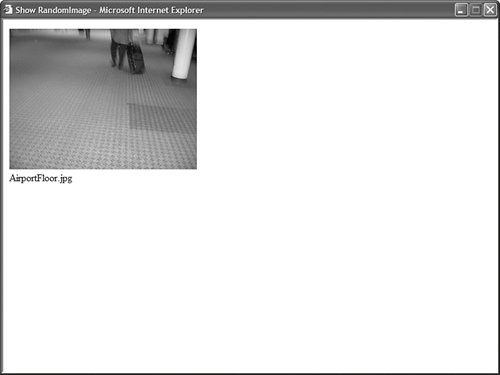
Listing 7.1. RandomImage.ascx <%@ Control Language="VB" ClassName="RandomImage" %> <%@ Import Namespace="System.IO" %> <script runat="server"> Private Sub Page_Load() Dim imageToDisplay As String = GetRandomImage() imgRandom.ImageUrl = Path.Combine("~/Images", imageToDisplay) lblRandom.Text = imageToDisplay End Sub Private Function GetRandomImage() As String Dim rnd As New Random() Dim images() As String = Directory.GetFiles(MapPath("~/Images"), "*.jpg") Dim imageToDisplay As String = images(rnd.Next(images.Length)) Return Path.GetFileName(imageToDisplay) End Function </script> <asp:Image Width="300px" Runat="server" /> <br /> <asp:Label Runat="server" />
|
Visual Web Developer Note You create a new User control in Visual Web Developer by selecting Website, Add New Item, and selecting the Web User control item.
The file in Listing 7.1 closely resembles a standard ASP.NET page. Like a standard ASP.NET page, the User control contains a Page_Load() event handler. Also, the User control contains standard controls such as the ASP.NET Image and Label controls. User controls are closely related to ASP.NET pages. Both the UserControl class and the Page class derive from the base TemplateControl class. Because they derive from the same base class, they share many of the same methods, properties, and events. The important difference between an ASP.NET page and a User control is that a User control is something you can declare in an ASP.NET page. When you build a User control, you are building a custom control. Notice that the file in Listing 7.1 ends with the .ascx extension. You cannot request this file directly from a web browser. To use the RandomImage User control, you must declare the control in an ASP.NET page. The page in Listing 7.2 contains the RandomImage User control. When you open the page, a random image is displayed. Listing 7.2. ShowRandomImage.aspx <%@ Page Language="VB" %> <%@ Register TagPrefix="user" TagName="RandomImage" src="/books/3/444/1/html/2/~/UserControls/RandomImage.ascx" %> <!DOCTYPE html PUBLIC "-//W3C//DTD XHTML 1.1//EN" "http://www.w3.org/TR/xhtml11/DTD/xhtml11.dtd"> <html xmlns="http://www.w3.org/1999/xhtml" > <head runat="server"> <title>Show RandomImage</title> </head> <body> <form runat="server"> <div> <user:RandomImage Runat="server" /> </div> </form> </body> </html>
|
Before you can use a web User control in a page, you must register it. The page in Listing 7.2 includes a <%@ Register %> directive that contains the following three attributes: TagPrefix Indicates the namespace that you want to associate with the User control for the current page. You can use any string that you want. TagName Indicates the name that you want to associate with the User control for the current page. You can use any string that you want. Src Indicates the virtual path to the User control (the path to the .ascx file)
The RandomImage User control is declared in the body of the page. It looks like this: <user:RandomImage Runat="Server" />
Notice that the declaration of the User control uses the TagPrefix and TagName specified in the <%@ Register %> directive. Furthermore, notice that you provide a User control with both an ID and a Runat attribute, just as you would for any standard ASP.NET control. Visual Web Developer Note You can add a User control to a page in Visual Web Developer simply by dragging the User control from the Solution Explorer window onto the Design surface. The <%@ Register %> directive is automatically added to the source of the page.
Registering User Controls in the Web Configuration File As an alternative to registering a User control in each page in which you need to use it by using the <%@ Register %> directive, you can register a User control once for an entire application. You can register a User control in an application's web configuration file. For example, the web configuration file in Listing 7.3 registers the RandomImage control for the application. Listing 7.3. Web.Config <?xml version="1.0"?> <configuration> <system.web> <pages> <controls> <add tagPrefix="user" tagName="RandomImage" src="/books/3/444/1/html/2/~/UserControls/RandomImage.ascx"/> </controls> </pages> </system.web> </configuration>
|
After you register a User control in the web configuration file, you can simply declare the User control in any page. For example, the page in Listing 7.4 contains an instance of the RandomImage User control, but it does not include the <%@ Register %> directive. Listing 7.4. ShowAppRegister.aspx <%@ Page Language="VB" %> <!DOCTYPE html PUBLIC "-//W3C//DTD XHTML 1.1//EN" "http://www.w3.org/TR/xhtml11/DTD/xhtml11.dtd"> <html xmlns="http://www.w3.org/1999/xhtml" > <head runat="server"> <title>Show Application Register</title> </head> <body> <form runat="server"> <div> <user:RandomImage Runat="Server" /> </div> </form> </body> </html>
|
You need to be aware of one important limitation when registering a User control in the web configuration file. A User control cannot be located in the same folder as a page that uses it. For that reason, you should create all your User controls in a subfolder (I typically create a UserControls subfolder for each of my applications). Exposing Properties from a User Control The RandomImage User control always displays an image from the Images folder. It would be nice if you could specify the name of the folder that contains the images so that you could use different folder paths in different applications. You can do this by exposing a property from the RandomImage User control. The modified RandomImage control in Listing 7.5, named PropertyRandomImage, exposes a property named ImageFolderPath. Listing 7.5. PropertyRandomImage.ascx <%@ Control Language="VB" ClassName="PropertyRandomImage" %> <%@ Import Namespace="System.IO" %> <script runat="server"> Private _imageFolderPath As String = "~/Images" Public Property ImageFolderPath() As String Get Return _imageFolderPath End Get Set(ByVal Value As String) _imageFolderPath = value End Set End Property Private Sub Page_Load() Dim imageToDisplay As String = GetRandomImage() imgRandom.ImageUrl = Path.Combine(_imageFolderPath, imageToDisplay) lblRandom.Text = imageToDisplay End Sub Private Function GetRandomImage() As String Dim rnd As New Random() Dim images() As String = Directory.GetFiles(MapPath("~/Images"), "*.jpg") Dim imageToDisplay As String = images(rnd.Next(images.Length)) Return Path.GetFileName(imageToDisplay) End Function </script> <asp:Image Width="300px" Runat="server" /> <br /> <asp:Label Runat="server" />
|
After you expose a property in a User control, you can set the property either declaratively or programmatically. The page in Listing 7.6 sets the ImageFolderPath property declaratively. Listing 7.6. ShowDeclarative.aspx <%@ Page Language="VB" %> <%@ Register TagPrefix="user" TagName="PropertyRandomImage" src="/books/3/444/1/html/2/~/PropertyRandomImage.ascx" %> <!DOCTYPE html PUBLIC "-//W3C//DTD XHTML 1.1//EN" "http://www.w3.org/TR/xhtml11/DTD/xhtml11.dtd"> <html xmlns="http://www.w3.org/1999/xhtml" > <head runat="server"> <title>Show Declarative</title> </head> <body> <form runat="server"> <div> <user:PropertyRandomImage ImageFolderPath="~/Images2" Runat="server" /> </div> </form> </body> </html>
|
Notice that the PropertyRandomImage User control in Listing 7.6 includes an ImageFolderPath property. When you request the page, the random images are retrieved from the Images2 folder. Visual Web Developer Note Any properties that you add to a User control appear in both Intellisense and the Property window.
The page in Listing 7.7 demonstrates how you can set the ImageFolderPath programmatically. Listing 7.7. ShowProgrammatic.aspx <%@ Page Language="VB" %> <%@ Register TagPrefix="user" TagName="PropertyRandomImage" src="/books/3/444/1/html/2/~/PropertyRandomImage.ascx" %> <!DOCTYPE html PUBLIC "-//W3C//DTD XHTML 1.1//EN" "http://www.w3.org/TR/xhtml11/DTD/xhtml11.dtd"> <script runat="server"> Protected Sub Page_Load(ByVal sender As Object, ByVal e As EventArgs) PropertyRandomImage1.ImageFolderPath = "~/Images2" End Sub </script> <html xmlns="http://www.w3.org/1999/xhtml" > <head runat="server"> <title>Show Programmatic</title> </head> <body> <form runat="server"> <div> <user:PropertyRandomImage Runat="server" /> </div> </form> </body> </html>
|
The page in Listing 7.7 includes a Page_Load() event handler. This handler programmatically sets the ImageFolderPath to the value Images2. Exposing Events from a User Control You can expose custom events from a User control. After you expose the event, you can handle the event in the page that contains the User control. Exposing events is useful when you need to pass information up to the containing page. Imagine, for example, that you want to create a custom tab strip with a User control. When a user clicks a tab, you want to change the content displayed in the page (see Figure 7.2). Figure 7.2. Displaying a tab strip with a User control. 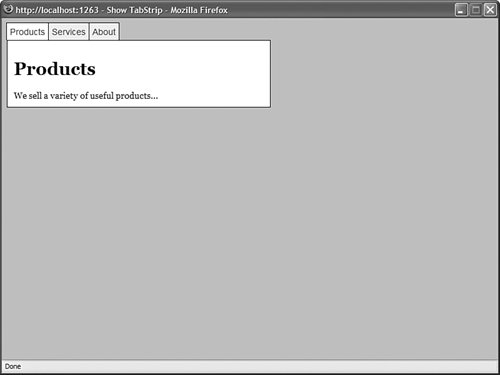
The User control in Listing 7.8 contains the code for a simple tab strip. Listing 7.8. TabStrip.ascx| [View full width] <%@ Control Language="VB" ClassName="TabStrip" %> <%@ Import Namespace="System.Collections.Generic" %> <script runat="server"> Public Event TabClick As EventHandler ''' <summary> ''' The index of the selected tab ''' </summary> Public ReadOnly Property SelectedIndex() As Integer Get Return dlstTabStrip.SelectedIndex End Get End Property ''' <summary> ''' Create the tabs ''' </summary> Private Sub Page_Load() If Not Page.IsPostBack Then ' Create the tabs Dim tabs As New List(Of String)() tabs.Add("Products") tabs.Add("Services") tabs.Add("About") ' Bind tabs to the DataList dlstTabStrip.DataSource = tabs dlstTabStrip.DataBind() ' Select first tab dlstTabStrip.SelectedIndex = 0 End If End Sub ''' <summary> ''' This method executes when a user clicks a tab ''' </summary> Protected Sub dlstTabStrip_SelectedIndexChanged(ByVal sender As Object, ByVal e As  EventArgs) RaiseEvent TabClick(Me, EventArgs.Empty) End Sub </script> <asp:DataList RepeatDirection="Horizontal" OnSelectedIndexChanged="dlstTabStrip_SelectedIndexChanged" Css ItemStyle-Css SelectedItemStyle-Css Runat="server"> <ItemTemplate> <asp:LinkButton Text='<%# Container.DataItem %>' CommandName="Select" Runat="server" /> </ItemTemplate> </asp:DataList> EventArgs) RaiseEvent TabClick(Me, EventArgs.Empty) End Sub </script> <asp:DataList RepeatDirection="Horizontal" OnSelectedIndexChanged="dlstTabStrip_SelectedIndexChanged" Css ItemStyle-Css SelectedItemStyle-Css Runat="server"> <ItemTemplate> <asp:LinkButton Text='<%# Container.DataItem %>' CommandName="Select" Runat="server" /> </ItemTemplate> </asp:DataList>
|
The tab strip is created with the help of a DataList control. The DataList control displays links for each of the items created in the Page_Load() event handler. Notice that the TabStrip control exposes an event named TabClick. This event is raised in the dlstTabStrip_SelectedIndexChanged() event handler when a user clicks a tab. The page in Listing 7.9 uses the TabStrip control to display different content depending on the tab selected. Listing 7.9. ShowTabStrip.aspx <%@ Page Language="VB" %> <%@ Register TagPrefix="user" TagName="TabStrip" src="/books/3/444/1/html/2/~/TabStrip.ascx" %> <!DOCTYPE html PUBLIC "-//W3C//DTD XHTML 1.1//EN" "http://www.w3.org/TR/xhtml11/DTD/xhtml11.dtd"> <script runat="server"> Protected Sub TabStrip1_TabClick(ByVal sender As Object, ByVal e As EventArgs) MultiView1.ActiveViewIndex = TabStrip1.SelectedIndex End Sub </script> <html xmlns="http://www.w3.org/1999/xhtml" > <head runat="server"> <style type="text/css"> html { background-color:silver; font:14px Georgia,Serif; } .tabs a { color:blue; text-decoration:none; font:14px Arial,Sans-Serif; } .tab { background-color:#eeeeee; padding:5px; border:Solid 1px black; border-bottom:none; } .selectedTab { background-color:white; padding:5px; border:Solid 1px black; border-bottom:none; } .views { background-color:white; width:400px; border:Solid 1px black; padding:10px; } </style> <title>Show TabStrip</title> </head> <body> <form runat="server"> <div> <user:TabStrip OnTabClick="TabStrip1_TabClick" Runat="Server" /> <div > <asp:MultiView ActiveViewIndex="0" Runat="server"> <asp:View runat="server"> <h1>Products</h1> We sell a variety of useful products... </asp:View> <asp:View runat="server"> <h1>Services</h1> We offer a number of services... </asp:View> <asp:View runat="server"> <h1>About</h1> We were the first company to offer products and services... </asp:View> </asp:MultiView> </div> </div> </form> </body> </html>
|
The page in Listing 7.9 includes an event handler for the TabStrip control's TabClick event. When you click a tab, the index of the selected tab is retrieved from the tab strip, and the View control with the matching index is displayed. Visual Web Developer Note You can add a TabClick event handler to the TabStrip control by selecting the TabStrip control from the top-left drop-down list and selecting the TabClick event from the top-right drop-down list.
Note The ASP.NET Framework includes a Menu control that you can use to create both tabstrips and pop-up menus. This control is discussed in Chapter 4, "Using the Rich Controls," and Chapter 17, "Using the Navigation Controls."
Creating an AddressForm Control Let's end this section by creating a generally useful Web User control. We'll build an AddressForm User control that you can reuse in multiple pages or reuse multiple times in a single page (see Figure 7.3). Figure 7.3. Displaying multiple address forms with the AddressForm User control. 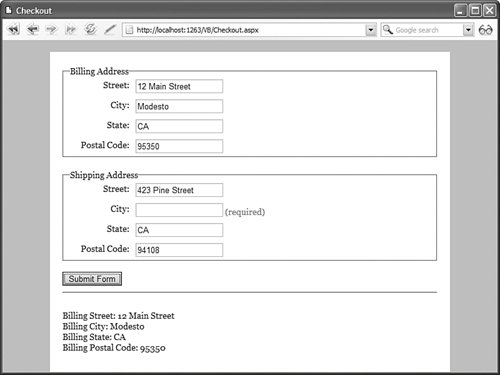
The AddressForm User control is contained in Listing 7.10. Listing 7.10. AddressForm.ascx <%@ Control Language="VB" ClassName="AddressForm" %> <script runat="server"> Public Property Title() As String Get Return ltlTitle.Text End Get Set (ByVal Value As String) ltlTitle.Text = value End Set End Property Public Property Street() As String Get Return txtStreet.Text End Get Set (ByVal Value As String) txtStreet.Text = value End Set End Property Public Property City() As String Get Return txtCity.Text End Get Set (ByVal Value As String) txtCity.Text = value End Set End Property Public Property State() As String Get Return txtState.Text End Get Set (ByVal Value As String) txtState.Text = value End Set End Property Public Property PostalCode() As String Get Return txtPostalCode.Text End Get Set (ByVal Value As String) txtPostalCode.Text = value End Set End Property </script> <fieldset> <legend> <asp:Literal Text="Address Form" runat="server" /> </legend> <div > <asp:Label Text="Street:" AssociatedControl Runat="server" /> </div> <div > <asp:TextBox Runat="server" /> <asp:RequiredFieldValidator Text="(required)" ControlToValidate="txtStreet" Runat="server" /> </div> <br /> <div > <asp:Label Text="City:" AssociatedControl Runat="server" /> </div> <div > <asp:TextBox Runat="server" /> <asp:RequiredFieldValidator Text="(required)" ControlToValidate="txtCity" Runat="server" /> </div> <br /> <div > <asp:Label Text="State:" AssociatedControl Runat="server" /> </div> <div > <asp:TextBox Runat="server" /> <asp:RequiredFieldValidator Text="(required)" ControlToValidate="txtState" Runat="server" /> </div> <br /> <div > <asp:Label Text="Postal Code:" AssociatedControl Runat="server" /> </div> <div > <asp:TextBox Runat="server" /> <asp:RequiredFieldValidator Text="(required)" ControlToValidate="txtPostalCode" Runat="server" /> </div> <br /> </fieldset>
|
The AddressForm control contains form controls for entering your street, city, state, and postal code. Each of these fields is validated by a RequiredFieldValidator control. Finally, the AddressForm includes a Label that can be used to provide a title for the control. The AddressForm exposes all of its form fields with properties. The control includes public Street, City, State, and PostalCode property, which you can read from the containing page. The page in Listing 7.11 illustrates how you can use the AddressForm control in a page. Listing 7.11. Checkout.aspx <%@ Page Language="VB" %> <%@ Register TagPrefix="user" TagName="AddressForm" src="/books/3/444/1/html/2/~/AddressForm.ascx" %> <!DOCTYPE html PUBLIC "-//W3C//DTD XHTML 1.1//EN" "http://www.w3.org/TR/xhtml11/DTD/xhtml11.dtd"> <script runat="server"> Protected Sub btnSubmit_Click(ByVal sender As Object, ByVal e As EventArgs) ' Show Billing Address Form Results ltlResults.Text = "<br />Billing Street: " + AddressForm1.Street ltlResults.Text += "<br />Billing City: " + AddressForm1.City ltlResults.Text += "<br />Billing State: " + AddressForm1.State ltlResults.Text += "<br />Billing Postal Code: " + AddressForm1.PostalCode ltlResults.Text += "<br /><br />" ' Show Shipping Address Form Results ltlResults.Text += "<br />Shipping Street: " + AddressForm2.Street ltlResults.Text += "<br />Shipping City: " + AddressForm2.City ltlResults.Text += "<br />Shipping State: " + AddressForm2.State ltlResults.Text += "<br />Shipping Postal Code: " + AddressForm2.PostalCode End Sub </script> <html xmlns="http://www.w3.org/1999/xhtml" > <head runat="server"> <style type="text/css"> html { background-color:silver; font:14px Georgia,Serif; } .content { background-color:white; width:600px; margin:auto; padding:20px; } .addressLabel { float:left; width:100px; padding:5px; text-align:right; } .addressField { float:left; padding:5px; } .clear { clear:both; } </style> <title>Checkout</title> </head> <body> <form runat="server"> <div > <user:AddressForm Title="Billing Address" Runat="server" /> <br /> <user:AddressForm Title="Shipping Address" Runat="server" /> <br /> <asp:Button Text="Submit Form" OnClick="btnSubmit_Click" Runat="server" /> <hr /> <asp:Literal Runat="server" /> </div> </form> </body> </html>
|
The page in Listing 7.11 contains two instances of the AddressForm control: a Billing Address and Shipping Address. When you click the Button control, the address information is retrieved from the AddressForm controls and displayed in a Literal control. (In a real application, you would grab the data and store it in a database.) Web Standards Note The AddressForm User control does not use an HTML table to layout its controls. You should strive to avoid using tables except when displaying tabular information. Instead, Cascading Style Sheet rules are used to position the form elements. The page looks almost identical in Internet Explorer 6, Firefox 1.0, and Opera 8.0.
|