Adding Skins to Themes
| A Theme can contain one or more Skin files. A Skin enables you to modify any of the properties of an ASP.NET control that have an effect on its appearance. For example, imagine that you decide that you want every TextBox control in your web application to appear with a yellow background color and a dotted border. If you add the file in Listing 6.1 to the Simple Theme (the App_Themes\Simple folder), then you can modify the appearance of all TextBox controls in all pages that use the Simple Theme. Listing 6.1. Simple\TextBox.skin
Notice that the Skin file in Listing 6.1 is named TextBox.skin. You can name a Skin file anything you want. I recommend following a naming convention in which you name the Skin file after the name of the control that the Skin modifies. A Theme folder can contain a single Skin file that contains Skins for hundreds of controls. Alternatively, a Theme can contain hundreds of Skin files, each of which contains a single Skin. It doesn't matter how you organize your Skins into files because everything in a Theme folder eventually gets compiled into one Theme class. The Skin file in Listing 6.1 contains a declaration of a TextBox control. Notice that the TextBox control includes a BackColor property that is set to the value Yellow and a BorderStyle property that is set to the value Dotted. You should notice that the TextBox control includes a Runat="Server" attribute, but it does not include an ID attribute. You must always include a Runat attribute, but you can never include the ID attribute when declaring a control in a Skin. Note You can't create a Skin that applies to the properties of a User Control. However, you can Skin the controls contained inside a User Control. The Skin is applied to every page to which the Simple Theme is applied. For example, the page in Listing 6.2 uses the Simple Theme. Listing 6.2. ShowSkin.aspx
Notice that the page in Listing 6.2 includes a Theme attribute in its <%@ Page %> directive. This attribute causes the Simple Theme to be applied to the page. When you open the page in Listing 6.2, the Label control appears with a yellow background color and dotted border. This is the background color and border specified by the Theme (see Figure 6.1). Figure 6.1. Using a TextBox Skin.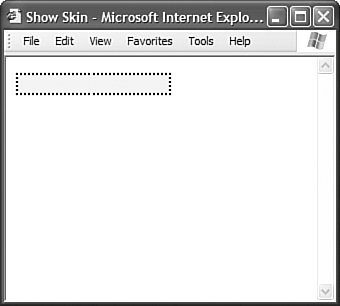 Only certain control properties are "themeable." In other words, you can create a Skin file that modifies only certain properties of a control. In general, you can use a Skin to modify properties that have an effect on a control's appearance but not its behavior. For example, you can modify the BackColor property of a TextBox control but not its AutoPostBack property. Note By default, all control properties are themeable (can be modified in a Skin file). However, certain control properties are decorated with the Themeable(False) attribute, which disables theming. Creating Named SkinsIn the previous section, we created something called a Default Skin. A Default Skin is applied to every instance of a control of a certain type. For example, a Default Skin is applied to every instance of a TextBox control. You also have the option of creating a Named Skin. When you create a Named Skin, you can decide when you want to apply the Skin. For example, you might want required fields in a form to appear with a red border. In that case, you can create a Named Skin and apply the Skin to only particular TextBox controls. The Skin in Listing 6.3 contains both a Default Skin and a Named Skin for a TextBox control. Listing 6.3. Simple2\TextBox.skin
The first TextBox in Listing 6.3 is an example of a Named Skin. Notice that it includes a SkinID property. The SkinID property represents the name of the Named Skin. You use the value of this property when applying the Skin in a page. The file in Listing 6.3 also includes a Default Skin for a TextBox control. The Default Skin does not include a SkinID property. If a TextBox control in a page is not associated with a Named Skin, then the Default Skin is applied to the TextBox. A Theme can contain only one Default Skin for each type of control. However, a Theme can contain as many Named Skins as you please. Each Named Skin must have a unique name. The page in Listing 6.4 contains two TextBox controls. The first TextBox control includes a SkinID attribute. This attribute causes the Named Skin to be applied to the control. The second TextBox, on the other hand, does not include a SkinID property. The Default Skin is applied to the second TextBox control. Listing 6.4. ShowNamedSkin.aspx
When you open the page in Listing 6.4, the first TextBox appears with a dashed border and the second TextBox appears with a double border (see Figure 6.2). Figure 6.2. Using Named Skins.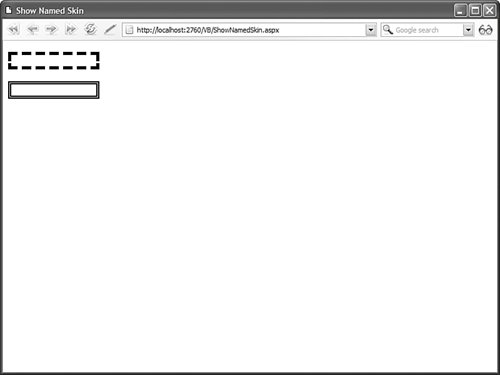 Themes versus StyleSheetThemesWhen you apply a Theme to a page, the Skins in the Theme override any existing properties of the controls in the page. In other words, properties in a Skin override properties in a page. For example, imagine that you create the Skin in Listing 6.5. Listing 6.5. Simple3\Label.skin
The Skin in Listing 6.5 sets the background color of all Label controls to the color Orange. Now, imagine that you apply the Skin in Listing 6.5 to the ASP.NET page in Listing 6.6. Listing 6.6. ShowSkinTheme.aspx
The page in Listing 6.6 includes a Label that has a BackColor property which is set to the value Red. However, when you open the page, the BackColor declared in the Skin overrides the BackColor declared in the page and the Label is displayed with an orange background. The default behavior of Themes makes it very easy to modify the design of an existing website. You can override any existing control properties that have an effect on the appearance of the control. However, there are situations in which you might want to override Skin properties. For example, you might want to display every Label in your website with an orange background color except for one Label. In that case, it would be nice if there was a way to override the Skin property. You can override Skin properties by applying a Theme to a page with the StyleSheetTheme attribute instead of the Theme attribute. For example, the page in Listing 6.7 uses the StyleSheetTheme attribute to apply the Simple3 Theme to the page. Listing 6.7. ShowSkinStyleSheetTheme.aspx
Notice that the <%@ Page %> directive in Listing 6.7 includes a StyleSheetTheme attribute. When you open the page in Listing 6.7 in a web browser, the Label is displayed with a red background color instead of the orange background color specified by the Theme. Disabling ThemesEvery ASP.NET control includes an EnableTheming property. You can use the EnableTheming property to prevent a Skin from being applied to a particular control in a page. For example, the page in Listing 6.8 contains two Calendar controls. The second Calendar control has its EnableTheming property set to the value False (see Figure 6.3). Figure 6.3. Disabling a Theme. Listing 6.8. ShowEnableTheming.aspx
The page in Listing 6.8 includes a Theme attribute that applies the Simple Theme to the page. The Simple Theme includes the Skin in Listing 6.9. Listing 6.9. Simple4\Calendar.skin
When you open the page in Listing 6.9 in a web browser, the Skin is applied to the first Calendar control but not the second Calendar control. Registering Themes in the Web Configuration FileRather than add the Theme or StyleSheetTheme attribute to each and every page to which you want to apply a Theme, you can register a Theme for all pages in your application in the web configuration file. The Web.Config file in Listing 6.10 applies the Site Theme to every page in an application. Listing 6.10. Web.Config
Rather than use the theme attribute, you can use the styleSheetTheme attribute to apply a Theme to the pages in an application. If you use the styleSheetTheme attribute, you can override particular Skin properties in a page. The web configuration file in Listing 6.11 includes the styleSheetTheme attribute. Listing 6.11. Web.Config
After you enable a Theme for an application, you can disable the Theme for a particular page by using the EnableTheming attribute with the <%@ Page %> directive. For example, the page in Listing 6.12 disables any Themes configured in the web configuration file. Listing 6.12. DisablePageTheme.aspx
|