Using the CreateUserWizard Control The CreateUserWizard control renders a user registration form. If a user successfully submits the form, then a new user is added to your website. In the background, the CreateUserWizard control uses ASP.NET membership to create the new user. The CreateUserWizard control supports a large number of properties (too many to list here) that enable you to modify the appearance and behavior of the control. For example, the page in Listing 20.12 uses several of the CreateUserWizard properties to customize the appearance of the form rendered by the control. Listing 20.12. ShowCreateUserWizard.aspx <%@ Page Language="VB" %> <!DOCTYPE html PUBLIC "-//W3C//DTD XHTML 1.0 Transitional//EN" "http://www.w3.org/TR/xhtml1/DTD/xhtml1-transitional.dtd"> <html xmlns="http://www.w3.org/1999/xhtml" > <head runat="server"> <style type="text/css"> .createUser { width:350px; font:14px Verdana,Sans-Serif; background-color:lightblue; border:solid 3px black; padding:4px; } .createUser_title { background-color:darkblue; color:white; font-weight:bold; } .createUser_instructions { font-size:12px; text-align:left; padding:10px; } .createUser_button { border:solid 1px black; padding:3px; } </style> <title>Show CreateUserWizard</title> </head> <body> <form runat="server"> <div> <asp:CreateUserWizard ContinueDestinationPageUrl="~/Default.aspx" InstructionText="Please complete the following form to register at this Website." CompleteSuccessText="Your new account has been created. Thank you for registering." Css TitleTextStyle-Css InstructionTextStyle-Css CreateUserButtonStyle-Css ContinueButtonStyle-Css Runat="server" /> </div> </form> </body> </html>
|
The CreateUserWizard control in Listing 20.12 is formatted with Cascading Style Sheets (see Figure 20.6). Notice that the control's ContinueDestinationPageUrl property is set to the value "~/Default.aspx". After you successfully register, you are redirected to the Default.aspx page. Figure 20.6. Formatting the CreateUserWizard control. 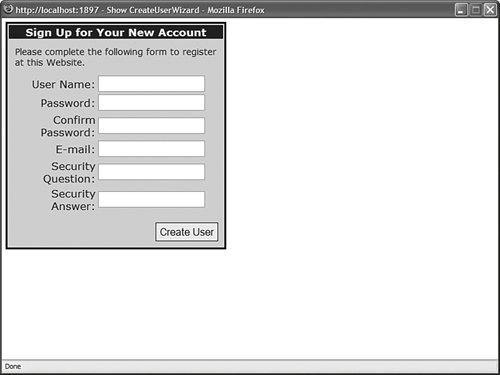
Note For the complete list of properties supported by the CreateUserWizard control, see the Microsoft .NET Framework SDK 2.0 documentation.
Configuring Create User Form Fields By default, the CreateUserWizard control displays the following form fields: Username Password Confirm Password Email Security Question Security Answer
These are the default form fields. The last three fields are optional. If you don't want to require a user to enter either an email address or a security question and answer, then you need to modify the configuration of the default membership provider. The web configuration file in Listing 20.13 makes both an email address and security question and answer optional. Listing 20.13. Web.Config <?xml version="1.0" encoding="utf-8"?> <configuration> <system.web> <authentication mode="Forms" /> <membership defaultProvider="MyMembership"> <providers> <add name="MyMembership" type="System.Web.Security.SqlMembershipProvider" connectionStringName="LocalSqlServer" requiresQuestionAndAnswer="false" requiresUniqueEmail="false" /> </providers> </membership> </system.web> </configuration>
|
If you add the web configuration file in Listing 20.13 to your application, then the CreateUserWizard control does not render fields for a security question and answer. However, the CreateUserWizard control still renders an email field. If you don't want the email form field to be rendered, then you must perform an additional step. You must set the CreateUserWizard control's RequireEmail property to the value False. If you add the page in Listing 20.14 to an application that contains the web configuration file in Listing 20.13, then the email, security question, and security answer form fields are not displayed (see Figure 20.7). Figure 20.7. An abbreviated registration form. 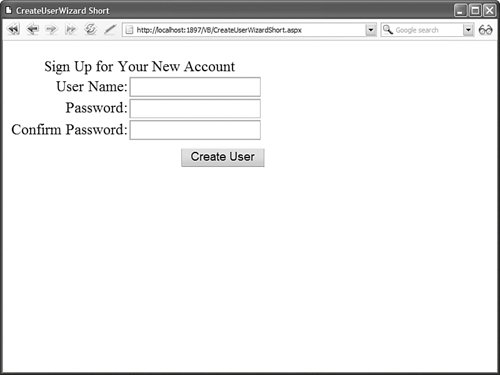
Listing 20.14. CreateUserWizardShort.aspx <%@ Page Language="C#" %> <!DOCTYPE html PUBLIC "-//W3C//DTD XHTML 1.0 Transitional//EN" "http://www.w3.org/TR/xhtml1/DTD/xhtml1-transitional.dtd"> <html xmlns="http://www.w3.org/1999/xhtml" > <head runat="server"> <title>CreateUserWizard Short</title> </head> <body> <form runat="server"> <div> <asp:CreateUserWizard RequireEmail="false" Runat="server" /> </div> </form> </body> </html>
|
Warning Don't set the CreateUserWizard control's RequireEmail property to the value False when the membership provider's requiresUniqueEmail property is set to the value true. In other words, don't require an email address when you haven't provided a user with a method for entering an email address.
Sending a Create User Email Message You can set up the CreateUserWizard control so that it automatically sends an email when a new user registers. For example, you can send an email that contains the new user's registered username and password to that user's email account. Warning Sending an unencrypted email across the Internet with a user's password is dangerous. However, it also is a very common practice to include a password in a registration confirmation email.
The page in Listing 20.15 includes a MailDefinition property that specifies the properties of the email that is sent to a user after the user successfully registers. Listing 20.15. CreateUserWizardEmail.aspx <%@ Page Language="VB" %> <!DOCTYPE html PUBLIC "-//W3C//DTD XHTML 1.0 Transitional//EN" "http://www.w3.org/TR/xhtml1/DTD/xhtml1-transitional.dtd"> <html xmlns="http://www.w3.org/1999/xhtml" > <head runat="server"> <title>CreateUserWizard Email</title> </head> <body> <form runat="server"> <div> <asp:CreateUserWizard Runat="server"> <MailDefinition BodyFileName="Register.txt" Subject="Registration Confirmation" From="Admin@YourSite.com" /> </asp:CreateUserWizard> </div> </form> </body> </html>
|
The MailDefinition class supports the following properties: BodyFileName Enables you to specify the path to the email message. CC Enables you to send a carbon copy of the email message. EmbeddedObjects Enables you to embed objects, such as images, in the email message. From Enables you to specify the FROM email address. IsBodyHtml Enables you to send an HTML email message. Priority Enables you to specify the priority of the email message. Possible values are High, Low, and Normal. Subject Enables you to specify the subject of the email message.
The MailDefinition associated with the CreateUserWizard control in Listing 20.15 sends the contents of the text file in Listing 20.16. Listing 20.16. Register.txt Thank you for registering! Here is your new username and password: username: <% UserName %> password: <% Password %>
|
Notice that the email message in Listing 20.16 includes two special expressions: <% UserName %> and <% Password %>. When the email is sent, the user's registered username and password are substituted for these expressions (see Figure 20.8). Figure 20.8. Receiving a registration email. 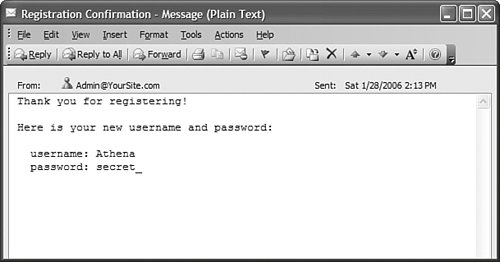
Note You can send a user's password in an email message even when password is encrypted or hashed by the Membership provider.
The MailDefinition class uses the email server configured by the smtp element in the web configuration file. For example, the web configuration file in Listing 20.17 illustrates how you can configure the MailDefinition class to use the local SMTP server included with Internet Information Services. (You can enable the local SMTP Server by opening Internet Information Services from the Administrative Tools folder.) Listing 20.17. Web.Config <?xml version="1.0" encoding="utf-8"?> <configuration> <system.net> <mailSettings> <smtp deliveryMethod="PickupDirectoryFromIis"/> </mailSettings> </system.net> <system.web> <authentication mode="Forms" /> </system.web> </configuration>
|
If you need to connect to a mail server located on another machine, you can use the web configuration file in Listing 20.18. In Listing 20.18, the smtp element includes a network element that specifies a mail host, username, and password. Listing 20.18. Web.Config <?xml version="1.0" encoding="utf-8"?> <configuration> <system.net> <mailSettings> <smtp> <network host="mail.YourServer.com" userName="admin" password="secret" /> </smtp> </mailSettings> </system.net> <system.web> <authentication mode="Forms" /> </system.web> </configuration>
|
Note If you need to customize the email message sent by the CreateUserWizard control, then you can handle the CreateUserWizard control's SendingMail event. See the CreateUserWizardCodeConfirmation.aspx page in the next section.
Automatically Redirecting a User to the Referring Page When you successfully log in from the Login.aspx page, you automatically are redirected back to the original page you requested. The CreateUserWizard control, on the other hand, does not redirect you back anywhere. If you want the CreateUserWizard control to work in the same way as the Login control, you need to write some code. The Login control in Listing 20.19 includes a link to a user registration page named CreateUserWizardReturn.aspx. In the Page_Load() event handler, the value of the ReturnUrl query string parameter is added to the link to the registration page. Listing 20.19. LoginReturn.aspx| [View full width] <%@ Page Language="VB" %> <!DOCTYPE html PUBLIC "-//W3C//DTD XHTML 1.0 Transitional//EN" "http://www.w3.org/TR/xhtml1/DTD/xhtml1-transitional.dtd"> <script runat="server"> Sub Page_Load(ByVal sender As Object, ByVal e As EventArgs) If Not Page.IsPostBack Then Dim dest As String = Request.QueryString("ReturnUrl") Login1.CreateUserUrl = "~/CreateUserWizardReturn.aspx?ReturnUrl=" & Server  .UrlEncode(dest) End If End Sub </script> <html xmlns="http://www.w3.org/1999/xhtml" > <head runat="server"> <title>Login Return</title> </head> <body> <form runat="server"> <div> <asp:Login CreateUserText="Register" CreateUserUrl="~/CreateUserWizardReturn.aspx" Runat="server" /> </div> </form> </body> </html> .UrlEncode(dest) End If End Sub </script> <html xmlns="http://www.w3.org/1999/xhtml" > <head runat="server"> <title>Login Return</title> </head> <body> <form runat="server"> <div> <asp:Login CreateUserText="Register" CreateUserUrl="~/CreateUserWizardReturn.aspx" Runat="server" /> </div> </form> </body> </html>
|
Before you use the page in Listing 20.19, you need to rename the page to Login.aspx. If a user requests a page that the user is not authorized to access, then the user is automatically redirected to the Login.aspx page. The ReturnUrl parameter is automatically added to the request for Login.aspx. The page in Listing 20.20 contains a CreateUserWizard control. This page also contains a Page_Load() event handler. The value of the ReturnUrl query string parameter is used to redirect the user back to the originally requested page. Listing 20.20. CreateUserWizardReturn.aspx <%@ Page Language="VB" %> <!DOCTYPE html PUBLIC "-//W3C//DTD XHTML 1.0 Transitional//EN" "http://www.w3.org/TR/xhtml1/DTD/xhtml1-transitional.dtd"> <script runat="server"> Sub Page_Load() If Not Page.IsPostBack Then Dim dest As String = "~/Default.aspx" If Not String.IsNullOrEmpty(Request.QueryString("ReturnURL")) Then dest = Request.QueryString("ReturnURL") CreateUserWizard1.ContinueDestinationPageUrl = dest End If End If End Sub </script> <html xmlns="http://www.w3.org/1999/xhtml" > <head runat="server"> <title>CreateUserWizard Return</title> </head> <body> <form runat="server"> <div> <asp:CreateUserWizard Runat="server" /> </div> </form> </body> </html>
|
Automatically Generating a Password Some websites require you to complete multiple steps when registering. For example, you must complete the following steps when registering for a new account at eBay: 1. | Complete the registration form.
| 2. | Receive an email with a confirmation code.
| 3. | Enter the confirmation code into a form.
|
This method of registration enables you to verify a user's email address. If someone enters an invalid email address, then the confirmation code is never received. If you need to implement this registration scenario, then you need to know about the following three properties of the CreateUserWizard control: AutoGeneratePassword Enables the CreateUserWizard control to generate a new password automatically. DisableCreatedUser Enables you to disable the new user account created by the CreateUserWizard control. LoginCreatedUser Enables you to prevent a new user from being logged in automatically.
You can send two types of confirmation email messages. First, you can generate a new password automatically and send the password to the user. In that case, you'll want to enable the AutoGeneratePassword property and disable the LoginCreatedUser properties. Alternatively, you can allow a new user to enter her own password and send a distinct confirmation code in the confirmation email message. In that case, you'll want to enable the DisableCreatedUser property and disable the LoginCreatedUser property. Let's examine each of these scenarios in turn. The page in Listing 20.21 contains a CreateUserWizard control that does not render a password form field. The control has its AutoGeneratePassword property enabled and its LoginCreatedUser property disabled. After you complete the form rendered by the CreateUserWizard control, you can click the Continue button to open the Login.aspx page. Listing 20.21. CreateUserWizardPasswordConfirmation.aspx <%@ Page Language="VB" %> <!DOCTYPE html PUBLIC "-//W3C//DTD XHTML 1.0 Transitional//EN" "http://www.w3.org/TR/xhtml1/DTD/xhtml1-transitional.dtd"> <html xmlns="http://www.w3.org/1999/xhtml" > <head runat="server"> <title>CreateUserWizard Password Confirmation</title> </head> <body> <form runat="server"> <div> <asp:CreateUserWizard CompleteSuccessText="A confirmation email containing your new password has been sent to your email address." AutoGeneratePassword="true" LoginCreatedUser="false" ContinueDestinationPageUrl="~/Login.aspx" Runat="server"> <MailDefinition From="Admin@YourSite.com" BodyFileName="PasswordConfirmation.htm" IsBodyHtml="true" Subject="Registration Confirmation" /> </asp:CreateUserWizard> </div> </form> </body> </html>
|
Warning Don't set the membership provider's passwordStrengthRegularExpression attribute when enabling the CreateUserWizard control's AutoGeneratePassword property.
The CreateUserWizard control in Listing 20.21 sends the email message contained in Listing 20.22. Listing 20.22. PasswordConfirmation.htm <!DOCTYPE html PUBLIC "-//W3C//DTD XHTML 1.0 Transitional//EN" "http://www.w3.org/TR/xhtml1/DTD/xhtml1-transitional.dtd"> <html xmlns="http://www.w3.org/1999/xhtml" > <head> <title>Password Confirmation</title> </head> <body> Your new password is <% Password %>. </body> </html>
|
The email message in Listing 20.22 includes the automatically generated password. When the new user receives the automatically generated password in her inbox, she can enter the password in the Login.aspx page. In the second scenario, the user gets to choose his password. However, the user's account is disabled until he enters his confirmation code. The CreateUserWizard control in Listing 20.23 has its DisableCreateUser property enabled and its LoginCreatedUser property disabled. Listing 20.23. CreateUserWizardCodeConfirmation.aspx <%@ Page Language="VB" %> <!DOCTYPE html PUBLIC "-//W3C//DTD XHTML 1.0 Transitional//EN" "http://www.w3.org/TR/xhtml1/DTD/xhtml1-transitional.dtd"> <script runat="server"> Sub CreateUserWizard1_SendingMail(sender As object, e As MailMessageEventArgs) Dim user As MembershipUser = Membership.GetUser(CreateUserWizard1.UserName) Dim code As String = user.ProviderUserKey.ToString() e.Message.Body = e.Message.Body.Replace("<%ConfirmationCode%>", code) End Sub </script> <html xmlns="http://www.w3.org/1999/xhtml" > <head runat="server"> <title>CreateUserWizard Code Confirmation</title> </head> <body> <form runat="server"> <div> <asp:CreateUserWizard CompleteSuccessText="A confirmation email containing your new password has been sent to your email address." DisableCreatedUser="true" ContinueDestinationPageUrl="~/ConfirmCode.aspx" OnSendingMail="CreateUserWizard1_SendingMail" Runat="server"> <MailDefinition From="Admin@YourSite.com" BodyFileName="CodeConfirmation.htm" IsBodyHtml="true" Subject="Registration Confirmation" /> </asp:CreateUserWizard> </div> </form> </body> </html>
|
Notice that the page in Listing 20.23 includes a SendingMail event handler. The confirmation code is the unique key assigned to the new user by the membership provider (a GUID). The confirmation code is substituted into the email message before the message is sent. The email message is contained in Listing 20.24. Listing 20.24. CodeConfirmation.htm <!DOCTYPE html PUBLIC "-//W3C//DTD XHTML 1.0 Transitional//EN" "http://www.w3.org/TR/xhtml1/DTD/xhtml1-transitional.dtd"> <html xmlns="http://www.w3.org/1999/xhtml" > <head> <title>Code Confirmation</title> </head> <body> <%UserName%>, your confirmation code is <%ConfirmationCode%> </body> </html>
|
After you complete the form rendered by the CreateUserWizard control, you can click the Continue button to open the ConfirmCode.aspx page (see Figure 20.9). Figure 20.9. Entering a confirmation code. 
Listing 20.25. ConfirmCode.aspx <%@ Page Language="VB" %> <!DOCTYPE html PUBLIC "-//W3C//DTD XHTML 1.0 Transitional//EN" "http://www.w3.org/TR/xhtml1/DTD/xhtml1-transitional.dtd"> <script runat="server"> Sub btnConfirm_Click(ByVal sender As Object, ByVal e As EventArgs) Dim user As MembershipUser = Membership.GetUser(txtUserName.Text) If IsNothing(user) Then lblError.Text = "Invalid User Name" Else Dim providerCode As String = user.ProviderUserKey.ToString() Dim userCode As String = txtConfirmationCode.Text.Trim() If providerCode <> userCode Then lblError.Text = "Invalid Confirmation Code" Else user.IsApproved = True Membership.UpdateUser(user) Response.Redirect("~/SecretFiles/Secret.aspx") End If End If End Sub </script> <html xmlns="http://www.w3.org/1999/xhtml" > <head runat="server"> <title>Confirm Code</title> </head> <body> <form runat="server"> <div> <p> Enter the confirmation code that you received by email. </p> <asp:Label EnableViewState="false" ForeColor="Red" Runat="server" /> <br /><br /> <asp:Label Text="User Name:" AssociatedControl Runat="server" /> <br /> <asp:TextBox Runat="server" /> <br /><br /> <asp:Label Text="Confirmation Code:" AssociatedControl Runat="server" /> <br /> <asp:TextBox Columns="50" Runat="server" /> <asp:Button Text="Confirm" OnClick="btnConfirm_Click" Runat="server" /> </div> </form> </body> </html>
|
If the user enters the correct username and confirmation code, then his account is enabled. The MembershipUser.IsApproved property is assigned the value TRue and the updated user information is saved with the Membership.UpdateUser() method. Using Templates with the CreateUserWizard Control If you need to customize the appearance of the form rendered by the CreateUserWizard control, then you can create templates for the CreateUserWizardStep and the CompleteWizardStep. For example, the page in Listing 20.26 displays a drop-down list to display options for the security question (see Figure 20.10). Figure 20.10. Customizing the CreateUserWizard control with templates. 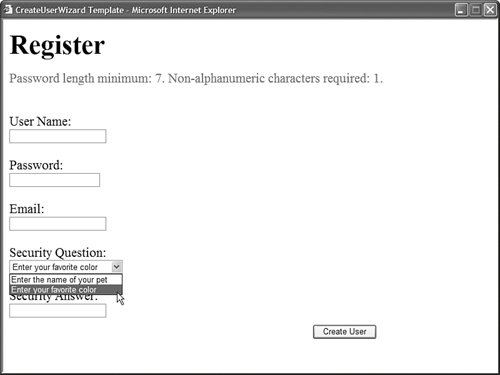
Listing 20.26. CreateUserWizardTemplate.aspx <%@ Page Language="VB" %> <!DOCTYPE html PUBLIC "-//W3C//DTD XHTML 1.0 Transitional//EN" "http://www.w3.org/TR/xhtml1/DTD/xhtml1-transitional.dtd"> <html xmlns="http://www.w3.org/1999/xhtml" > <head runat="server"> <title>CreateUserWizard Template</title> </head> <body> <form runat="server"> <div> <asp:CreateUserWizard Runat="server"> <WizardSteps> <asp:CreateUserWizardStep> <ContentTemplate> <h1>Register</h1> <asp:Label ForeColor="Red" Runat="server" /> <br /><br /> <asp:Label Text="User Name:" AssociatedControl Runat="server" /> <br /> <asp:TextBox Runat="server" /> <br /><br /> <asp:Label Text="Password:" AssociatedControl Runat="server" /> <br /> <asp:TextBox TextMode="Password" Runat="server" /> <br /><br /> <asp:Label Text="Email:" AssociatedControl Runat="server" /> <br /> <asp:TextBox Runat="server" /> <br /><br /> <asp:Label Text="Security Question:" AssociatedControl Runat="server" /> <br /> <asp:DropDownList Runat="server"> <asp:ListItem Text="Enter the name of your pet" Value="Pet Name" /> <asp:ListItem Text="Enter your favorite color" Value="Favorite Color" /> </asp:DropDownList> <br /><br /> <asp:Label Text="Security Answer:" AssociatedControl Runat="server" /> <br /> <asp:TextBox Runat="server" /> </ContentTemplate> </asp:CreateUserWizardStep> <asp:CompleteWizardStep> <ContentTemplate> Your account was successfully created. </ContentTemplate> </asp:CompleteWizardStep> </WizardSteps> </asp:CreateUserWizard> </div> </form> </body> </html>
|
In the CreateUserWizardStep, you can add controls with the following IDs: UserName Password Email ConfirmPassword Question Answer ErrorMessage
Of course, you can add any other controls that you need. For example, you can request additional information when a new user registers and store the information in a separate database table (see the next section). In the CreateUserWizardStep, you also can add Button controls that contain CommandName properties with the following values: Adding Steps to the CreateUserWizard Control The CreateUserWizard control inherits from the base Wizard control. That means that you can use all the properties supported by the Wizard control when using the CreateUserWizard control. In particular, you can extend the CreateUserWizard control with additional wizard steps. For example, imagine that you want to require new users to enter their first and last names. The page in Listing 20.27 contains an additional WizardStep that includes both first and last name form fields. Listing 20.27. CreateUserWizardExtra.aspx| [View full width] <%@ Page Language="VB" %> <%@ Import Namespace="System.Data.SqlClient" %> <%@ Import Namespace="System.Web.Configuration" %> <!DOCTYPE html PUBLIC "-//W3C//DTD XHTML 1.0 Transitional//EN" "http://www.w3.org/TR/xhtml1/DTD/xhtml1-transitional.dtd"> <script runat="server"> Sub CreateUserWizard1_CreatedUser(ByVal sender As Object, ByVal e As EventArgs) CreateUserProfile(CreateUserWizard1.UserName, txtFirstName.Text, txtLastName.Text) End Sub Private Sub CreateUserProfile(ByVal userName As String, ByVal firstName As String, ByVal lastName As String) Dim conString As String = WebConfigurationManager.ConnectionStrings ("UserProfiles").ConnectionString Dim con As New SqlConnection(conString) Dim cmd As New SqlCommand("INSERT UserProfiles (UserName,FirstName,LastName) VALUES (@UserName,@FirstName,@LastName)", con) cmd.Parameters.AddWithValue("@UserName", userName) cmd.Parameters.AddWithValue("@FirstName", firstName) cmd.Parameters.AddWithValue("@LastName", lastName) Using con con.Open() cmd.ExecuteNonQuery() End Using End Sub </script> <html xmlns="http://www.w3.org/1999/xhtml" > <head runat="server"> <title>CreateUserWizard Extra</title> </head> <body> <form runat="server"> <div> <asp:CreateUserWizard OnCreatedUser="CreateUserWizard1_CreatedUser" Runat="server" > <WizardSteps> <asp:WizardStep> <asp:Label Text="First Name:" AssociatedControl Runat="server" /> <br /> <asp:TextBox Runat="server" /> <br /><br /> <asp:Label Text="Last Name:" AssociatedControl Runat="server" /> <br /> <asp:TextBox Runat="server" /> </asp:WizardStep> <asp:CreateUserWizardStep /> </WizardSteps> </asp:CreateUserWizard> </div> </form> </body> </html>
|
The page in Listing 20.27 includes a CreatedUser event handler that executes after the new user is created. This handler adds the new user's first and last name to a database named UserProfilesDB. |