| After a server crash, administrators will want to restore all the server components that facilitate completely restoring the functionality of the server. Using the Restore Wizard or Restore tab within the Windows backup utility called Backup (ntbackup.exe), administrators can restore individual databases and storage groups or restore available backups. Although the first time Backup is used it will start in Wizard mode for ease of use, most administrators will want to use the Advanced mode because it provides more options. The Backup utility can be accessed via command line by typing ntbackup.exe in the Start menu, Run option, or by selecting Programs or All Programs, Accessories, System Tools, Backup. Recovery procedures depend on the types of backups available to administrators. Using normal (full) backups and differential backups, administrators can restore an Exchange database or storage group to the point of failure by performing the following steps: 1. | Restore the latest normal backup. Do not set the Last Backup Set option and do not mount the database after the recovery.
| 2. | Restore the latest differential backup. Set the Last Backup Set option and then mount the database after restore to start the replay of the log files.
| 3. | Review the related mailbox and public folder stores to validate a successful recovery of the data.
|
Using normal backups and incremental backups, administrators can recover an Exchange database or storage group to the point of failure by performing the following steps: 1. | Restore the latest normal backup. Do not set the Last Backup Set option and do not mount the database after the recovery.
| 2. | In order, apply each incremental backup. Restore the first incremental backup after the full backup, then restore the second incremental backup, and so on until incremental backups have been restored.
| 3. | When restoring the last incremental backup, be sure to set the Set the Last Backup Set option and then mount the database after restore to start the replay of the log files.
| 4. | Review the related mailbox and public folder stores to validate a successful recovery of the data.
|
Restoring Mailboxes and Public Folders Administrators can restore Exchange 2003 data manually using the Advanced mode of Backup. Configure backups manually by performing the following steps: 1. | Recover system and configuration before restoring user data. Server documentation should include the following steps:
- Stop all Exchange and IIS services when restoring configuration data. After exiting Exchange System Manager, restart ESM and then restart the Microsoft Exchange Information Store via the Service program in Administrative Tools.
- Dismount the affected data stores before starting the restore of user data. During restore, Exchange Services are temporarily stopped.
- Restore the drives, system state data, Exchange configuration data, and Exchange user data when recovering an entire server.
| 2. | Start Backup via command line or the Start menu. If Wizard mode is enabled, click Advanced mode and then select the Restore and Manage Media tab as shown in Figure 14.1. Otherwise, select the Restore and Manage Media tab.
Figure 14.1. Using the Restore and Manage Media tab to manually configure a restore operation. 
| 3. | Select the data to restore using the left pane view, which displays files organized by volume, and the right pane view, which displays media sets. If no media set is displayed, right-click File in the left pane view, select Catalog File, and then enter the path for the backup file.
| 4. | To recover Exchange data, individually select the Information Store storage groups to restore. To restore an individual mailbox store or log files for a storage group, expand the storage group node and then select the appropriate mailbox store and log files. If no file data or system state is to be recovered, skip to step 6. Otherwise, continue to step 5.
| 5. | To recover file data, select the check box next to any drive, folder, or file to restore. Exchange data and file data cannot be restored in the same recovery operation. Typically, file data will be recovered first and then Exchange data.
| 6. | Administrators can specify how to restore files by clicking Tools and selecting Options on the menu bar. The Options dialog box opens, displaying the Restore tab. Available options are as follows:
- Do Not Replace the Files on My Computer (Recommended) Selecting this option does not overwrite existing files.
- Replace the File on Disk Only if the File on Disk Is Older Selecting this option replaces older files on the disk with newer files from backup.
- Always Replace the File on My Computer Selecting this option replaces all files on disk with files from the backup.
| 7. | Use the Restore File To drop-down list to specify the restore location. The Original location option restores data to the folder or files logged during the backup process. The Alternate Location option restores data to the administrator-specified location while preserving the existing directory structure. The Single Folder option restores all data to an administrator-specified single folder without keeping the existing directory structure.
| 8. | Click Restore to display the Restoring Database dialog box. In the Restore To field, type the name of the server to restore files to, such as Schenker, or click Browse to search for a computer.
| 9. | If this is the last backup set to restore, select the check boxes next to the Last Backup Set and Mount Database After Restore options. Click OK to start restoring data. If prompted, type in a name of the backup set to use. If needed, click Cancel in the Operation Status and Restore Progress dialog boxes to stop the recovery process. When the restore is complete, click Close to complete the process or click Report to view a backup log containing information about the restore operation.
|
Be sure to complete post-recovery checklist items of mailbox and public folder stores to ensure that data recovery was successful. Restoring Certificate Services Administrators will often want or need to restore Certificate Services. This procedure is useful if you want to restore a Certification Authority (CA) without restoring the entire server on which the CA is installed. Using the Windows interface, perform the following steps to restore the CA: 1. | Log on to the system as a Backup Operator or a Certification Authority Administrator.
| 2. | Open Certification Authority on the Start menu by selecting Programs or All Programs, Administrative Tools, Certification Authority. Expand the Certification Authority server and select the appropriate CA.
| 3. | Right-click the CA, point to All Tasks, and then select Restore CA. If prompted by the Certificate Services Wizard to stop Certificate Services, click OK to do so and then click Next at the wizard welcome page.
| 4. | On the Items to Restore page, click the check boxes next to the items to restore (Private Key and CA Certificate or Certificate Database and Certificate Database Log), click Browse to locate the directory containing the backup files, such as CAbackup, and then click Next to continue.
| 5. | On the Password page, enter the password that was entered during the backup process. If the password is correct, the Certification Authority Restore Wizard dialog box will be displayed as shown in Figure 14.2.
Figure 14.2. Viewing CA restore results on the Certification Authority Restore Wizard dialog box. 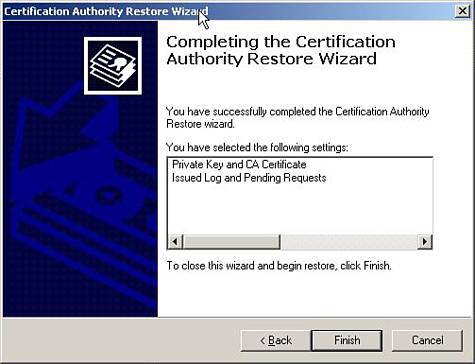
|
Restoring Internet Information Services Restoring the Internet Information Service (IIS) configuration may be necessary if IIS metabase data info is erased, becomes corrupt, or is not functioning as desired. Use the following steps to restore the IIS metabase data: 1. | Log on to the IIS server using Local Administrator privileges and then open the IIS Manager via the Start menu by selecting Programs or All Programs, Administrative Tools, Internet Information Services Manager. If the IIS server does not appear, right-click Internet Information Services in the left pane and select Connect. Type in the FQDN of the IIS server and click OK.
| 2. | In the left pane, right-click the IIS server and select All Tasks; then click Backup/Restore Configuration. The Configuration Backup/Restore window will display all automatic backups that have been created. Select the backup to use and then click the Restore button to perform a manual restore.
| 3. | A dialog box will pop up stating that all Internet services need to be stopped prior to restoring the data and will be restarted when the restore is complete. Click Yes to continue the restore.
| 4. | A confirmation will be displayed when the restore is completed. When you're finished reviewing, click OK to close the window. Click Close on the Configuration Backup/Restore page.
| 5. | In IIS Manager, verify that the restore was successful and that services are up and running. Close IIS Manager and log off the server.
|
Note  | By default, backups are stored in the %systemroot%\system32\Inetsrv\MetaBack directory. |
IIS Web and FTP folders are located in the C:\InetPub\directory and the IIS log files are located in C:\Windows\system32\LogFiles. To recover the IIS website, the IIS Logs, or the FTP site, restore the files using the Backup utility. Restoring Active Directory: Users, Groups, and Contacts Administrators can back up Exchange 2003 manually using the Advanced mode of Backup. Configure backups manually by performing the following steps: 1. | Follow steps 13 in the instructions for recovering mailbox and public folder data found in the "Restoring Mailboxes and Public Folders" section of this lesson.
| 2. | To restore system state data, select the System State check box and check boxes for other data to recover. If data is being restored to the original location, the current system state is replaced by the system state being restored. If the system state is restored to an alternate location, only SYSVOL, system boot files, and Registry information is restored; system state data can be restored only on a local system.
| By default, Active Directory and other replicated data such as SYSVOL are not restored on a domain controller. This protects the AD information on the domain controller by preventing the domain information from being overwritten. |
| 3. | Follow the remaining steps 59 of the instructions for recovering mailbox and public folder data found in the "Restoring Mailboxes and Public Folders" section.
|
Be sure to complete the post-recovery checklist items of the system state and any other restored data to ensure that data recovery was successful. |