| SMTP connectors are another type of connector available in Exchange 2003 and are used to transfer messages between local bridgehead servers and remote servers. SMTP connectors are more complex to use than routing group connectors, yet they have distinct advantages: stronger authentication and encryption, smart host support, DNS mail exchanger record support, and Extended SMTP support. Multiple SMTP connectors can also be configured for load balancing and providing highly available email architecture. Because an SMTP connector creates an isolated route for mail delivery, it eases administration and troubleshooting of mail flow problems. To configure an SMTP connector, perform the following steps: 1. | In ESM, expand the routing group to work with, right-click Connectors, select New, and then click SMTP Connector. The Properties dialog box for the new connector appears.
| 2. | On the General tab, type a descriptive name for the connector.
| 3. | To use the DNS settings configured on the SMTP virtual server that is hosting the connector, select Use DNS to Route to Each Address Space on This Connector. (DNS resolves the IP address of the remote SMTP server.)
| 4. | To use a smart host routing, select Forward All Mail Through This Connector to the Following Smart Hosts. (Smart host handles DNS resolution and mail delivery.)
| 5. | On the General tab, click Add and then add a bridgehead server and an SMTP virtual server as shown in Figure 6.3. Repeat to use additional bridgehead servers.
Figure 6.3. Using the Properties dialog box to configure SMTP connector settings. 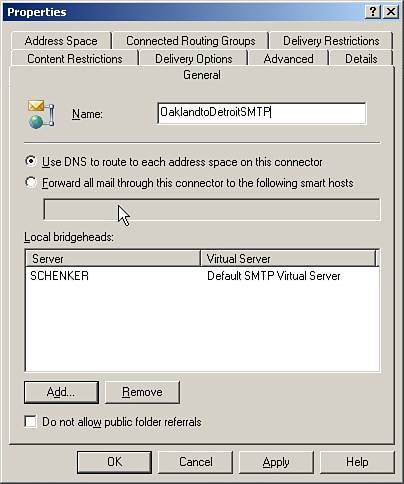
| 6. | Click the Address Space tab. If two Exchange organizations are being connected, set the Connector scope as Entire Organization and then click Add to configure an SMTP address space with the appropriate Cost. If two routing groups are being connected, set the Connector Scope to Routing Groups and then click Add to configure an SMTP address space and a Cost. After this is done, click the Routing Group tab and select the routing group to connect.
| 7. | If message relaying to other routing groups or organization is not needed, click OK to install the connector. Otherwise, click the Allow Messages to be Relayed to These Domains check box and then click OK to install the connector.
|
After the SMTP connector is installed, administrators may want to change additional settings, such as delivery options, outbound security, delivery and content restrictions, and other advanced controls. |