Getting the Directory Server Up and Running
|
| < Day Day Up > |
|
The first thing you have to do is install the directory-server software. A description of the installation instructions for all of the major software distributions would be beyond the scope of this book. So we will first review some general instructions that are valid for all installations. Then we will see two example installations. The first example is the open-source directory-server OpenLDAP. The second is a commercial product, the Sun One iPlanet directory server, formerly known as Netscape Directory Server and available from Netscape. In August 2002, iPlanet became a division of Sun Microsystems, and the iPlanet server became integrated in the Sun Open Net Environment (Sun One). These two servers were selected because both are available on Win32 and UNIX platforms. We will see both a commercial and an open-source solution available on both platforms. Now let us begin with the instructions for a general installation.
Software Installation
It normally takes some time between the moment you unpack the server software until the magic moment when the directory server is ready to be released for public access. By the time you unpack your software, the phase of analysis, planning, and design should be concluded. You should also be familiar with the details of the proposed configuration, including knowledge about the distribution of the directory among other directory servers, replication, and connections to other data sources (metadirectory, applications, synchronization, etc.).
The first recommended step is to verify that your system meets the requirements of the software you want to install. This applies not just to simple space requirements, but also to the available memory, swap space, and base system configuration. Read the delivered documentation carefully to find out whether there are any operating-system parameters that need to be modified for better performance. This is often necessary for UNIX operating systems, where you can change a number of system parameters to fit the special purpose of your UNIX server. However, under normal circumstances with a normal system load, this should not necessary.
Next, you have to gather information about your network connection. This includes verifying that your host is accessible to possible clients. Once you are sure that your clients can reach the computer where your directory server is running, make it clear that they can also access its service. Perhaps you will be providing a directory service for customers accessing the directory from the Internet, but your directory server is in your intranet behind a firewall. In this case, you should discuss with your networking team the location of the directory server. It may be that your customers will never even know that they are using your directory server, because they will use applications running on your Internet Web server, and only that application has to access the directory server. Once the location of the directory server is determined, verify that the service is visible to your client. It is quite probable that your directory server will run behind a firewall. In this case, you must be sure that the firewall will allow the LDAP protocol to pass through and that it will accept connections to the port that the directory server actually is running on.
Furthermore, you need information about the host name and the IP number of the machine your directory server is running on. It may be that you have more than one network card. If so, you must understand the requirements of your installation. It may be that the directory server has to accept requests coming from one subnet only. Check the documentation of your directory-server software to see if it is possible to listen on more than one IP address. It is possible that you will need additional IP numbers. If you have a directory server with one administration server and one directory server, you might decide to run each server on a network card of its own. With this setup, you can shut down the administration server and boot it only when you really need it. This boosts performance while increasing system security.
The last step is to clear up some base configuration questions. Some products ship with a separate administration server. If you do not have two different network cards, you could install the administration server on a separate port. To set this up, you need the name and password of the administrator of the server. Some implementations also configure an operator of the directory server. The second piece of information you need is the root of the directory information tree (DIT). Now you can begin the installation procedure.
Commercial products will include an installation guide, release notices, a "readme-first" document, a "readme before readme-first document," and so on. It is good practice, at a minimum, to look at these documents before beginning the installation. The exact installation procedure should be documented in the installation guide. If a consultant is installing the directory server for you, it is a good idea to try to understand what the consultant is doing and why. After the consultant leaves, the person administering the system will likely encounter situations where the directory server is in need of first aid or where a change in the configuration is required.
OpenLDAP Installation
OpenLDAP is available on both UNIX and Win32 platforms. It is an open-source implementation, and the most recent version, with LDAP (v3) functionality, is available at the OpenLDAP Web site, http://www.openldap.org. The site also holds a lot of documentation, including installation instructions, the administration guide, FAQs, and an archive of the OpenLDAP newsgroups. The project leader, Kurt Zeilenga, has written many of the LDAP RFCs.
At the time of this writing, the OpenLDAP version 2.1.x is the latest one available for download from the Web site, although by the time you read this book, a new version may be available. The first step is to download the software, which is available in the form of a compressed archive file. Once downloaded, you should create a new directory that will be your workbench for the next steps. Move the compressed archive into this directory and decompress the file. The commands for decompressing the file are different, depending on the operating system. Using one of the UNIX operating systems, the command would be:
gzip -cd openldap-2.1.8.tgz | tar xvf -
On a Win32 platform, you would use Winzip or a similar utility. Double-click on the file's icon and Winzip will tell you that the compressed file is an archive. It proposes to uncompress this file to a temporary file and open the archive. Click "okay" and extract the files as usual.
In both cases, you will have a directory containing the entire source code and documentation, including the installation instructions. Carefully review the "readme" file. It contains the system requirements needed to successfully install the software on your system. The following software packages are needed:
-
Standard ANSI-compliant C compiler: If you do not have one, the best choice would be the open-source GCC compiler available from the Free Software Foundation (FSF) at http://www.fsf.org.
-
C development system: This is available on most UNIX systems. The FSF on the C development system holds all the components on its site (http://www.fsf.org). On other operating systems, you will get the components together with the compiler.
-
Posix regex libraries: These libraries are normally included in every standard UNIX distribution. They facilitate the implementation of regular expressions in the C language.
-
Suitable back-end to hold the repository: The back end is the data store that finally holds the data that you put into the directory. See Chapter 1 for additional details about the underlying concepts. If you use BDB, you need to install the open-source Berkeley DB distribution available from Sleepycat (http://www.sleepycat.com). If you use LDBM, you can choose between the Berkeley DB distribution and GDBM (Gnu database manager), available from FSF. There are other back-end options available, ranging from a shell back end to a RDBMS (e.g., Oracle). See the installation instructions contained in the distribution.
-
Replication: If you install ldap servers replicating between each other, the master series will need threading support. You will need the necessary thread libraries to be installed.
-
TLS: If you wish to use TLS (Transport Layer Security protocol), you need the TLS layer, e.g., the OpenSSL distribution available from http://www.openssl.org. (Also see the section "Securing Your LDAP Server" later in this chapter.)
-
SASL: If you would like to use strong authentication via SASL, you need the SASL libraries, e.g., the SASL distribution from the Cyrus project. You can get the software and find out more about Cyrus SASL at the Web site http://asg.web.cmu.edu/sasl/. (Also see the section "Securing Your LDAP Server" later in this chapter.)
Once you have installed the required software, you can begin compiling your LDAP application.
UNIX
In the UNIX operating system, you simply launch "configure." The configure tool tries to find out details about your operating system and about the software packages available on your machine. However, the configure tool does not always find the details it needs to know. In such cases, you may have to manually provide the necessary information. It may also be that you wish to configure the LDAP software in a different way. "Configure" can be launched using a number of parameters that are documented in the "install" file. You can find the parameters by launching "configure" with the -h switch. Exhibit 1 shows you a dump of all switches available with the "configure-h" command (available electronically as configure-h.doc).
#!/bin/sh # #Name: ConfigureLdap.sh #Author: Reinhard e. Voglmaier #Version: 1.0 #Date: 15.08.2003 #Description: Script to configure the compilation of the # OpenLDAP software CC=gcc \ CPPFLAGS="-I/usr/local/BerkeleyDB.4.1/include" \ LDFLAGS="=I/usr/local/BerkeleyDB.4.1/lib" \ ./configure --prefix=/usr/local \ --enable-bdb
Note It is a good idea to fix the configuration of the compilation phase in a script. This documents the installation procedure for later use.
The line CC=gcc tells the configure utility to use the GNU compiler, the CPPFLAGS variable describes where to search additional include files not located at the standard location, the LDFLAGS environment variable where to find additional libraries not located in the standard location. Here we use the Sleepycat distribution for the Berkeley DB.
Exhibit 1: Example of OpenLDAP Configure Script—
Once the system is configured, launch "make depend" to resolve dependencies followed by "make." If the program compiles successfully, you can test the OpenLDAP program by typing "make test." If all tests are executed successfully, a process that can take several minutes, install the server with "make install." This will install the server software, the utilities, the command-line tools, the manual pages, and the configuration files. If you have problems in the compilation phase, go to the OpenLDAP home page at http://www.openldap.org.
WIN32
The software requirements are the same as before. There are a number of C/C++ compilers available for Win32 platforms. However, it is a good idea to use Microsoft's Visual C++ when installing OpenLDAP on a Win32 platform. Most of the hints regarding the OpenLDAP software installation on Win32 refer to this environment. From a technical point of view, however, other development tools should work as well.
We strongly advise that you take a look at the Web site of FiveSight Technologies Inc. They have successfully installed OpenLDAP on the Win32 platform. The URL is http://www.fivesight.com/downloads/openldap.asp. From this site, you can also get a ready-to-work version of OpenLDAP for the Win32 platform.
Sun One Installation
The installation of Sun One is much more user friendly because it limits the user activity to answering a number of questions during the program setup. The answers to these questions anticipate some of the configuration you have to do later.
The first step is to get the software, which can be ordered from Sun Microsystems. If you are in a hurry, you can download an evaluation copy via the Internet from http://wwws.sun.com/software/download. If you download the software from the Internet, you should first create a working directory and download the file into this directory. Note that this is only a temporary directory and not the location where the software will be installed.
The method used to decompress the file depends on the operating system you are working in. In UNIX, you have to use the command:
gzip -cd directory-5[1].1sp1-us.sparc-sun-solaris2.8.tar.gz | tar xvf -
In Win32/Win2000, you can use the Winzip program or a similar utility. It is enough to double click the file you downloaded. Winzip, or whatever decompression software you are using, will ask you to name a location where it should store the files contained in the compressed archive. Again, it is convenient to use a temporary directory holding only the installation files. Note that this is not the final location where the software will installed.
After decompressing the software, you will execute the installation utility "setup" for UNIX operating systems and "setup.exe" in the Microsoft environment. If you have the official software distribution on CD, you simply insert the CD and launch the installation tool from the CD. The installation procedure is nearly identical in UNIX and in the MS world, so we will only show it once.
Once you have started the installation procedure, you will see a welcome message as shown in Exhibit 2. Click on "View Readme" if you need further information about the product, or click on "Next" to proceed with the software installation.
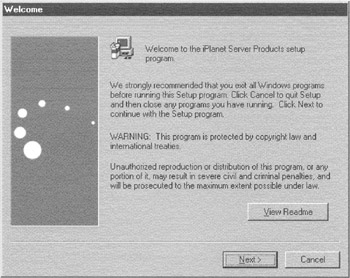
Exhibit 2: Welcome Mask to SUN ONE
The next screen shows you the license agreement, which you should read carefully. If you agree, answer with "yes." In the UNIX version you have to type in "yes" by hand; in the Win32 version you only click on the button "yes." Exhibit 3 shows the screen shot.
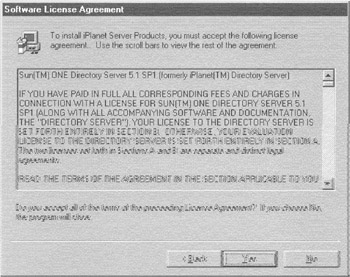
Exhibit 3: License Agreement for SUN ONE Directory Server
You then have to choose what you want to install. Because this is the first installation, choose iPlanet servers and install everything you are interested in. Exhibit 4 shows the screen shot. You could also install just the administration utility, called "iPlanet console," which provides only the administration utilities for running a remote installation. You do this if you install the directory on another machine.
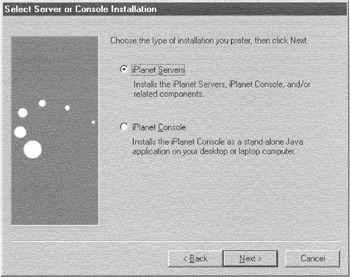
Exhibit 4: Choosing the Type of Installation
Once you choose the installation type, you should decide the location where the software will be installed. The standard installation procedure suggests a location, but you are free to change it to suit your requirements. Exhibit 5 shows the screen shot.
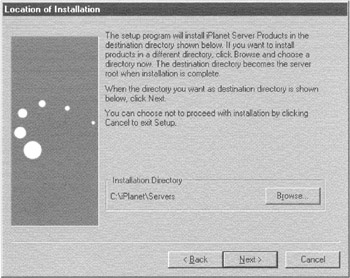
Exhibit 5: Choosing the Software Location
Next, you have to choose which software you wish to install. Exhibit 6 shows the screen shot. The first three components are needed for the directory server itself. If you have more than one instance of the directory server on the same machine you could get by without one of them. Carefully read the installation instructions delivered with the software to understand which software components you will need. There are two more interesting software components to choose from. One of these is Perl, the most comfortable language for pattern matching and fast development you will ever meet. The second is the Perl library for LDAP. Both of them are maintained and provided by Sun, so you can consider this software to be stable.
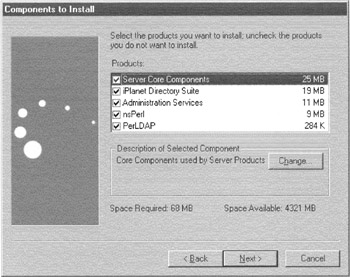
Exhibit 6: Choosing the Software to Install
If you already have installed an instance of the Sun One directory server, you might wish to administer both servers from the same console. The next mask, shown in Exhibit 7, asks whether you want to make a fresh installation or use a previously installed directory server that you could then use for administration purposes. If you already have a configuration server, fill out the answers to the questions about the port the server is listening to and the distinguished name (DN) of the administrator of this service.
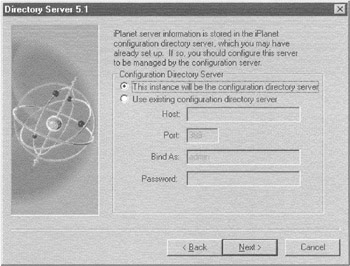
Exhibit 7: Choosing the Configuration Server
The next step is to give some information about the configuration of the directory server, including the server name, the port at which the server is listening, and the suffix of the directory server. The suffix of the directory server is also known as the root of the directory tree. Exhibit 8 shows what we put in for the example application used throughout this book.
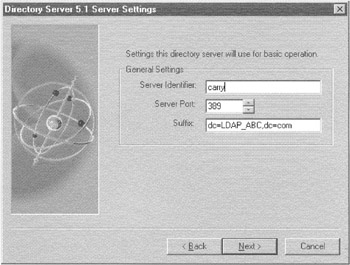
Exhibit 8: Directory Server Settings
At this point, you should configure the userID and password of the person responsible for the directory, called the "directory manager." You have to insert the password twice to confirm that you have typed it in correctly. Exhibit 9 shows a screenshot of this dialog.
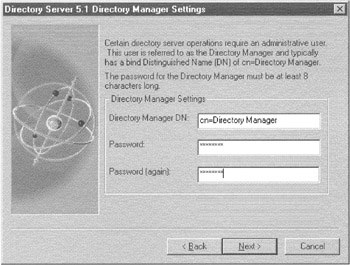
Exhibit 9: UserId and Password of the "Directory Manager"
Next, we configure the administration server. Like all servers from the Sun/Netscape alliance, such as the proxy server and the Web server, the directory server also has an administration server, reachable via the Internet, that allows the administration. In this step, we configure the port on which this administration server can be reached. Exhibit 10 shows the form that allows you to choose the port. The choice you make here is not definitive because another port number can be chosen later by changing one of the configuration files.
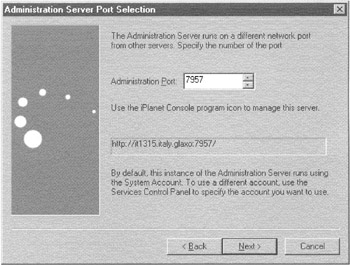
Exhibit 10: Choose the Administration Port
The last step is to confirm that all of the software components have been installed. The last mask shows the list of software that is ready to be installed. You can scroll through the list, and when you are satisfied you simply click on the install button to start the installation. After that, the administration server and the directory server will be started with the data to put in during the installation procedure. The configuration has already been done during the installation procedure. Exhibit 11 shows you the last form to confirm before installation takes place.
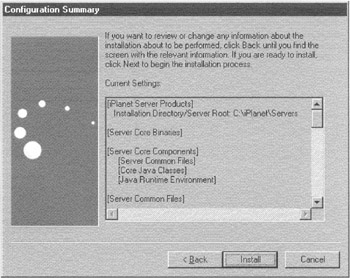
Exhibit 11: Last Confirmation before Software Installation
|
| < Day Day Up > |
|
EAN: 2147483647
Pages: 149