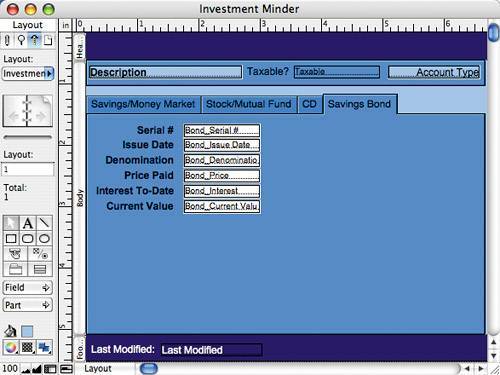
Finally, we'll place the fields and labels on the Savings Bond tab panel.
Use the Text Tool to delete the Bond_ prefix from all the savings bond fields. In addition, change the field label for Bond_Price to Price Paid and Bond_Interest to Interest To-Date.
Set the width of all six Bond fields to 1.264".
Click the Bond tab on the tab control to make it active, and drag the fields and labels into the positions shown below. Check the positions of the fields and labels to ensure that they're properly aligned with one another.
Delete the unused field labels (Account Type and Description) by selecting the labels and pressing /.
Eliminate the blank space under the tab control by dragging the Body part up until it bumps against the bottom of the tab control.