| Often seen by animators, but rarely seen by developers and web designers, the timeline is where animation takes place. Each frame of the timeline represents a frame of the movie, so as objects are placed at different positions as the frames progress, it gives the appearance of movement through time. You can see what the timeline looks like in Figure 4.1. Figure 4.1. The timeline in Flash, where animation takes place. 
The timeline contains two basic sections: the layers section and the frames section. The Layers Section If you have worked with PhotoShop or Freehand before, layers will not be a new concept. However, if layers are new to you, the basic idea is that you can put objects on different layers, which will stack over top of each other through the layer order. Layers work from top to bottom, so anything on the uppermost layer will be above objects placed on all layers beneath it. The different layer options for the timeline are outlined next and shown in Figure 4.2: Insert Layer Creates a new layer on top of the selected layer. Add Motion Guide Creates a motion guide above the selected layer and automatically associates itself with the selected layer. (You'll learn more about motion guides in Chapter 5, "Symbols and the Library.") Insert Layer Folder Creates a folder to hold layers in. It can be collapsed and expanded for a more organized timeline. Remove Layer Removes selected layer(s) or layer folder(s).
Figure 4.2. The layers section of the timeline. 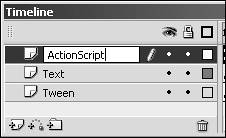
You can also choose from three more options to control some visual aspects of layers and the capability for them to be edited. Show/Hide Layers Turns everything in the layer invisible. Lock Layers Makes the layer uneditable, but objects are still visible. Show Layer as Outline Creates an outline around all objects in the layer and turns the objects themselves invisible. Objects are still editable.
You can see the icons for the preceding options at the top of the layers section. If you click these, it affects all layers. However, if you click the dots under the icon (in each layer), it affects only that layer. TIP When you click the individual layer controls, hold down the Alt key, and all layers but the selected layer will be affected.
That covers the layers side of the timeline, but remember that there are two sections, and the frames section is the most important when it comes to animation. The Frames Section As mentioned previously, the frames section is where all the animation takes place. The layers section is more for stacking shapes and objects. As you go through the chapter, you will use different types of frames, so here is a quick rundown of what they are: Keyframe A keyframe indicates change on that layer. For instance, in a movie, where action takes place, each movement is in its own keyframe. To insert a keyframe, go to Insert, Timeline, Keyframe (PCF6). Blank Keyframe Just like a normal keyframe, these frames show change in the timeline. The difference is that with blank keyframes, the change is that nothing is there anymore. To insert a blank keyframe, go to Insert, Timeline, Blank Keyframe (PCF7). Frame A frame also has data in it, but there has been no change to it from the previous frame. Frames must always follow keyframes. To insert a frame, select Insert, Timeline, Frame (PCF5). Unpopulated Frame Unpopulated frames are frames that have no changes in them from the previous frame, and the frame does not have any content in it. Unpopulated frames must follow a blank keyframe. You insert an unpopulated frame the same way you would a normal frame: Insert, Timeline, Frame (PCF5).
Also, when moving through frames, you will use the play head, which can be seen in Figure 4.3. The play head is visual representation of where in the movie you are, and the stage will change accordingly to what is in the frames where the play head is. Figure 4.3. The frames section of the timeline. 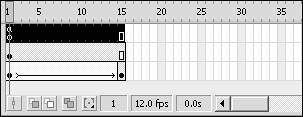
You can control the play head by dragging it along the timeline, or you can open the controller window by going to Window, Toolbars, Controller. It is shown in Figure 4.4 and works like a VCR would. Figure 4.4. Use the controller window to play, pause, and move through the timeline. 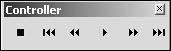
More options are available that will greatly help when you're animating. They can be found at the bottom left of the frames section and are marked in Figure 4.3. Here are what those options are, followed by a description of what they do: Center Frame Use this option to center the timeline in the view so that the selected frame will be the center. Onion Skin This option allows you to see several frames at once. Onion skinning will show previous and future frames as shadows on the stage. You can adjust how many frames forward and backward to display at once by grabbing the onion skin brackets and dragging them. As you adjust the play head, the onion skins will automatically adjust. To see what onion skinning looks like, see Figure 4.5. Figure 4.5. Using onion skins allows you to see more than one frame as shadows on the stage. 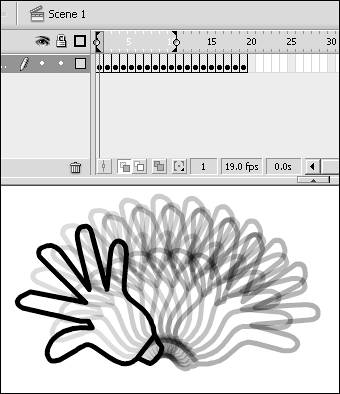
Onion Skin Outlines Similar to normal onion skinning, onion skin outlines show content on previous and future frames, but only in outline form. Edit Multiple Frames This option enables you to edit any frame within the onion skin; otherwise, although you can see other frames, you can edit only the current frame.
Just past the Modify Onion Markers option are a few fields with some information about the movie and the play head's position within it: Current Frame This is the current frame the play head resides on. Frame Rate This is the current frames-per-second (FPS) that your Flash movie is set for. The default value is 12 FPS. You can adjust this setting in the Properties Inspector. (Tip: you can also adjust this setting by double-clicking the field itself.) Elapsed Time This is the number of seconds from frame 1 to the selected frame. Because this is time based on a frame number, if you adjust the FPS setting, it will also adjust.
The final set of options can be seen in the top right of the timeline, the HH button, where the view options are. Following is a list of those options: Tiny, Small, Normal, Medium, and Large These options control the width of the frames. Short This option adjust the height of the frames and subsequently the height of the layers. Tinted Frames This option makes frames that have content in them a shade of gray. By default, this option is on. Preview This option shows a thumbnail of the content from that frame in the frame itself. You can see an example in Figure 4.6. Figure 4.6. This is what the frames look like in Preview mode. 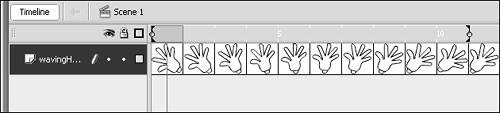
Preview in Context This option also shows a small thumbnail of the content in the frame, but it shows the content in context with the stage, as you can see in Figure 4.7. Figure 4.7. These are the same frames, but in Preview in Context mode. 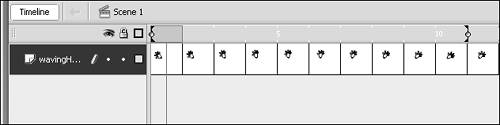
That wraps up the options for the timeline, so now let's get into some actual animation. But before we get into the ways Flash can help you animate, let's go over how real cartoonists do animations. |