Understanding Conditional Expressions
In some macros, you might want to execute some actions only under certain conditions. For example, you might want to update a record, but only if new values in the controls on a form pass validation tests. Or you might want to display or hide certain controls based on the value of other controls.
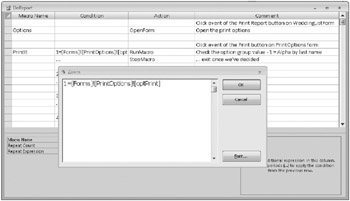
The PrintIt macro in the DoReport macro group is a good example of a macro that uses conditions to determine which action should proceed. Right-click the DoReport macro in the Navigation Pane, and then click Design View on the shortcut menu to see the Macro window. Click in the Condition column of the first line of the PrintIt macro, and press Shift+F2 to open the Zoom window, shown in Figure 18–11. (If you can’t see the Condition column, click the Conditions button in the Show/Hide group on the Design tab.)

Figure 18–11: In the Zoom window, you can see we added a condition in the DoReport macro group.
As you saw earlier, this macro is triggered by the On Click property of the Print button on the PrintOptions form. This form allows the user to print a specific report by selecting the appropriate option button and then clicking the Print button. If you look at the form in Design view (see Figure 18–10), you’ll see that the option buttons are located within an option group control on the form. Each option button sets a specific numeric value (in this case 1. for the first button, 2, for the second button, 3 for the third button, and 4. for the fourth button) in the option group, which you can test in the Condition column of a macro.
When you include a condition in a macro, Access won’t run the action on that line unless the condition evaluates to True. If you want to run a series of actions on the basis of the outcome of a test, you can enter the test in the Condition column on the first action line and enter an ellipsis (…) in the Condition column for the other actions in the series. This causes Access to evaluate the condition only once and execute additional actions (those with an ellipsis in the Condition column) if the original test evaluated to True.
In this particular example, the condition tests the value of the option group control on the form. You can reference any control on an open form by using the syntax
FORMS! formname! controlname
where formname is the name of an open form and controlname is the name of a control on that form. In this case, the direct reference is [FORMS]![PrintOptions]![optPrint]. (optPrint is the name of the option group control. You can see this in the Name property on the Other tab of the property sheet for this control.) See “Referencing Form and Report Objects” on page 919 for more details about the rules for referencing objects in Access.
| Inside Out-When to Use Brackets | If your object names do not contain any embedded blanks or other special characters, you don’t need to surround formname or controlname with brackets when you use this syntax to reference a control on a form; Access inserts the brackets as needed. |
After you understand how to refer to the value of a control on a form, you can see that the PrintIt macro tests for each of the possible values of the option group control. When it finds a match, PrintIt runs the appropriate named macro within the macro object to open the requested report and then stops. If you look at the individual report macros, you’ll see that they each run a common macro, DoReport.Cancel, to close the PrintOptions form (which isn’t needed after the user chooses a report) and then open the requested report in Print Preview and put the focus on the window that displays the report.
EAN: 2147483647
Pages: 234