Setting Up a Subscription Feed
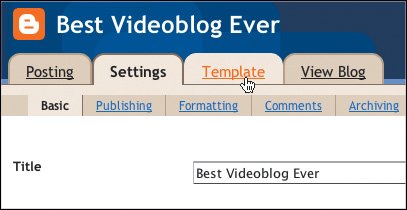
| As you may remember from Chapter 1, a vlog feed is the number one key to getting and keeping an audience because it allows viewers to subscribe to a number of videoblogs for automatic updates rather than visiting each one individually. Most blogging services provide feed for their blogs automatically, but they're not always very helpful feeds for videobloggers or vlog subscribers. For videoblogging, you need an RSS 2.0 feed with enclosures. An enclosure is simply a line of code in the feed that contains a link to the actual video file. That's important because it allows vlog subscribers who use video aggregators like FireAnt and iTunes to automatically download videos from their vlog subscriptions. If your blogging application doesn't provide this kind of feed, we recommend Feedburner, a free service. So first we'll help you attach the right feed to your vlog so people can subscribe (we'll be using Blogger). Then we'll help you publicize your fabulous new creation. Creating a Feedburner RSS FeedThe great thing about replacing your default feed with a Feedburner RSS 2.0 feed is that it makes it easy for people to view your videoand all future videos you post. Every time you update your vlog, Feedburner will notify all your subscribers via their aggregators that you've made new content available. Figure 8.1. Make the switch by opening a browser and going to http://feedburner.com. Enter your videoblog address. Make sure the "I am a podcaster" button to the right of the vlog address field is checked (podcasting and videoblogging use the same type of RSS feeds). This will ensure that a proper RSS 2.0 feed, with media enclosures, is created for your vlog. Click Next.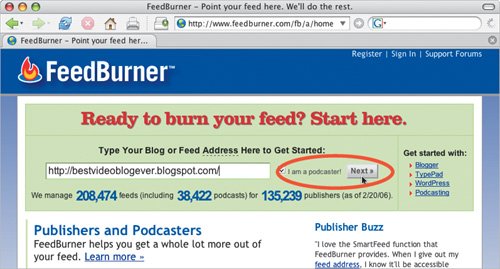 Figure 8.2. Create a Feedburner user name and password. (It's a good idea to use the same user name and password as your vlog so they are easy to remember.) Click Activate Feed.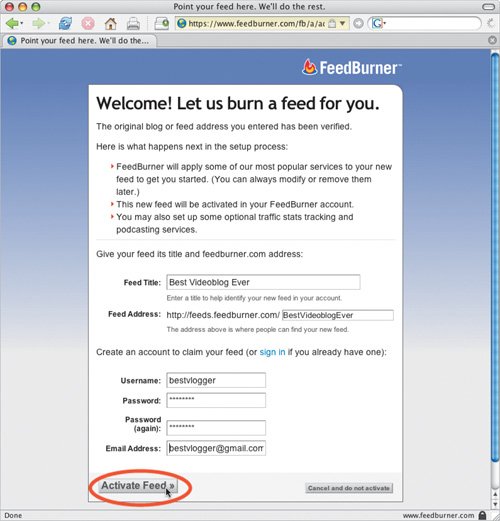 Figure 8.3. Click the link to Skip directly to feed management. Figure 8.4. In the Feed Management window, click the Publicize tab and from the list of options on the left, click Chicklet Chooser. This will get the HTML code needed to put your feed button on your sidebar.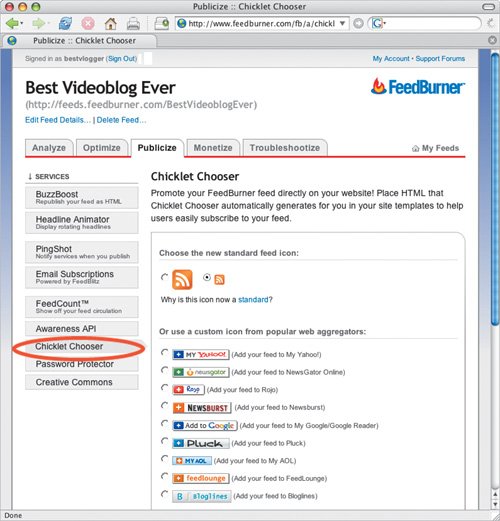 Figure 8.5. Scroll down to select and copy the code in the text field. Note In Firefox, you can press Cmd + T to open your vlog in another tab. Figure 8.6. Go back to Blogger.com and sign in. In your Blogger Dashboard, click the Change Settings gear icon.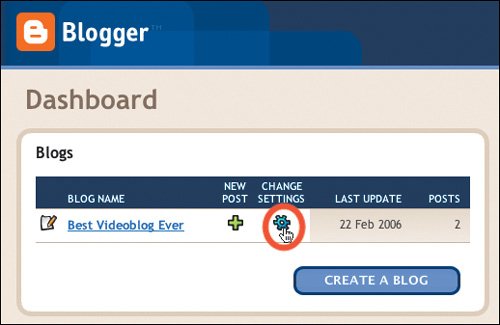 Figure 8.7. Click the Template tab. Figure 8.8. Scroll down almost to the bottom of the Template text field until you see the "I Power Blogger" code that reads:<p id="powered-by"><a href="http://www.blogger.com"><img src="http://buttons.blogger.com/bloggerbutton1.gif" alt="Powered by Blogger" /></a></p> Place your cursor immediately above that code and paste in your Feedburner code. 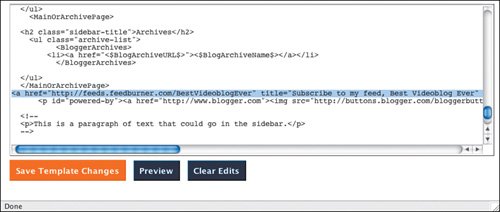 Note Sometimes feed buttons don't show up right away. If that happens, click the Refresh button on your browser. Your feed button should show up above the "I Power Blogger" button. Figure 8.9. Click the Save Template Changes button. At the top of the screen, click the blue Republish button. Finally, after your vlog has republished, click the View Blog link to see the feed button placed on your sidebar.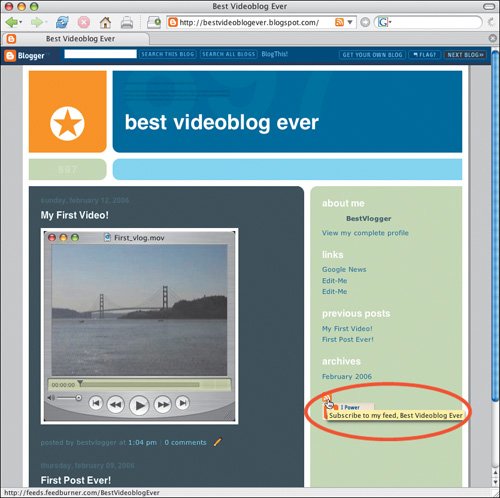 Note If you go to your Blogger Settings tab and click the Site Feed link, you will see that the default Description option is Full. This means the full text of the post will be included in your feed. Don't change this setting. If you do, the enclosures will be removed from your vlog's Feedburner feed. |
EAN: 2147483647
Pages: 81