Windows Movie Maker Compression
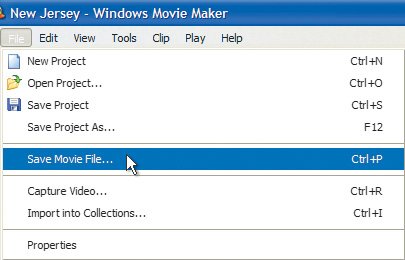
| When you compress your video in Windows Movie Maker, you'll be making a .wmv (Windows Media) file. There's a nice wizard that walks you through the process and includes a good compression preset so you don't have to enter everything by hand. See what we mean by following the steps in Figures 6.13 to 6.20. Figure 6.13. With your project open in Movie Maker, choose File > Save Movie File, or press the keyboard shortcut, Ctrl + P.
Figure 6.14. Choose My Computer as the place where you want to save your movie file. Figure 6.15. Give your file a name and click Browse.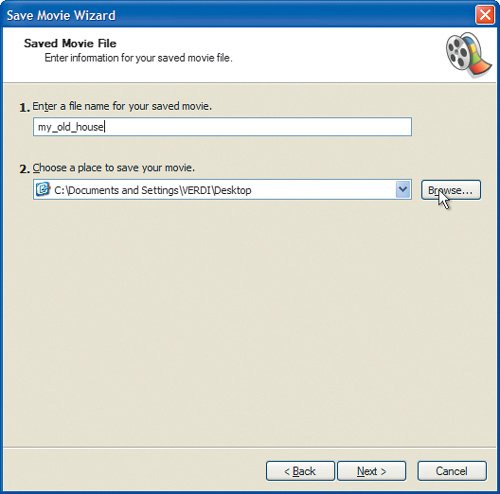 Figure 6.16. Find and select your video project folder as the destination for your compressed movie file. Click OK, and when the previous dialog reappears, click Next.
Figure 6.17. Back in the Movie Setting dialog, click Show More Choices. Figure 6.18. Select Other Settings, choose Video For Broadband (512kbps) from the pop-up menu, and click Next.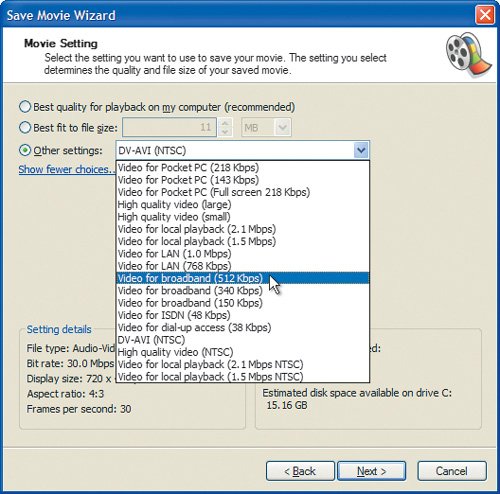 Figure 6.19. Movie Maker will now begin compressing your video. Compression time depends on the speed of your computer, but it's usually about equal to the length of your video. So a two-minute video usually takes about two minutes to compress. Figure 6.20. After the Save Movie Wizard tells you compression is completed, click Finish. Note Whether you use a PC or a Mac, remember to keep all the files on a single video project in one folder. That will make it easier to back up your project and later remove it from your hard drive to make room for new projects. |

Secrets of Videoblogging
ISBN: 0321429176
EAN: 2147483647
EAN: 2147483647
Year: 2006
Pages: 81
Pages: 81