Managing Access to Shared Files Using Offline Caching
| So far we've talked about sharing files over the network. But what happens when you need to take some files with you? How about that long coast-to-coast flight you have next weekcouldn't you use the time to work on your budget for the next fiscal year? Obviously, servers aren't portable, but you conceivably will be setting up your file server so that portable usersfor instance, those users with laptopswill be able to take work home with them, or on the road. Although end users could always manually copy the desired files directly to their laptops, save them to diskette, or burn them on a CD, it can be tough to remember to make these copies. And what happens when users have worked on the files on their laptops and reconnect to the server? Which files have changed, and which have not? This is where the Offline Files feature of Windows Server 2003 comes in handy. This feature allows the user to specify either single files or a complete folder to be copied to a PC. The Windows Server 2003 operating system manages these files and folders and synchronizes them in the background so that the user will always have the most current version available. The Offline Files feature works by reserving space on the client machine to store the offline files. By default, this local cache will not exceed more than 10% of the space on the disk. The files are not stored in a recognizable format, so you can't work with them directly. The following caching options are available:
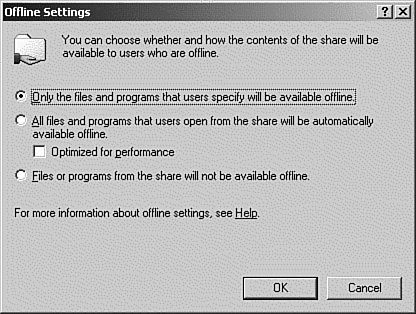
When using the automatic option, to keep the percentage of disk space used for the cache at or under 10%, the system will automatically delete the oldest files. When you're using the manual option, the cache will take as much space as it needs, potentially filling your hard drive. However, after the Offline Files feature is enabled, the end user will notice no difference in accessing the files. Even when they are offline, if they had originally accessed the file share via drive mappings or My Network Neighborhood, the same methods will seem to work. The users' view of the file location will not change. They can continue to work with the files as if they were still connected to the server. When users are working with the files, they have no idea, nor should they care whether they are working on the files locally or across the network. Using Offline Files is a two-step process. First the system administrator must verify that caching is enabled on each shared folder that she wants to allow users to use with the offline files feature (it should be enabled by default). Then the user needs to select the files and/or folders that he wants to have available to him offline. In Step by Step 4.11, we will enable caching on a file share on our Windows Server 2003 server.
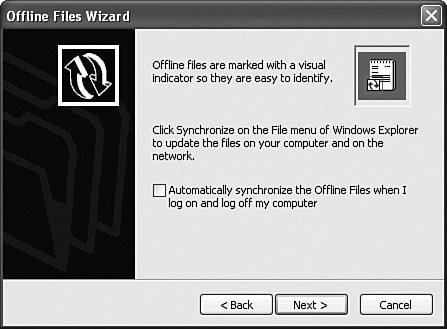
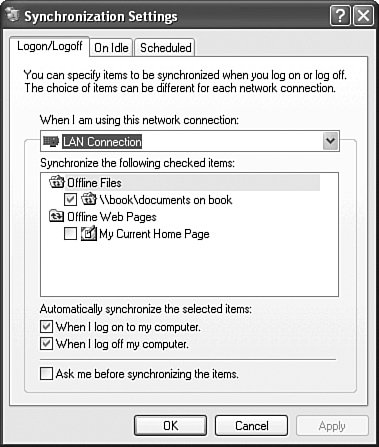
Note that the preceding steps, like most file management functions in Windows Server 2003, can be performed on local shares via My Computer, Windows Explorer, or the Shared Folders snap-in, or on remote shares via the Shared Folders snap-in. The second step of this process is to select the files that you want cached. This step is automatically performed for you if you selected the All Files and Programs That Users Open from the Share Will Be Automatically Available Offline optionwhatever files you work with will be downloaded to your cache. However, if you need to select files or folders individually, open My Computer or Windows Explorer on your workstation, right-click the files or folders, and select Make Available Offline, as shown in Figure 4.22. Figure 4.22. To manually select the file or folders that you want to have available offline, select Make Available Offline.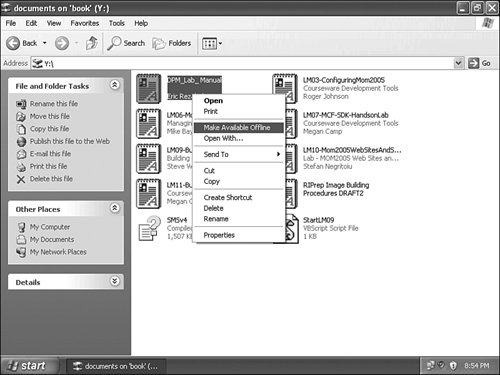 After you select a file(s) the Offline Files Wizard appears and asks you whether you want to automatically synchronize your files as you log on and off the network, as shown in Figure 4.23. Figure 4.23. The Offline Files Wizard assists you in setting up your files and synchronizing. You can tell which files are marked as Offline Files by looking in the folder where they are stored. They will be marked with the offline symbol as shown in Figure 4.24. Figure 4.24. Offline Files will be shown with a special icon.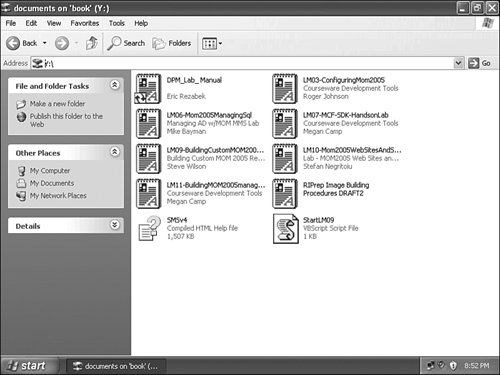 When the user is reconnected to the network, any changes made to the files while the user was offline will be automatically synchronized with the files on the network. If for some reason, the files on the network are newer than the files in the cache (if other users were working on them, for example), the user will be prompted as to which version of the file to save, or both, if you prefer. The files are kept in sync by the Synchronization Manager. The Synchronization Manager is responsible for comparing the items on the network to the items in your local cache and making sure that the most current version is available both places. Synchronization Manager can be configured to synchronize your files and folders at the following times:
You can configure Synchronization Manager separately for each resource. Note: Synchronize Anytime You can also synchronize your files anytime by selecting Tools, Synchronize from the menu of My computer or Windows Explorer. Synchronization Manager can be started by selecting Start, All Programs, Accessories, Synchronize. The Synchronization Manager and the various options available via the different tabs is shown in Figure 4.25. Figure 4.25. Synchronization Manager offers a variety of configuration settings. Note: Secure Your Files The Offline Files feature is enabled on the server by default. Important files and folders will need to be secured. |
EAN: 2147483647
Pages: 219