Transitions
Whereas filters are used to apply formatting to an object that already appears on the screen, transitions are used to affect how an object is displayed on, or disappears from, the screen. Internet Explorer supports two basic types of transitions: the blend transition and the reveal transition. Blend transitions work by fading an object into or out of visibility. Because of this functionality, the blend transition has only one argument, duration, which states how long the fade-in or fade-out cycle will take. The reveal transition uses one of several effects to hide one object and reveal another. Table 16-1 presents a list of the transition effects supported and the numeric values used to represent them in code.
Table 16-1 Transition Effects and Their Numeric Values
| Transition Effect | Numeric Code | Transition Effect | Numeric Code |
|---|---|---|---|
| box in | 0 | random dissolve | 12 |
| box out | 1 | split vertical in | 13 |
| circle in | 2 | split vertical out | 14 |
| circle out | 3 | split horizontal in | 15 |
| wipe up | 4 | split horizontal out | 16 |
| wipe down | 5 | strips left down | 17 |
| wipe right | 6 | strips left up | 18 |
| wipe left | 7 | strips right down | 19 |
| vertical blinds | 8 | strips right up | 20 |
| horizontal blinds | 9 | random bars horizontal | 21 |
| checkerboard across | 10 | random bars vertical | 22 |
| checkerboard down | 11 | random | 23 |
Code Listing 16-6 below demonstrates bringing an image onto a page with a simple dissolve transition. Figure 16-5 captures the effect in progress.
Code Listing 16-6.
<HTML> <HEAD> <TITLE>Listing 16-6</TITLE> <SCRIPT FOR="window" EVENT="onload" LANGUAGE="JavaScript"> flower.filters.item(0).apply() flower.style.visibility="visible" flower.filters.item(0).play() </SCRIPT> </HEAD> <BODY> <!-- transition 12 is "random dissolve" Change transition value for different effects --> <IMG ID="flower" SRC="flower.gif"; STYLE="visibility: hidden; filter: revealtrans(duration=2.0, transition=12)"> </BODY> </HTML> |
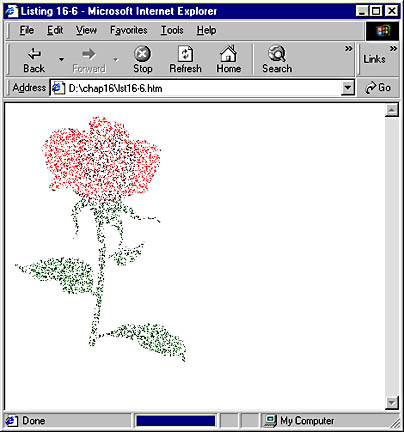
Figure 16-5. Partway through the transition of the image into visibility.
In the <IMG> tag in Code Listing 16-6, we set the image to be invisible initially (that is, we set its visibility property to hidden) because we want it to become visible over time. Also notice in the <IMG> tag that the transition is defined in the STYLE attribute as a filter. The duration argument specifies the number of seconds the transition should take to complete, and the transition argument specifies which transition to use (indicated in the previous chart by the numeric value assigned a particular transition).
When the page loads, the script block in the HEAD of the document is executed and performs three actions on the image object. Understanding this code is key to understanding transitions. For a transition to work, there must be a change in the state, or condition, of the object. In this case, the image object's initial state has been set to invisible. The first line of the script applies the filter that we defined in the <IMG> tag to the image. It does not actually execute the transition at this point because we have not yet specified the target state, which in this case is visibility. The target state is specified in the next line, which states that we want the image to become visible. The last line calls the play method, which actually executes the transition and causes the image to fade in.
Code Listing 16-7 allows the user to cycle through all 24 reveal transition effects by clicking a button at the bottom of the page. Figure 16-6 below shows one of the transitions in progress.
Code Listing 16-7.
<HTML> <HEAD> <TITLE>Listing 16-7</TITLE> <SCRIPT LANGUAGE="JavaScript"> var curVal=0; //put all the names of the reveal transitions in an array var tNames=new Array("Box In", "Box Out", "Circle In", "Circle Out", "Wipe Up", "Wipe Down", "Wipe Right", "Wipe Left", "Vertical Blinds", "Horizontal Blinds", "Checkerboard Across", "Checkerboard Down", "Random Dissolve", "Split Vertical In", "Split Vertical Out", "Split Horizontal In", "Split Horizontal Out", "Strips Left Down", "Strips Left Up", "Strips Right Down", "Strips Right Up", "Random Bars Horizontal", "Random Bars Vertical", "Random"); function nextFilter(){ ff=flower.filters.item(0) if (ff.status!=2) { flower.style.visibility="hidden" ff.transition=curVal ff.apply() flower.style.visibility="visible" ff.play() window.status="Transition " + (curVal) + " " + tNames[curVal] nextBtn.value=("Next Transition is " + tNames[curVal+1]) if (curVal==23){curVal=0} else{curVal=curVal + 1} } } </SCRIPT> </HEAD> <BODY> <IMG ID="flower" SRC="flower.gif"; STYLE="visibility: visible; filter: revealtrans(duration=2.0, transition=1)"> <P> <INPUT TYPE=button ID=nextBtn onclick="nextFilter()" VALUE="Next Transition is Box In"> </BODY> </HTML> |
Figure 16-6. One transition effect being applied to the flower image.
Each time the button is clicked, the nextFilter function is called. This function first checks the status of the transition to make sure that no other effect is in progress. If none is, the image is hidden. The transition is then changed to the variable curVal and applied to the image. Then the image is reset to visible, and the transition is played. The transition number (curVal) is incremented every time the button is clicked and loops back to 0 when it reaches the number 23. Information about the current transition is written to the status bar of the browser through the use of window.status, and information about the next transition is put into the button.
EAN: 2147483647
Pages: 128