| You can make a single button respond differently to different mouse events by placing several handlers in the button's ActionScript. You could, for example, create one action set that jumps Flash to the next scene when the user clicks and then releases the mouse button within the active button area. You could create a second action set that opens a new movie with help information in a separate window if the user clicks within the button area but then drags the pointer out of the button area before releasing the mouse button. And you could deliver yet another action if the user presses a key on the keyboard, such as jumping to a frame that displays the message "You must click the button to move to the next question." To vary a button's response to different mouse events: -
Open a new copy of the ObjectActions Template that you created earlier in this chapter (a movie with five keyframes and a stop action in Keyframe 1). -
In Keyframe 1, select the button on the Stage. -
Access the Actions-Button panel. -
From the Add menu, choose Actions > Movie Control > on . -
In the Event section of the parameters area, uncheck the Release checkbox, and check the Roll Out checkbox. -
From the Add menu, choose Actions > Movie Control > goto . -
In the parameters area, do the following: -
Choose the radio button named Go to and Stop. -
From the Type pop-up menu, choose Frame Number. -
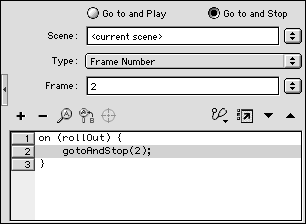
Enter 2 in the Frame field. Flash adds gotoAndStop (2) ; to Line 2 in the Script pane between the curly braces of the event handler (Figure 13.26). Figure 13.26. This set of actions tells Flash to jump to Frame 2 if the user rolls the pointer into and then out of the active button area.  -
In the Script pane, select the closing curly brace (Line 3). -
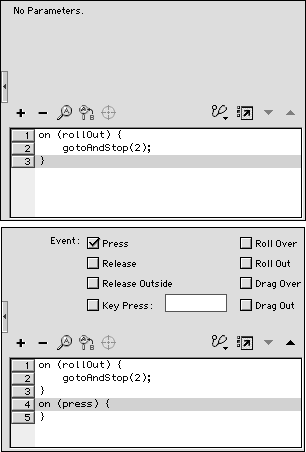
Repeat steps 4 and 5, this time choosing the mouse event Press . Flash adds a second handler on (press) and a second set of curly bracesto the bottom of the Script pane (Figure 13.27). Figure 13.27. To add a second set of actions with a different mouse-event trigger, in the Script pane, select the closing curly brace of the first handler (top). From the Add menu, choose Actions > Movie Control > on, and select a new event (bottom).  -
With on (press) selected, from the Ad menu, choose Actions > Movie Control > goto . -
In the parameters area, do the following: -
Choose the radio button named Go to and Stop. -
From the Type pop-up menu, choose Frame Number. -
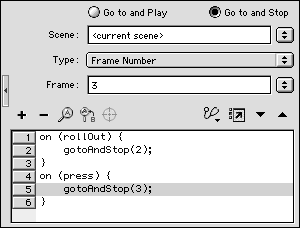
Enter 3 in the Frame field. Flash adds gotoAndStop (3); to Line 5 in the Script pane, placing the action between the second set of curly braces (Figure 13.28). Figure 13.28. The second set of actions in the Script pane tells Flash to jump to Frame 3 if the user clicks within the active button area.  You're ready to see the button in action. -
Choose Control > Test Movie. Flash exports the movie and opens it in Flash Player. If you move the mouse so that the pointer rolls into and then out of the active button area, Flash jumps to Frame 2. If you click within the active button area, Flash immediately jumps to Frame 3, even before you release the mouse button.  Tip Tip
 |


