| A button is a Flash movie clip with different frames that represent the button in all its possible states. The button symbol has three button-state framesUp, Over, Downplus one frame that defines the active button area. To create the most basic button symbol, choose a simple shape and use it for each frame; change its color or add or modify internal elements for the various states. When you complete all four frames, your button is ready to use. Return to document-editing mode, and drag an instance of the button symbol from the Library panel to the Stage. To create a button symbol 1. | Open a Flash document to which you want to add buttons.
| 2. | Choose Insert > New Symbol, or press  -F8 (Mac) or Ctrl-F8 (Windows) (Figure 12.1). -F8 (Mac) or Ctrl-F8 (Windows) (Figure 12.1).
Figure 12.1. Choosing Insert > New Symbol is the first step in creating a button. 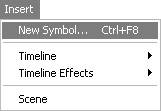
The Create New Symbol dialog appears.
| 3. | Type a name in the Name field (for example, MyBasicButton), choose Button in the Behavior section, and click OK (Figure 12.2).
Figure 12.2. To make a button, create a new symbol and assign it Button behavior in the Create New Symbol dialog. You can also name the button there. 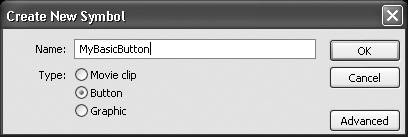
Flash creates a new symbol in the Library panel and returns you to the Timeline and Stage in symbol-editing mode. The Timeline for a button symbol contains the four frames that you need to define the button: Up, Over, Down, and Hit.
By default, the Up frame contains a keyframe (Figure 12.3). You must add keyframes to the Over, Down, and Hit frames and place the graphic elements in each frame of the button. To give users feedback about the buttonso they can tell when they're on a live button and sense the difference when they click ituse a different graphic in each frame.
Figure 12.3. The Timeline for every button symbol contains four frames: Up, Over, Down, and Hit. Flash automatically puts a keyframe in the Up frame of a new button symbol. 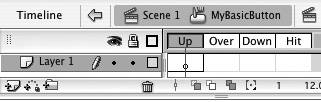
|
To create the Up state 1. | Using the file from the preceding task, in the Timeline, select the Up frame.
| 2. | On the Stage, create a new graphic or place a graphic symbol (Figure 12.4).
Figure 12.4. When a button is waiting for your viewer to notice and interact with it, Flash displays the contents of the Up frame. 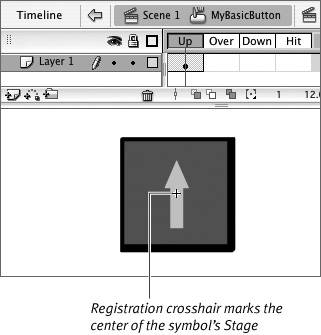
This graphic element becomes the button as it's sitting onstage in your movie, waiting for someone to click it. The crosshair in the middle of the Stage in symbol-editing mode will become both the center point of the symbol and the point for registering the symbol in document-editing mode.
|
To create the Over state 1. | Using the file from the preceding task, in the Timeline, select the Over frame.
| 2. | Choose Insert > Timeline > Keyframe.
Flash inserts a keyframe that duplicates the contents of the Up keyframe. Now you can make minor changes in the Up graphic to convert it to an Over graphic. Enlarge an element within the button, for example (Figure 12.5). Duplicating the preceding keyframe makes it easy to align all your button elements so they don't appear to jump around as they change states.
Figure 12.5. When the viewer's pointer rolls (or pauses) over the button, Flash displays the contents of the Over frame. 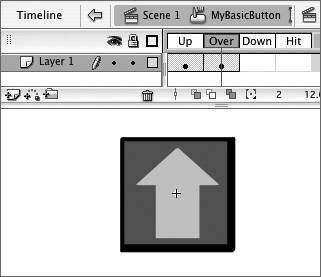
|
To create the Down state 1. | Using the file from the preceding task, in the Timeline, select the Down frame.
| 2. | Choose Insert > Timeline > Keyframe.
Flash inserts a keyframe that duplicates the contents of the Over keyframe. Now you can make minor changes to convert the Over graphic to a Down graphic. Change the button color, for example, and reverse the shadow effect so the button looks indented (Figure 12.6).
Figure 12.6. When the viewer clicks the button, Flash displays the contents of the Down frame. 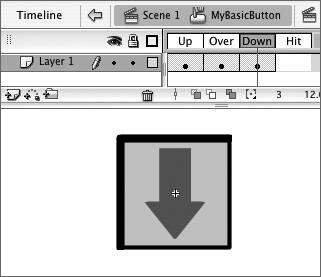
After you create graphics for the three states of your button, you need to define the active area of the button.
|
To create the Hit state 1. | Using the file from the preceding task, in the Timeline, select the Hit frame.
| 2. | Choose Insert > Timeline > Keyframe to duplicate the contents of the Down keyframe.
When you use a graphic with the same shape and size for all three phases of your button, you can safely use a copy of any previous frame as the Hit-frame graphic.
| 3. | If you want, use the paint bucket and ink bottle tools to fill the Hit-frame graphic with a single color (Figure 12.7).
Figure 12.7. The Hit-frame graphic doesn't need to be a fully detailed image of the button in any state; it just needs to be a silhouette of the button shape. Flash uses that shape to define the active button area. This Hit frame contains a copy of the Down frame that has been filled with dark gray. 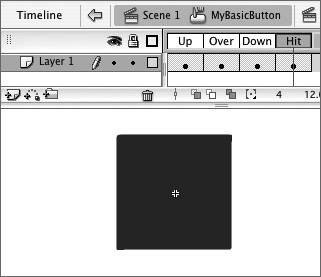
This step isn't required, but it helps remind you that this graphic isn't the one that viewers of your movie will see.
|
4. | Choose Edit > Edit Document, or click the Back button in the Edit Bar.
Flash returns you to the main Timeline. Now you can use the button symbol in your movie just as you would use any other symbol.
|
 Tip Tip
If you use a copy of the Up, Over, or Down graphic in the Hit frame, try enlarging that copy slightly. Using a larger image ensures that users activate the button easily as soon as they get near it. To enlarge the graphic by a small amount quickly, select the graphic. Choose Modify > Shape > Expand Fill. In the Expand Fill dialog, enter a small value (say, 2 pixels). Choose Expand, and click OK.
The Mystery of Hit-Frame Graphics Although it never appears in a Flash movie, the Hit frame's graphic content is vital to a button's operation. The sole purpose of the Hit-frame graphic is to define the button's boundaries. This graphic doesn't need to be detailed; it's just a silhouette that defines the button shape. Any fill or line in the Hit frame becomes an active part of the button. During playback, when the viewer moves the pointer into that area, the Over frame of the button appears; when the user clicks that area, the Down frame appears. For the clearest, most user-friendly buttons, make sure your Hit-frame graphic is large enough to cover all the graphics in the first three frames of the button. To be safe, make your Hit-frame graphic a little larger than the other graphics. If the Up, Over, and Down states of your button contain something delicate, such as type or a line drawing, don't use the Up, Over, and Down images for the Hit frame. Make the Hit-frame graphic a geometric shapesay, a filled rectangle or ovalthat completely covers the Up, Over, and Down graphics. That way, your viewers won't have to position the pointer directly over a letter form or line to activate the button. |
To place the newly created button in your movie - Continuing with the file from the preceding task, drag an instance of the button MyBasicButton from the Library panel to the Stage.
You can modify the instance to change its size, rotation, and color. (For more information on modifying symbol instances, see Chapter 7.)
Tips To create a consistent look on a Web site, you may want to use a set of buttons over and over. You can even reuse buttons in several projects with only slight changes. To save time, devote one whole document to buttons, and always create your button symbols there. Then you can copy a button from this master button file to your current Flash document and tweak the button there. Always fill your Hit-frame silhouette with the same colorsay, neon blue or another bright color that you won't use elsewhere in your movie. That way, the silhouette becomes another visual cue that you're in the Hit frame of a button, in symbol-editing mode. You can preview the Up, Over, and Down states of your button by selecting the button in the Library panel and then clicking the Play button in the preview window. Flash displays each frame in turn. Choose Control > Enable Simple Buttons to evoke the different states for a button instance on the Stage in authoring mode. Flash displays the Up, Over, and Down states as you move the pointer over the button and click. Remember, with buttons enabled, you can't select them or work with them. To turn off Enable Simple Button mode, choose Control > Enable Simple Buttons again.
|