| The last process I'll demonstrate for working with databases is how to retrieve data from an established database. While you'll still use the mysql_db_query() function, retrieving data is slightly different than inserting data in that you have to assign the retrieved information to a variable in order to make use of it. I'll go through this one step at a time. The easiest query to read data from a table is: $Query = "SELECT * from $TableName"; The asterisk is the equivalent of saying everything (so this query states "select everything from $TableName"). This four-word statement will frequently be sufficient for data retrieval. However, you could, in our example, limit the query by writing SELECT FirstName, Comments from $TableName. This query requests that only the information from those two columns ( FirstName and Comments ) be gathered. Another way to restrict your query is to write something like SELECT * from $Tablename where (FirstName='Larry'). Here you want the information from every column in the table, but only from the rows where the FirstName column is equal to Larry. These are good examples of how SQL uses only a few terms effectively and flexibly. The main difference in retrieving data from a database as opposed to inserting data into a database is that you need to handle the query differently. I prefer to assign the results of the query to a variable: $Result = mysql_db_query ($DBName, $Query, $Link); In layman's terms, this variable now knows what the result of the query is. In order to access multiple rows of information retrieved, you should run the $Result variable through a loop. while ($Row = mysql_fetch_array ($Result)) { statements; } With each iteration of the loop, the next row of information from the query (stored in $Result) will be turned into an array called $Row. This process will continue until there are no more rows of information to be found. The best way to comprehend this system is to try it out, so now you'll write a script that reads the information stored in the Feedback table (you may want to run through form.html a couple more times to build up the table). To retrieve data from a table: -
Create a new PHP document in your text editor. -
Begin with the standard HTML header (Script 11.5). Script 11.5. The SQL query for retrieving all data from a table is quite simple, but in order for PHP to access every item, you must loop through the results one row at a time. 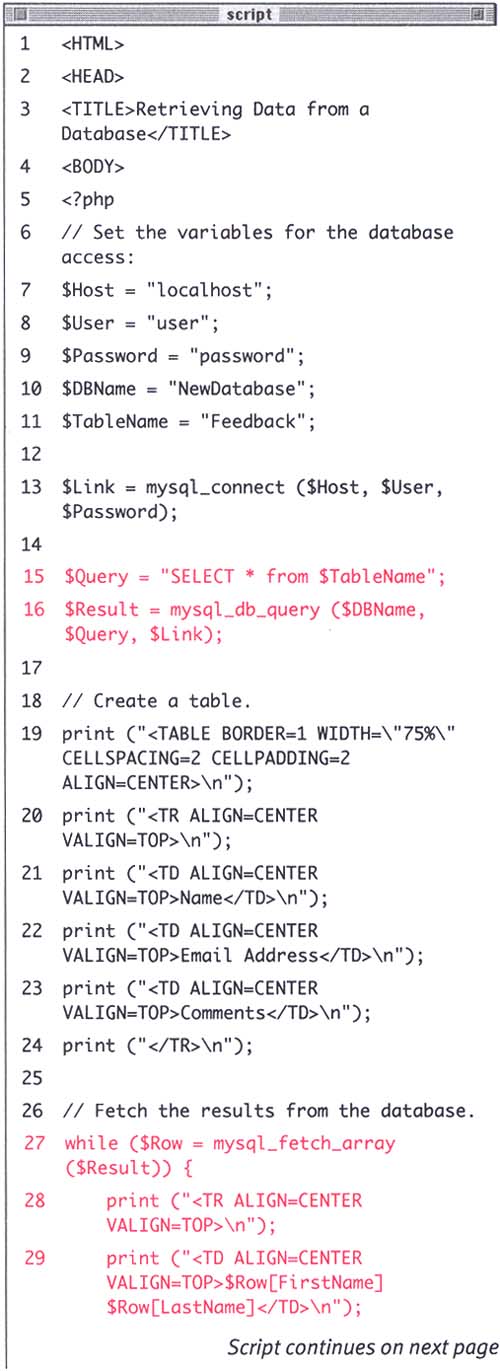 <HTML><HEAD><TITLE>Retrieving Data from a Database</TITLE><BODY> -
Start the PHP section of the page and set the variables for the database . <?php $Host = "localhost"; $User = "user"; $Password = "password"; $DBName = "NewDatabase"; $TableName = "Feedback";
Figure . 
-
Connect to the database, write, and execute the query. $Link = mysql_connect ($Host, $User, $Password); $Query = "SELECT * from $TableName"; $Result = mysql_db_query ($Query, $Link); -
The query is straightforward and very useful. Then, as I indicated, earlier, the results of the query will be stored in a variable, which will be looped later in the script. -
Start an HTML table to display the results of the query. print ("<TABLE BORDER=1 WIDTH=\i "75%\i " CELLSPACING=2 CELLPADDING=2 ALIGN=CENTER>\n"); print ("<TR ALIGN=CENTER VALIGN=TOP>\n"); print ("<TD ALIGN=CENTER VALIGN=TOP>Name</TD>\n"); print ("<TD ALIGN=CENTER VALIGN=TOP>Email Address</TD>\n"); print ("<TD ALIGN=CENTER VALIGN=TOP>Comments</TD>\n"); print ("</TR>\n"); Since you are retrieving information from a table and displaying it in an HTML form, it makes sense to create an HTML table to improve the appearance of the data. -
Create a loop that retrieves each row from the database until there are no more rows. while ($Row = mysql_fetch_array ($Result)) { What this loop is doing is setting the vari-able $Row to an array comprised of the first table row in $Result. The loop will then execute the following commands (step 7). Once the loop gets back to the beginning, it will assign the next row, if it exists. It will continue to do this until there are no more rows of information to be obtained. -
Print out the database information in the HTML table. print ("<TR ALIGN=CENTER VALIGN=TOP>\n"; print ("<TD ALIGN=CENTER VALIGN=TOP>$Row[FirstName] $Row[LastName]</TD>\n"); print ("<TD ALIGN=CENTER VALIGN=TOP>$Row[EmailAddress] </TD>\n"); print ("<TD ALIGN=CENTER VALIGN=TOP>$Row[Comments] </TD>\n"); Because the mysql_fetch_array() function was used, you can refer to each individual column in the row as you would any other array. The array's keys are the names of the columns from the table, hence, FirstName, LastName, EmailAddress, and Comments (there's no need to print out the id ). -
Close the HTML row and close the while loop. print ("</TR>\n"); } -
Just to make sure that it is clear, this loop will assign a row of table data to the $Row array, then print out an HTML table row. -
Close the MySQL link, close the HTML table, then close the PHP section, and the HTML page itself. mysql_close ($Link); print ("</TABLE>\n"); ?></BODY></HTML> -
Save your script as DisplayDB.php, upload it to the server, and test it in your Web browser (Figure 11.6). Figure 11.6. Being able to pull out data from a database and create a dynamic Web page is a great use of PHP and something you'll never be able to accomplish with HTML alone.  |