| Once you have successfully connected to and selected a database, you can start performing queries. These queries can be as basic as inserts, updates, and deletions or as involved as complex joins returning numerous rows. In any case, the PHP function for executing a query is mysql_query(): $result = mysql_query($query);
Organizing Your Documents I introduced the concept of site structure back in Chapter 3 when developing the first Web application. Now that I'll begin using a database connection script, the topic is more important. Should the database connectivity information (username, password, host, and database) fall into malicious hands, it could be used to steal your information or wreak havoc upon the database as a whole. Therefore, you cannot keep a script like mysql_connect.php too secure. The most important recommendation for securing such a file is to store it outside of the Web documents directory. If, for example, the html folder in Figure 7.2 is the root of the Web directory (in other words, the URL www.DMCInsights.com leads there), then not storing mysql_connect.php anywhere within the html directory means it will never be accessible via the Web browser. Granted, the source code of PHP scripts is not viewable from the Web browser (only the data sent to the browser by the script is), but you can never be too careful. Secondarily, I would recommend using a .php extension for your connection scripts. A properly configured and working server will execute rather than display code in such a file. Conversely, if you use just .inc as your extension, that page's contents would be displayed in the Web browser if accessed directly. |
For simple queries like INSERT, UPDATE, DELETE, etc. (which do not return records), the $result variable will be either trUE or FALSE depending upon whether the query executed successfully. For complex queries that do return records (SELECT, SHOW, DESCRIBE, and EXPLAIN), the $result variable will be a resource link to the results of the query if it worked or be FALSE if it did not. One final, albeit optional, step in your script would be to close the existing MySQL connection once you're finished with it: mysql_close();
This function is not required, because PHP will automatically close the connection at the end of a script, but it does make for good programming form to incorporate it. To demonstrate this process, I'll write another registration script like the one from Chapter 3 (refer to Script 3.13). In this version, the user's information will actually be entered into the users table of the sitename database. To execute simple queries 1. | Create a new PHP script in your text editor (Script 7.3).
<?php # Script 7.3 - register.php $page_title = 'Register'; include ('./includes/header.html');
Script 7.3. The registration script adds a record to the database. 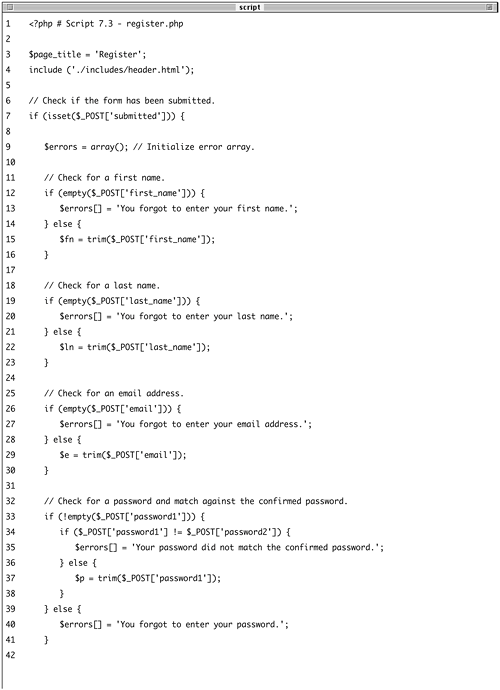 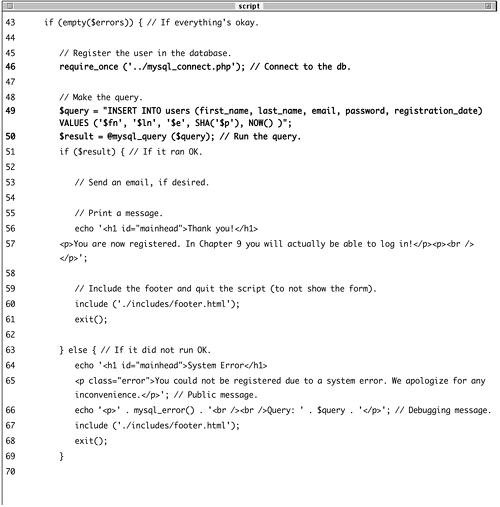 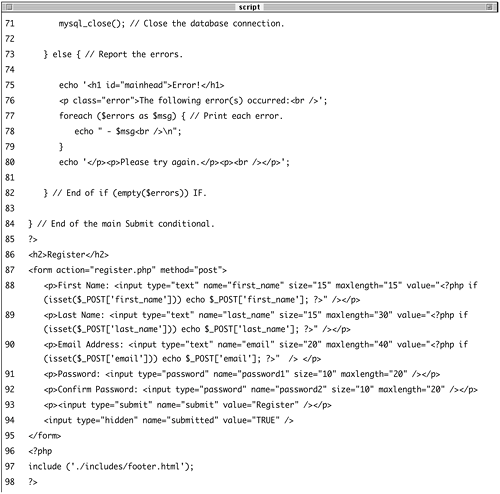
Although most of the script will be similar to register.php from Chapter 3, I'll write it from scratch as a refresher.
| 2. | Create the submission conditional and initialize the $errors array.
if (isset($_POST['submitted'])) { $errors = array();
This script will both display and handle the HTML form. This conditional will check whether or not to process the form. The $errors variable is initialized so that no warnings are created when I build upon it later. It will be used as it was in Chapter 3.
| 3. | Validate the first name.
if (empty($_POST['first_name'])) { $errors[] = 'You forgot to enter  your first name.'; } else { $fn = trim($_POST['first_name']); } your first name.'; } else { $fn = trim($_POST['first_name']); }
As in the previous examples, the empty() function is used as a minimal way of ensuring that a text field was filled out. If the first name field was not filled out, an error message is added to the $errors array. Otherwise, $fn is set to the submitted value, after trimming off any extraneous spaces. By using this new variablewhich is obviously short for first_nameI make it syntactically easier to write my query later.
| 4. | Validate the last name and email address.
if (empty($_POST['last_name'])) { $errors[] = 'You forgot to enter  your last name.'; } else { $ln = trim($_POST['last_name']); } if (empty($_POST['email'])) { $errors[] = 'You forgot to enter your last name.'; } else { $ln = trim($_POST['last_name']); } if (empty($_POST['email'])) { $errors[] = 'You forgot to enter  your email address.'; } else { $e = trim($_POST['email']); } your email address.'; } else { $e = trim($_POST['email']); }
These lines are syntactically the same as those validating the first name field. In both cases a new variable will be created, assuming that the minimal validation was passed.
| 5. | Validate the password.
if (!empty($_POST['password1'])) { if ($_POST['password1'] != $_POST  ['password2]) { $errors[] = 'Your password did ['password2]) { $errors[] = 'Your password did  not match the confirmed not match the confirmed  password.'; } else { $p = trim($_POST['password1']); } } else { $errors[] = 'You forgot to enter password.'; } else { $p = trim($_POST['password1']); } } else { $errors[] = 'You forgot to enter  your password.'; } your password.'; }
To validate the password I need to check the password1 input for a value and then confirm that the password1 value matches the password2 value (so the password and confirmed password are the same).
| 6. | Check if it's OK to register the user.
if (empty($errors)) {
If the submitted data passed all of the conditions, this condition will be trUE and it's safe to proceed. If not, then the appropriate error messages should be printed and the user given another opportunity to register.
| 7. | Add the user to the database.
require_once ('../mysql_connect.  php); $query = "INSERT INTO users php); $query = "INSERT INTO users  (first_name, last_name, email, (first_name, last_name, email,  password, registration_date) password, registration_date)  VALUES ('$fn, '$ln', '$e', VALUES ('$fn, '$ln', '$e',  SHA('$p), NOW() )"; $result = @mysql_query ($query); SHA('$p), NOW() )"; $result = @mysql_query ($query);
The first line of code will insert the contents of the mysql_connect.php file into this script, thereby creating a connection to MySQL and selecting the database. You may need to change the reference to the location of the file as it is on your server.
The query itself is similar to those demonstrated in Chapter 4. The SHA() function is used to encrypt the password, and NOW() is used to set the registration date as this moment.
After assigning the query to a variable, it is run through the mysql_query() function, which sends the SQL command to the MySQL database. As in the mysql_connect.php script, the mysql_query() call is preceded by @ in order to suppress any ugly errors. If a problem occurs, the error will be handled more directly in the next step.
| 8. | Report on the success of the registration.
if ($result) { echo '<h1 >Thank you!  </h1> <p>You are now registered. </h1> <p>You are now registered.  In Chapter 9 you will actually In Chapter 9 you will actually  be able to log in!</p><p> be able to log in!</p><p>  <br /></p>'; include ('./includes/footer.html'); exit(); } else { echo '<h1 >System <br /></p>'; include ('./includes/footer.html'); exit(); } else { echo '<h1 >System  Error</h1> <p >You could not be Error</h1> <p >You could not be  registered due to a system registered due to a system  error. We apologize for any error. We apologize for any  inconvenience.</p>'; echo '<p>' . mysql_error() inconvenience.</p>'; echo '<p>' . mysql_error()  . '<br /><br />Query: ' . $query . '<br /><br />Query: ' . $query  . '</p>'; include ('./includes/footer.html'); exit(); } . '</p>'; include ('./includes/footer.html'); exit(); }
The $result variable, which is assigned the value returned by mysql_query(), can be used in a conditional to indicate the successful operation of the query. In this example, you could also save yourself a line of code by writing the conditional as
if (@mysql_query ($query)) {
If $result is trUE, then a message is displayed, the footer is included, and the script is halted (using exit()). If I didn't include the footer here and exit the script, then the registration form would be displayed again. You could also send an email upon successful registration, as I had in Chapter 3.
If $result is FALSE, error messages are printed. For debugging purposes, the error messages will include both the error spit out by MySQL (thanks to the mysql_error() function) and the query that was run. Again, the footer is included and the page's execution is halted so that the form is not redisplayed.
| 9. | Close the database connection.
mysql_close();
This isn't required but is a good policy.
| 10. | Print out any error messages and close the submit conditional.
} else { echo '<h1 >Error!  </h1> <p >The following </h1> <p >The following  error(s) occurred:<br />'; foreach ($errors as $msg) { echo " - $msg<br />\n"; } echo '</p><p>Please try again. error(s) occurred:<br />'; foreach ($errors as $msg) { echo " - $msg<br />\n"; } echo '</p><p>Please try again.  </p><p><br /></p>'; } } </p><p><br /></p>'; } }
The else clause is invoked if there were any errors. In that case, all of the errors are displayed using a foreach loop, exactly as in Chapter 3.
The final closing curly brace closes the main submit conditional. In Chapter 3, the main conditional was an if-else, so that either the form was displayed or it was handled. In order for the form to be sticky (again, see Chapter 3), a different structure is used here.
| 11. | Close the PHP code and begin the HTML form.
?> <h2>Register</h2> <form action="register.php"  method="post> <p>First Name: <input type="text" method="post> <p>First Name: <input type="text"  name="first_name size="15" name="first_name size="15"  maxlength="15 value="<?phpif maxlength="15 value="<?phpif  (isset($_POST['first_name])) (isset($_POST['first_name]))  echo $_POST['first_name]; echo $_POST['first_name];  ?>" /></p> <p>Last Name: <input type="text" ?>" /></p> <p>Last Name: <input type="text"  name="last_name size="15" name="last_name size="15"  maxlength="30 value="<?php if maxlength="30 value="<?php if  (isset($_POST['last_name])) (isset($_POST['last_name]))  echo $_POST['last_name]; echo $_POST['last_name];  ?>" /></p> ?>" /></p>
The form itself is nearly identical to its brethren in Chapter 3, although I have broken the name into separate first and last inputs and made the text fields sticky.
Also, I would strongly recommend that you use the same name for your form inputs as the corresponding column in the database where that value will be stored. Further, you should set the maximum input length in the form equal to the maximum column length in the database. Both of these habits help to minimize errors.
| 12. | Complete the HTML form.
<p>Email Address: <input  type="text name="email" type="text name="email"  size="20 maxlength="40" size="20 maxlength="40"  value="<?php if (isset($_POST value="<?php if (isset($_POST  ['email])) echo $_POST ['email])) echo $_POST  ['email]; ?>" /> </p> <p>Password: <input ['email]; ?>" /> </p> <p>Password: <input  type="password name= type="password name=  "password1 size="10" "password1 size="10"  maxlength="20 /></p> <p>Confirm Password: <input maxlength="20 /></p> <p>Confirm Password: <input  type="password name= type="password name=  "password2 size="10" "password2 size="10"  maxlength="20 /></p> <p><input type="submit" name= maxlength="20 /></p> <p><input type="submit" name=  "submit value="Register" "submit value="Register"  /></p> <input type="hidden" name= /></p> <input type="hidden" name=  "submitted value="TRUE" /> </form> "submitted value="TRUE" /> </form>
Again, most of this form is exactly as it was in Chapter 3. As a side note, I don't need to follow my maxlength recommendation (from Step 11) with the password inputs, because they will be encrypted with SHA(), which always creates a string 40 characters long.
| 13. | Complete the page using the HTML footer.
<?php include ('./includes/footer.html'); ?>
| 14. | Save the file as register.php, upload to your Web server in the same directory as index.php, and test the file by running the script in your Web browser (Figures 7.6, 7.7, and 7.8).
Figure 7.6. The registration form. 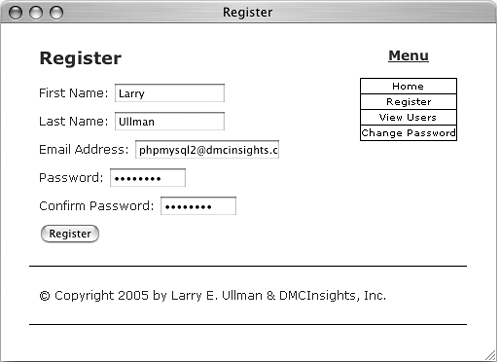
Figure 7.7. If the user could be registered in the database, this message is displayed. 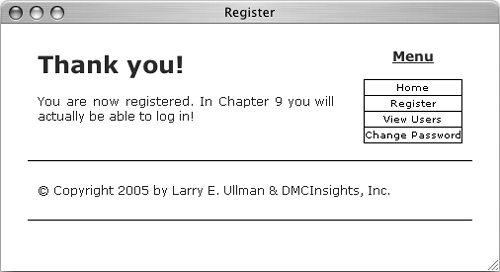
Figure 7.8. Any MySQL errors caused by the query will be printed, as will the query that was used. 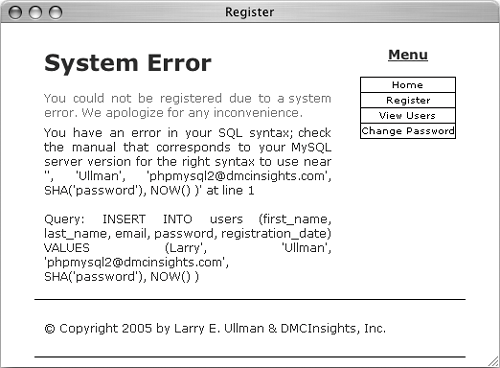
|
 Tips Tips
After running the script, you can always ensure that it worked by using the mysql client to view the values in the table. As you saw in Chapter 6, there are many ways of handling errors. In these scripts, the mysql_error() function will be called and the query will be printed, should the query not successfully run. These steps are only for easier debugging and shouldn't be used in a live site. You should not end your queries with a semicolon in PHP, as you did when using the mysql client. When working with MySQL, this is a common, albeit harmless, mistake to make. When working with other database applications (Oracle, for one), doing so will make your queries unusable. The mysql_query() function returns TRUE if the query could be executed on the database. This does not necessarily mean that the result of the query is what you were expecting. Later scripts will demonstrate how to more accurately gauge the success of a query. Remember that the best method of debugging PHP scripts that interact with MySQL is to use the mysql_error() function, have PHP print out your query, and, if still confused, run the query through the mysql client or a similar tool. You are not necessarily obligated to create a $query variable as I tend to do (you could directly insert your query text into mysql_query()). However, as the construction of your queries becomes more complex, using a variable will be the only option. Practically any query you would run in the mysql client can also be executed using mysql_query().
|


 your first name.'; } else { $fn = trim($_POST['first_name']); }
  ['password2]) { $errors[] = 'Your password did


 Tips
Tips