The Dreamweaver Environment
Macromedia Dreamweaver is a powerful website development tool. Despite all its powerful features, it’s also surprisingly user-friendly. (After struggling to learn Photoshop, you’ll probably find Dreamweaver a nice change of pace.)
Dreamweaver contains an intuitive interface for creating professional-looking websites quickly. The program also features several programming tools that allow you to design data-driven web-based applications.
-
The first time you fire up Dreamweaver, it’ll ask you if you wish to use a Design or Code layout. For our purposes, select the Design layout.
The Design layout allows users to work in a WYSIWYG environment.
Note A WYSIWYG (pronounced WIZ-zee-wig) application allows users to see on their monitor exactly what their document will look like when viewed in its final form. In Dreamweaver, what you type on the Design layout is a WYSIWYG display of the web page.
Tip If you accidentally select the Code layout, don’t worry. You can decide which layout you wish to use once you are in Dreamweaver. Once you start a new page or open an existing HTML page (which you’ll learn to do in a moment), go to Window ▶Workspace Layout in the menu bar. A submenu displays. Here, you can select the Design layout.
You can also select the Dual Screen item from this submenu. This allows you to view both the Designer and Code layouts at the same time.After selecting the Design layout, a menu screen displays, as shown in Figure 9-1.
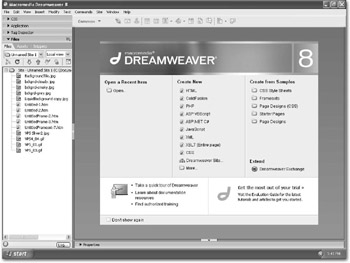
Figure 9-1: Viewing the Dreamweaver main menu -
Select the Open folder (from the Open a Recent Item column). An Open dialog box displays.
-
Select the bing_home.html file you created in Chapter 7.
-
Press the Open button. The bing_home.html file opens within your Dreamweaver environment.
Note You can access the bing_home.html file from the Chapter 9 folder of the downloadable files available at www.wordware.com/files/.
Exploring the Dreamweaver Environment
The Dreamweaver Design layout screen (displayed in Figure 9-2) is fairly standard looking. Common commands are accessible from a menu bar at the top of the screen. In the middle of your screen is the Design window, where you can add text, images, tables, and other elements.
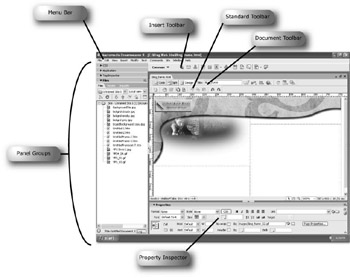
Figure 9-2: Looking at the Dreamweaver environment
There are a couple areas that you may not be familiar with, such as the Properties inspector and the panel groups. Let’s take a look at these and other areas of the Dreamweaver environment.
| Tip | If you don’t see some of these toolbars, select View ▶Toolbars from the menu bar. A submenu displays. Select the toolbar you wish to view from the submenu. This item should have a check mark next to it, and will now display within Dreamweaver. |
The Document Toolbar
You’ll find Dreamweaver’s Document toolbar above the Document window (where your WYSIWYG Design window displays). The Document toolbar contains such items as Code, Split, and Design, as shown in Figure 9-3.
![]()
Figure 9-3: Working with the Document toolbar
The following summarizes the options on the Document toolbar:
-
Code: Displays the Code layout, where users may view and work directly with the web page’s HTML code.
-
Split: Displays both the Code and Design layouts in a split screen, so users can view both the Code layout and the Design layout.
-
Design: Displays the Design layout, where users may view and work in a WYSIWYG environment.
-
Title: Allows users to define the title for the page. This title appears in the title bar of the web browser when the web page is viewed.
-
No Browser/Check Errors: Provides options for checking the compatibility of different web browsers with your web page.
-
File Management: Provides file management options for web pages, such as uploading pages to your web server.
-
Preview in Browser: Allows users to preview web pages in different web browsers.
-
Refresh Design View: Refreshes the web page. This is necessary in order to see any changes you make to the web page.
-
View Options: Allows users to define settings for the current view, such as viewing rulers or grids.
-
Visual Aids: Allows users to show or hide areas of the layout, such as table borders.
The Standard Toolbar
Directly below the Document toolbar resides the Standard toolbar, as shown in Figure 9-4. Here’s where you’ll find items you’d find on most standard Windows toolbars, such as New, Open, Save, Copy, and Paste.
![]()
Figure 9-4: Exploring the Standard toolbar
The following summarizes the options on the Standard toolbar:
-
New: Allows users to create a new web page.
-
Open: Allows users to open an existing web page.
-
Save: Allows users to save the currently open web page.
-
Save All: Allows users to save all web pages users currently have open in Dreamweaver.
-
Print Code: Allows users to print the HTML code that makes up a web page.
-
Cut: Allows users to cut the current selections (areas they have highlighted with their mouse) of their web page.
-
Copy: Allows users to copy the current selection (areas they have highlighted with their mouse) of their web page.
-
Paste: Allows users to paste the contents they’ve previously cut or copied.
-
Undo: Allows users to undo their last action.
-
Redo: Allows users to redo their last action.
The Insert Bar
Dreamweaver’s Insert bar (shown in Figure 9-5) contains buttons for creating and inserting objects, such as tables, layers, and images. The Insert bar is organized into several categories, which you can choose from on the left side of the bar. Each category conatins different options.
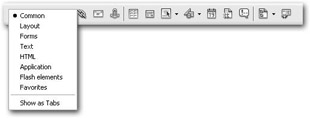
Figure 9-5: Working with the Insert bar
The Insert bar contains the following categories:
-
Common Category: Acts as a one-stop area for adding common items such as hyperlinks, tables, images, and multimedia objects to your web pages.
-
Layout Category: Allows users to add page layout items, such as tables, layers, and framesets. Here, you can also choose among three views of tables: Standard (the default), Expanded, and Layout. When Layout mode is selected, you can use the layout table tools Draw Layout Cell and Draw Layout Table.
-
Forms Category: Allows users to add form elements to a web page. Forms provide a way to prompt users for information, and then carry out actions based on that input.
-
Text Category: Allows users to format text on web pages, as well as insert special characters. This is where you can add bold and italics to your text.
-
HTML Category: Allows users to select various HTML code to place into a web page, such as header content, tables, and frames.
-
Server-code Categories: An advanced feature that allows users to add server-side objects into web pages. A server-side object is code that performs actions on a web server (where the website is hosted) rather than the viewer’s computer. A CGI script is an example of a server-side application, while a JavaScript script is an example of a client-side application.
-
Application Category: Allows users to insert dynamic elements into their web pages, such as recordsets and repeated regions.
-
Flash elements Category: Enables users to add Macromedia Flash elements to their web pages. Flash elements are animated vector images.
While Flash elements are cool to look at, you want to avoid overusing Flash in your websites. For starters, if a user doesn’t have a Flash plug-in, he won’t be able to view your web pages. Another reason is that search engines such as Google and Yahoo can’t read vector images. Too much Flash won’t help you be found on the search engines.
-
Favorites Category: Allows users to group and organize the Insert bar items in a single location.
Exploring the Properties Inspector
Now that you’ve gotten some of your bearings with Dreamweaver, let’s start putting Dreamweaver to work. Make sure your bing_home.html page is open. Then, let’s take a look at the Properties inspector at the bottom of your Document window, as shown in Figure 9-6.

Figure 9-6: Working with the Properties inspector
The Properties inspector allows you to examine and edit properties within your web page, such as text, images, or objects. The contents of the Properties inspector change depending on the element you select.
For example, say you’re working with text. The Properties inspector displays properties related to text (such as text size, whether the text is bold, text justification, and text color). If you’re working with an image, the properties include width, height, and whether the image is a hyperlink.
Creating Background Images
One of the first things you’ll want to do when pulling Photoshop images into Dreamweaver is make them background images. Defining images as background images allows you to place text over them.
You’ll define these properties of your web page images within Dreamweaver’s Properties inspector. Perform the following:
-
Select each of the images within the Dreamweaver tables and press the Delete key. This removes them from the Designer layout as shown in Figure 9-7. Don’t worry, though; you’ll add them back in a moment.
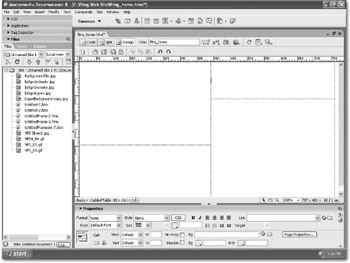
Figure 9-7: Deleting images from your web page -
Select the first cell in your table (the one that held your title bar). Now, select the folder icon next to the Bg field in the Properties inspector, as shown in Figure 9-8. The Select Image Source dialog box displays.

Figure 9-8: Defining a background imageThe Bg field is where you define background images.
-
In the Select Image Source dialog box, go to the folder that contains the images for your web page. (Photoshop saved this folder in the same location you saved your web page.)
-
Select the title bar image (it may be Bing_home_01.gif). If you’re not sure, press the View Menu icon. This is the last icon to the right of the Look in drop-down field. From the View menu, select Thumbnails. This displays a small picture of the images in this folder, as shown in Figure 9-9.
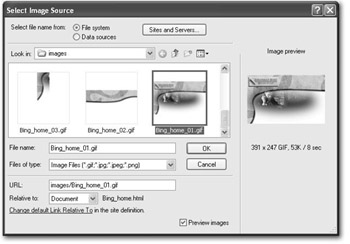
Figure 9-9: Accessing images from the Select Image Source dialog box -
Press OK. You’re returned to the Design layout. Notice this image displays in your web page, as shown in Figure 9-10. If you look at the Properties inspector, the Bg field displays the Bing_home_01.gif image. That means this image now is a background image.
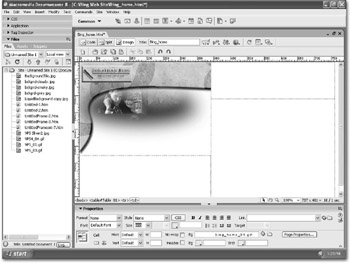
Figure 9-10: Defining background images in a web pageContinue working your way around the table cells. Add the appropriate images again as background images using the Properties inspector. When you’re finished, your screen should look like Figure 9-11.
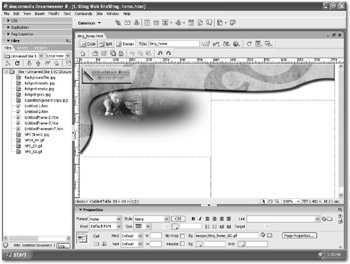
Figure 9-11: Changing all graphics to background images
You’ll want to perform these same steps with any images you create in Photoshop to change your images to background images. Making your graphics “background images” allows you flexibility when working with your web editor (no matter what the program, be it Macromedia Dreamweaver, Adobe GoLive, Microsoft FrontPage, or even Notepad).
Creating Rollover Buttons
In Chapter 4, you created some buttons for the Jonathan Bing web page. Let’s put those to work now. Perform the following steps in Dreamweaver:
-
Access the following button files you created in Chapter 4. Save these files in the images folder associated with the bing_home.html web page you’ve been working on in this chapter.
-
bing_home1.gif
-
bing_home2.gif
-
bing_services1.gif
-
bing_services2.gif
-
bing_contact1.gif
-
bing_contact2.gif
Note You can access these button files from the Chapter 9 folder in the downloadable files.
-
-
With the bing_home.html page open in Dreamweaver, go to the cell that holds the navigation/title bar. In the Properties inspector, change the Vertical drop-down field to Bottom, as shown in Figure 9-12.

Figure 9-12: Changing the vertical alignment of a table cellThis changes the vertical alignment of this table cell. Thus, anything you add to this cell (text, images, etc.) will begin at the bottom.
-
Make sure you’ve selected the cell where the navigation/title bar image resides. In Dreamweaver, go to the Insert bar. Select the down-facing arrow next to the Images icon and choose Rollover Image, as shown in Figure 9-13.

Figure 9-13: Inserting a rollover image -
The Insert Rollover Image dialog box displays. Define the following, as shown in Figure 9-14.
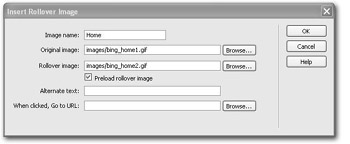
Figure 9-14: Defining the Home rollover button-
Image name: Home
-
Original image: images/bing_home1.gif (you can select this using the Browse button)
-
Rollover image: images/bing_home2.gif (you can select this using the Browse button)
Tip Although we left the When clicked, Go to URL text field blank (because we haven’t built any other pages for this website), normally you would want to use this field to link your button to another web page.
Avoid having links and buttons that don’t lead anywhere, as links that don’t work correctly will annoy visitors to your web page.
-
-
Press OK in the Insert Rollover Image dialog box. The Home rollover image is added to your web page.
-
Hold down the Shift key while you press the Enter key twice.
-
Go to the Insert bar again. Select the down-facing arrow next to the Images icon and choose Rollover Image.
-
Perform the same action as you did in steps 4 and 5; however, this time name the image Services, and selectbing_services1.gif and bing_services2.gif.
-
In the cell directly below the navigation/title bar, hold down the Shift key while you press the Enter key twice.
-
Again, go to the Insert bar. Select the down-facing arrow next to the Images icon and choose Rollover Image.
-
Perform the same action as you did in steps 4 and 5; however, this time name the image Contact, and selectbing_contact1.gif and bing_contact2.gif.
Your screen should look something like Figure 9-15.
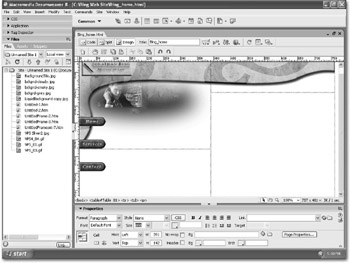
Figure 9-15: Adding rollover buttons to your web page
| Tip | One of the nice things about Dreamweaver is that you don’t have to create rollover buttons in Photoshop. Go to Insert ▶Media ▶Flash Buttons to view a wide selection of predefined rollover buttons you can use in your web pages. |
Adding Text to Your Web Page
Let’s finish up by adding some text to the Jonathan Bing web page. If you’ve used Microsoft Word or some other word processing program, you’ll probably find yourself right at home with Dreamweaver’s text tools.
To add text in Dreamweaver, all you need to do is type directly into the Dreamweaver Document window. You can also cut and paste from other documents (such as Microsoft Office programs).
In the Properties inspector there’s a Format drop-down field, a Size drop-down field, and a Style drop-down field. These and the other options of the Properties inspector allow you to modify your page’s text as needed.
Type some text now, and then play with the Properties inspector to modify this text. See if you can make your screen look something like Figure 9-16.
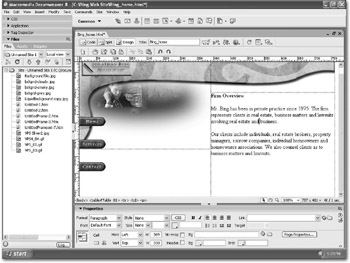
Figure 9-16: Adding text to your web page
Previewing Your Web Pages
It’s a good idea to preview your web pages in an actual web browser as you work in Dreamweaver. This ensures that the pages are appearing and functioning as you wish.
To preview your web page, press the F12 key. You’re asked if you wish to save your web page. Go ahead and save your page. Your web page then displays in a web browser, as shown in Figure 9-17. As you roll your mouse over the buttons, notice how the buttons change.
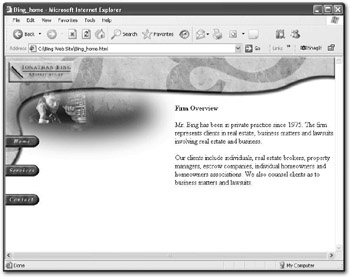
Figure 9-17: Viewing your web page in a web browser
EAN: 2147483647
Pages: 108