6.5 Using JavaBeans in the sample portlet
|
| < Day Day Up > |
|
6.5 Using JavaBeans in the sample portlet
In the HelloWorldFromDominoServer portlet example, you wrote an output directly to the portlet. A better way to accomplish the same thing is to create a JSP for output and use JavaBeans to pass values to the JSP from Java code.
Overview of JavaBeans
The JavaBeans component architecture extends "write once, run anywhere" capability to reusable component development. In fact, the JavaBeans architecture takes interoperability a major step forward: your code runs on every OS and also within any application environment.
JavaBeans brings component technology to the Java platform. With the JavaBeans API you can create reusable, platform-independent components. Using JavaBeans-compliant application builder tools, you can combine these components into applets, applications, or composite components. JavaBean components are known as "Beans."
The JavaBeans specification defines a set of standard component software APIs for the Java platform. The specification was developed by Sun Microsystems.
Working through this example gives you the opportunity to extend your Java programming skills from the HelloWorld sample to the use of JavaBeans. This example also reinforces understanding of the MVC model as well: Model is the JavaBean, View is the JSP file, and Controller is the Java file.
Implementation details and example
Starting from the same point as the previous HelloWorldFromDominoServer exercise, open the project and proceed as follows:
-
Create a JavaBean class called PortletDominoBean. Do this by selecting New → Other → Java → Class → Next; for name field type PortletDominoBean, and click finish.
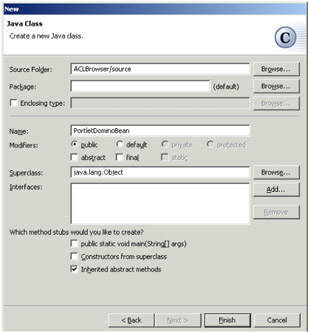
Figure 6-12: Creating a JavaBean -
Rewrite the PortletDominoBean class as shown in example Example 6-3.
Example 6-3: Example of JavaBean

public class PortletDominoBean { private String NotesVersion = ""; public void setNotesVersion(String s) { NotesVersion = s; } public String getNotesVersion() { return (NotesVersion); } } -
Modify the portlet code to use the JavaBean. The modified code is shown in Example 6-4 on page 327. Once you are able to getNotesVersion from the session, you will add it to the bean.
Example 6-4: Functionality in doView
if (diiopsession == null) try{ // Creating diiop session for Domino diiopsession = NotesFactory.createSession("<servername>","<username>","<password>"); // Set session to attribute for reuse request.getSession().setAttribute("diiopsession", diiopsession); //Make a bean PortletDominoBean bean = new PortletDominoBean(); //Save name in bean bean.setNotesVersion((String)diiopsession.getNotesVersion()); //Save bean in request request.setAttribute("PortletDominoBean",bean); //Invoke the JSP to render getPortletConfig().getContext().include("/jsp/View.jsp ",request,response); -
Create a JSP file to make the final UI for the browser. Select New → JSP; in the name field type View.jsp; and click Finish.
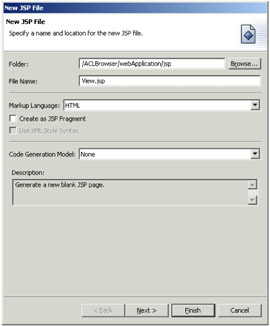
Figure 6-13: Creating a JSP file -
Click Source from the designer and edit the view.jsp code. The modified code is presented in Example 6-5.
Example 6-5: Using JavaBean in JSP
<!DOCTYPE HTML PUBLIC "-//W3C//DTD HTML 4.01 Transitional//EN"> <HTML><HEAD> <%@ page language="java"contentType="text/html; charset=WINDOWS-1252"%> <META http-equiv="Content-Type" content="text/html; charset=WINDOWS-1252"> <META name="GENERATOR" content="IBM WebSphere Studio"> <TITLE>View.jsp</TITLE> </HEAD><BODY> <jsp:useBean scope="request"/> <h1>Notes version through java bean is <%=PortletDominoBean.getNotesVersion()%></h1></BODY></HTML>
The result of this example is identical to the previous one; therefore, we don't repeat the deployment. The only difference from the previous example is how the data is stored.
|
| < Day Day Up > |
|
EAN: 2147483647
Pages: 103