Installing and Configuring iPrint
| < Day Day Up > |
| Test Objective Covered:
As with the NNLS components discussed in the previous chapter, the CLE objectives require you to know how to install and configure iPrint. Just as with these other products, we're not going to spend a great deal of time discussing how to install the iPrint service because NNLS installation procedures and dependencies were presented in depth in Chapter 5, "NNLS Installation and Administration." Instead, we will focus on installing the iPrint Client and configuring the iPrint service in this chapter. Installing the iPrint ServiceIf you performed an Express NNLS installation, iPrint was installed on your system. If you performed a Custom install, you had the opportunity to select the iPrint component for installation. If you didn't select iPrint during the initial installation of NNLS, you can perform a post-installation by completing the following steps:
During the installation process, the iPrint system files are copied to the following directories in your server's file system:
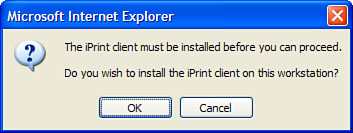
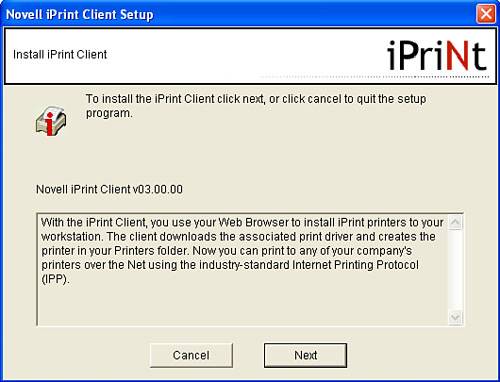
Installing the iPrint ClientAs mentioned earlier, Novell only provides an iPrint Client for Windows workstations at the present time. There are rumblings that an iPrint Client for Linux will become available in future releases. We'll have to wait and see if that actually happens. For now, let's talk about how the iPrint Client is installed on Windows workstations. As with the iFolder Client we discussed earlier in this book, Novell makes the client software for iPrint available on the iPrint website that is installed by default on your server when you install NNLS. This makes your job as an administrator very easy. Instead of having to run around to all the PCs in your company with a stack of CDs, the end user can simply access this website and download the required client software. It also makes the required software easily accessible to remote users. Recall the scenario introduced at the beginning of this chapter. Odds are that the employee working from home at 2:00 in the morning will not have a CD with client software handy. Putting the client software on the iPrint website makes it available to any employee who needs it when he or she needs it. To install the iPrint Client, you need to do the following:
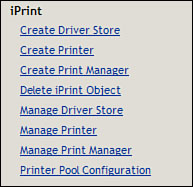
Let's now talk about how to configure your iPrint implementation. Configuring iPrintIn order to configure your iPrint system, you need to complete a series of tasks . These include the following:
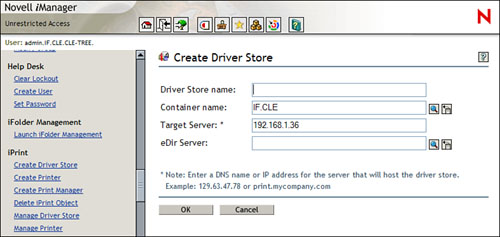
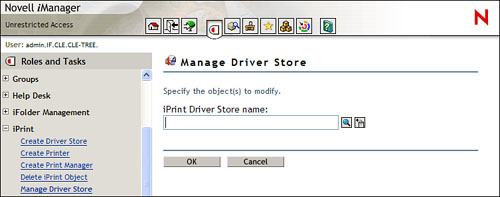
Let's look at the first task: configuring your system's Driver Store. Configuring the iPrint Driver StoreAs we discussed earlier, the iPrint Driver Store contains the drivers for the printers serviced by your iPrint Manager. However, the Driver Store is not created during the installation of iPrint. You must create it manually with iManager. To do this, follow these steps:
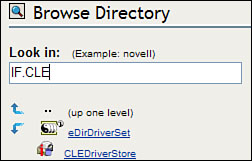
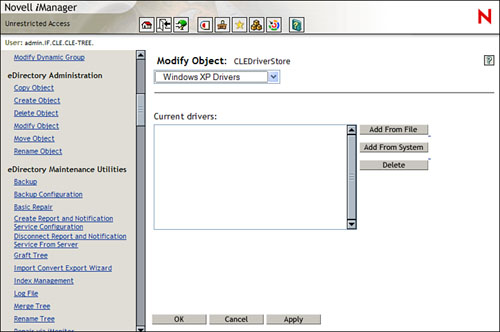
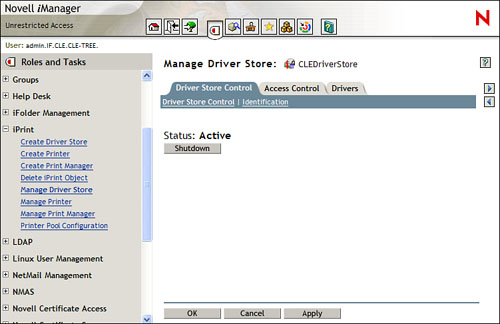
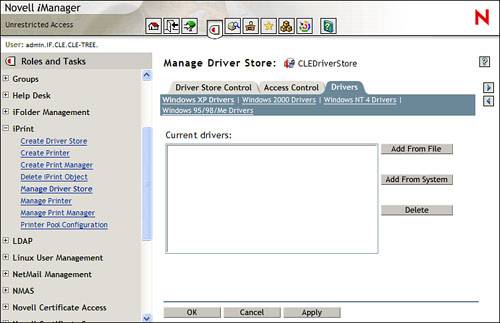
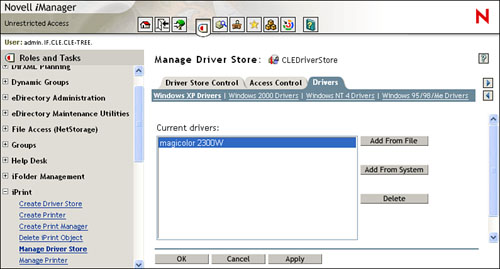
After completing this process, you will see a new Driver Store object in your eDirectory tree. In Figure 9.8, a Driver Store object named CLEDriverStore has been created in the IF.CLE container. Figure 9.8. Driver Store object in the eDirectory tree. With the Driver Store object created, the next task you need to complete is to add printer drivers to the Driver Store. By default, NNLS doesn't provide any printer drivers, as shown in Figure 9.9. Figure 9.9. No drivers in the Driver Store. Before you can deploy iPrint, you must upload the appropriate drivers for your printers into the Driver Store object. Using iManager, you can upload drivers in two ways:
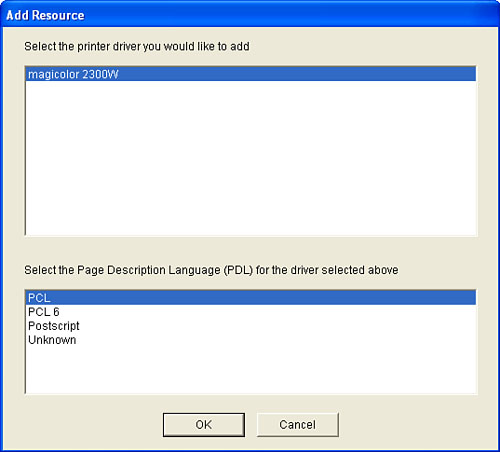
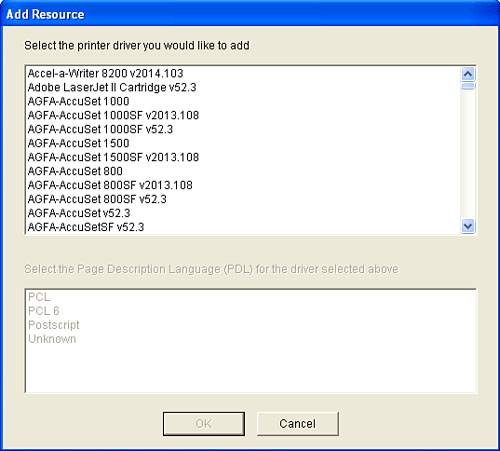
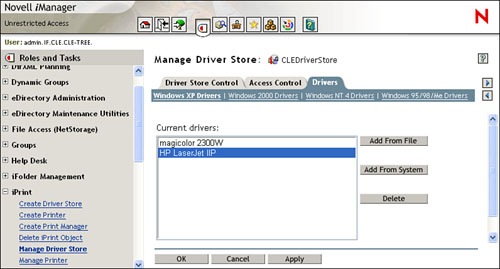
To upload drivers, you must access iManager using Internet Explorer. You can't use Mozilla or Netscape Navigator. You must also access iManager from a workstation that already has the iPrint Client installed. Once these conditions are met, you can upload a driver by doing the following:
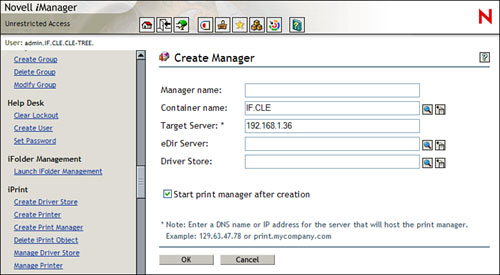
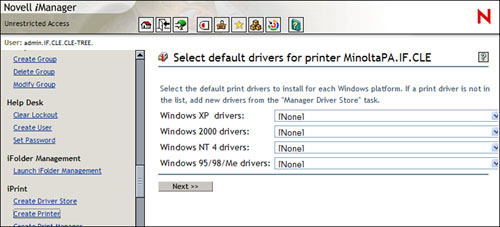
You can also add an individual driver to your Driver Store when you create a Printer Agent. We'll discuss how to do this later in the chapter. With your Driver Store created and configured with drivers, the next task in configuring your iPrint system is to configure an iPrint Manager for your server. Configuring an iPrint ManagerAs we discussed earlier in this chapter, the iPrint Manager is the heart of the iPrint system. The iPrint Manager runs as a daemon (ipsmd) on your NNLS server. However, it is created and managed as an object in your eDirectory tree using iManager. Unlike configuring a Driver Store, creating and managing an iPrint Manager can be done with any supported web browser and doesn't require the iPrint Client to be installed on the system where the web browser is running. To create and configure an iPrint Manager, do the following:
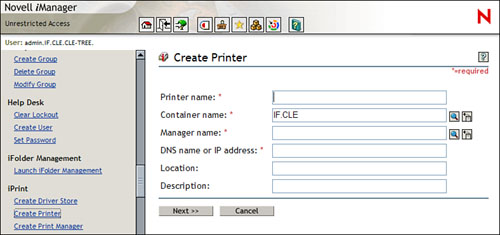
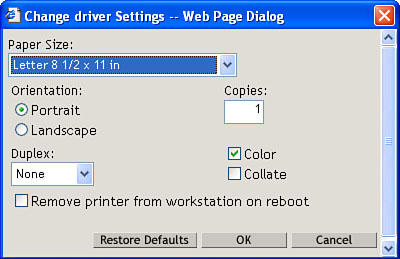
That's all there is to it. At this point, your Driver Store and your iPrint Manager are configured. The next thing you need to do is configure Printer Agents for your network printers. Configuring Printer AgentsRemember that Printer Agents represent each physical printer in your network. The relationship between Printer Agents and printers is one-to-one. A Printer Agent can only be associated with one physical printer. Note Interestingly, you can actually have multiple Printer Agents representing a single physical printer. This is very useful because you can create, through eDirectory rights assignments, one Printer Agent with one set of printer settings (such as paper size , duplexing , and so on) available to one type of user and then another Printer Agent with a different set of printer settings available to a different category of user . As well, a single iPrint Manager (of which there can only be one per server) can manage multiple Printer Agents. As with the iPrint Manager, Printer Agents are configured using iManager. You can use any supported web browser to configure Printer Agents, and you don't have to have the iPrint Client installed on the workstation you are using to access iManager. To create a Printer Agent, complete the following steps:
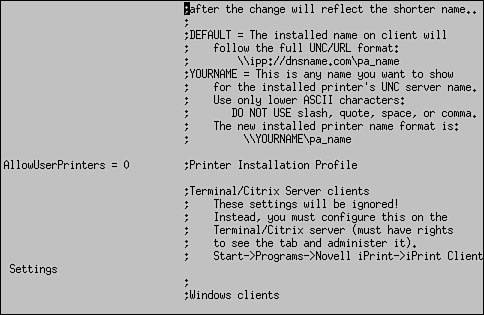
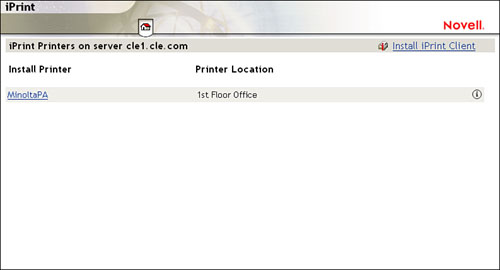
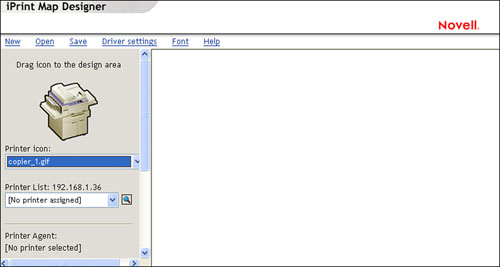
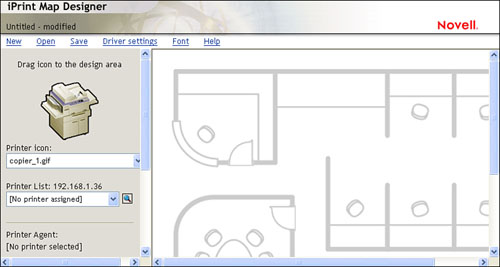
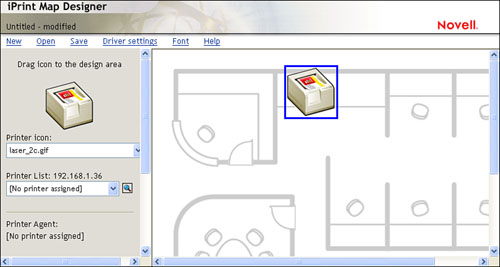
That's all there is to creating Printer Agents in your tree. Before continuing, you need to understand a couple issues regarding TCP/IP communications between the iPrint Client, the iPrint Manager, and the Printer Agent. First, data sent between the iPrint Client and the iPrint Manager can be encrypted using IP port 443. You can also use IP port 631 to send data between these two components unencrypted. Unless you have a compelling reason not to, you should always use encrypted communications. Second, data passing from the Printer Agent and the physical printer is sent using the LPR protocol. LPR doesn't support encryption; therefore, data sent between the Printer Agent on the server and the physical printer hardware is passed in clear text. With this in mind, you should be sure communications between these two components doesn't cross a public network (such as the Internet). The best way to prevent this is to place both components behind the same firewall. With that said, there's still one more Printer Agent configuration task to be completed. This task is related to the way printers can be added to Windows NT, 2000, and XP workstations. Remember that these operating systems are multiuser systems. Each local user in the system has his or her own profile, Desktop, and My Documents directory (among other things). Warning In this context, the term local user refers to Windows user accounts, not eDirectory user accounts. The Administrators and Power Users groups mentioned refer to Windows groups on the local workstation, not to eDirectory groups . Windows 95, 98, and Me, on the other hand, are not multiuser systems. Tip Windows Me can be configured as a quasi multiuser system, but its default configuration is a single-user system. On Windows 9x and Me systems, every user who uses the system sees the same Desktop and the same My Documents folder, and has access to the same installed printers. If an iPrint printer is downloaded and installed on one of these operating systems, it is available to all local users in the system. With Windows NT, 2000, and XP, a printer can be installed such that it is available to all local users on the system, much like a Windows 9x or Me system. Only users who are members of the Administrators or Power Users group can create this type of printer. However, a printer can also be configured on these system such that it is available only to the local user who installed it. This type of printer can be created by any local user. iPrint can be configured to support either type of printer. This is done by editing the /var/opt/novell/httpd/htdocs/ippdocs/iprint.ini file on your NNLS server, a portion of which is shown in Figure 9.21. Figure 9.21. Configuring iPrint to support user printers. In Figure 9.21, notice the AllowUserPrinters parameter. This is used to define how printers installed in the Windows system by iPrint are implemented. If this parameter is set to (which is the default value), iPrint printers can only be installed by local users who are members of the Administrators or Power Users groups. In this situation, iPrint printers installed are available to all local users in the system. If this parameter is set to 1 , then local users who are members of the Administrators or Power Users group can install iPrint printers for all users in the system as they can when this is set to . However, if the local user is not a member of either group, he or she can only install the iPrint printer for his or her own user account. In this situation, the printer will only be available to the given user, and other local users won't see the printer. If this parameter is set to 2 , then all users will only be able to install iPrint printers for their own local user accounts. Even users in the Administrators or Power Users group can only install iPrint printers for themselves . As implied earlier, these parameters have no impact on Windows 95, 98, and Me workstations. The best way to configure this file depends on your organization's standards. Some will direct that iPrint printers be created only for the individual Windows users. Others may not be quite so rigid. When you're done configuring this file, you're ready to complete the last iPrint configuration task: creating printer location maps. Creating Location-Based Printer MapsiPrint can be configured to display the Printer Agents associated with the iPrint server in two different ways. The first way is called the list view . As shown in Figure 9.22, when you access the iPrint web page, located at http:// your_server_IP_address /ipp, with Internet Explorer, a simple list of configured printers is displayed. This is the default view for your iPrint server. Figure 9.22. iPrint list view. This display is nice, but it seems rather dull to me. You've probably noticed that throughout this chapter I've referred to the fact that you can configure iPrint to display an office map with printer icons that users can use to access printers. This is the second way Printer Agents for your iPrint system can be displayed. In my opinion, this is the best way to do it. It provides users with an easy way to pick the printer they want to print to. iPrint comes with the iPrint Map Designer, which is a simple web-based tool that you can use to create a customized map for your organization. To do this, you will need a Windows workstation that has Internet Explorer 5.5 and the iPrint Client installed. You'll also need a graphic (in BMP, GIF, or JPEG format) of your office's floor plan. If you just want to experiment, NNLS includes a couple sample maps in the /var/opt/novell/httpd/htdocs/ippdocs/images/maps directory. We'll use these sample maps later in a lab exercise for this chapter. Once you have your workstation and your map image files ready, you can configure your location-based printing maps by doing the following:
|

| < Day Day Up > |
EAN: 2147483647
Pages: 128