Managing the Linux Networking Configuration
| < Day Day Up > |
| Test Objective Covered:
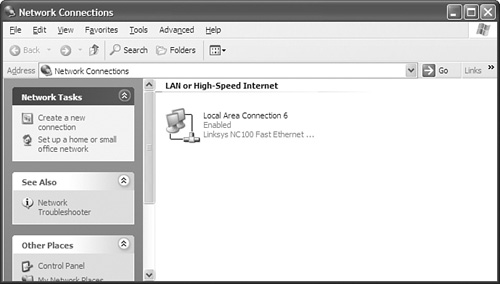
With Linux file system security behind us, we're ready to move on to a discussion of basic Linux network configuration tasks . To pass the CLE certification, Novell expects you to know what the term eth0 means and how to do some simple tasks, such as assigning an IP address or subnet mask. Linux Network InterfacesIf you're coming into the Linux arena from the Windows world, you're probably used to managing Windows network interfaces using the Control Panel, as shown in Figure 3.15. Figure 3.15. Managing network interfaces in Windows XP. Notice that each interface is assigned a name , such as Local Area Connection 1 , Local Area Connection 2 , and so on. Managing Linux network interfaces is a little bit different. Linux Ethernet interfaces are labeled eth0 , eth1 , eth2 , and so on. Each network board installed in the system is assigned one of these labels. Most modern PC systems use the Peripheral Component Interconnect (PCI) expansion bus to implement modular expansion boards . PCI slots are assigned a number beginning with 1, as shown in Figure 3.16. Figure 3.16. PCI slots. By default, if you have only one network board in the system, it is assigned to eth0. If you have more than one network interface in the system, the board installed in the lowest numbered PCI slot is assigned to eth0. The board installed in the next lowest-numbered PCI slot is assigned to eth1, and so on. This seems simple on the surface. It gets tricky, however, when your motherboard uses an integrated network board. Tip An integrated network board is one that is built into the motherboard hardware itself. There is no network board installed in an expansion slot. The motherboard provides an RJ-45 jack to plug in an Ethernet cable. If you are using only one network interface and it is the integrated interface, it will be automatically assigned to eth0. If you use the integrated interface and a network board installed in an expansion slot, however, either one could be assigned to eth0. Some motherboard manufacturers build their boards such that an integrated device, such as a network board, will be assigned a lower slot number than one installed in a PCI expansion slot. I've encountered many systems where the built-in network adapter was assigned a very high number, whereas the first PCI expansion slot was assigned the number 1. If you encounter this situation, you can manually swap eth0 and eth1 between interfaces. I've found it much easier (and faster), however, to simply swap the cables plugged into the RJ-45 jacks on the two interfaces.
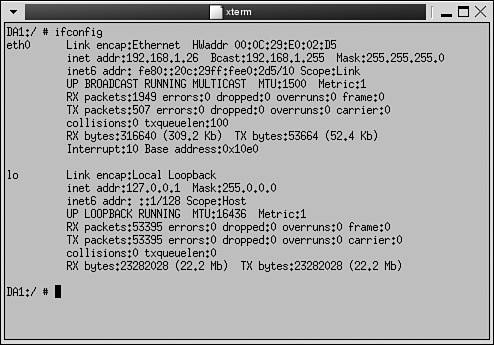
The good news is that most of the systems you work with will probably only have a single network interface. Most of the administration tasks you will need to perform will be with eth0. There's also one other interface to be aware of that is present in all Linux systems, even those that don't have a network board installed: lo . The lo interface is the localhost loopback interface. It is usually assigned an IP address of 127.0.0.1. This interface always points back to the host system. Many Linux applications and services require lo to be present to function. Managing Linux Network Interfaces with ifconfigWhen you install your Linux system, you are given the opportunity to configure various parameters for your network interfaces, such as IP address, subnet mask, and default gateway. At some point, you will probably need to modify this configuration. This can be done with the ifconfig command. ifconfig is a very powerful command. It can be used to assign IP addresses, modify subnet masks, and perform many other tasks. It can also be used to view the current networking configuration. If you enter ifconfig at a shell prompt on a Linux system, it displays detailed information about each network interface installed in the system. This output is displayed in Figure 3.17. Figure 3.17. Output from the ifconfig command. Tip The ifconfig command can only be run by the root user . Notice in Figure 3.17 that this particular SUSE Linux system has two interfaces installed: eth0 and lo. The eth0 interface is an Ethernet interface with the parameters listed in Table 3.1. Table 3.1. Network Parameters
The ifconfig utility can also be used to configure a Linux network interface. The general syntax is as follows : ifconfig Linux_interface parameter For example, if you wanted to see only the current settings for the eth0 interface, you could enter ifconfig eth0 . Some of the more useful parameters (and the ones you need to know for the CLE certification) include the ones shown in Table 3.2. Table 3.2. ifconfig Parameters
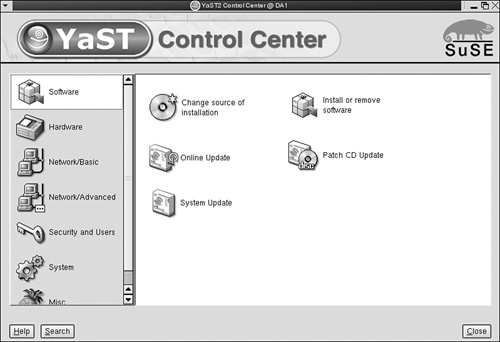
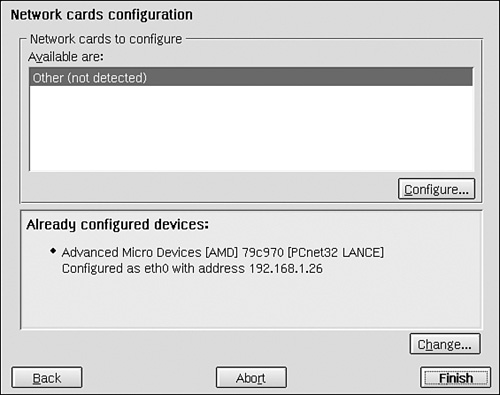
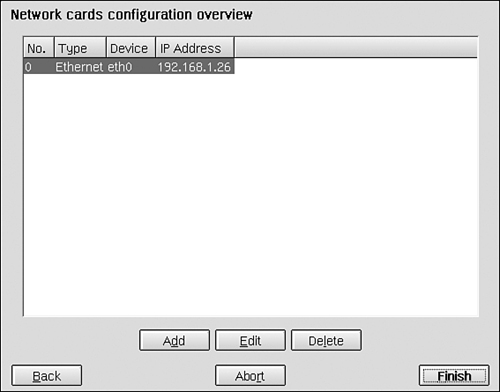
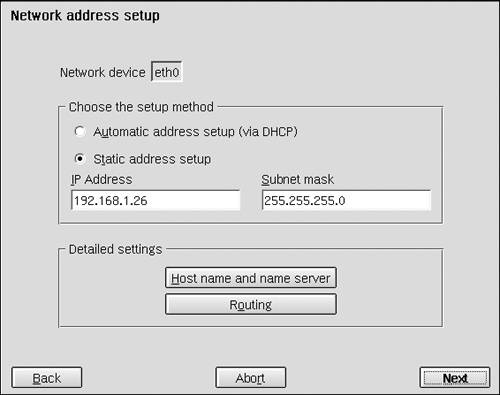
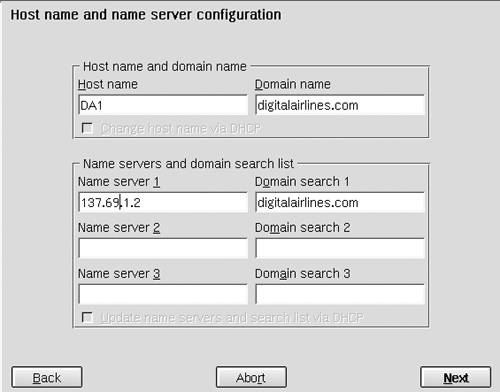
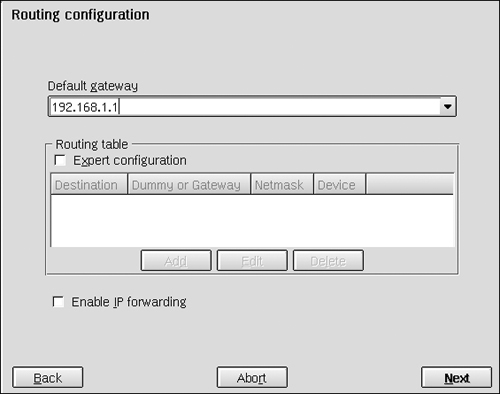
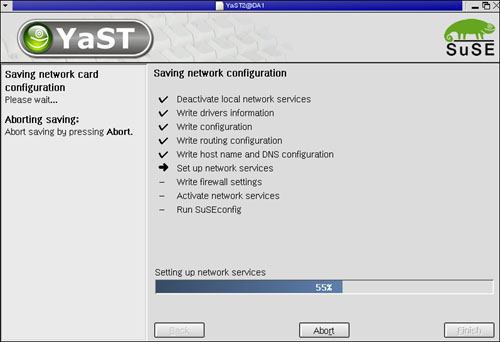
Configuring Linux Network Interfaces in YaSTIf using the command line gives you a case of the hives, never fear. You can also configure your Linux network interfaces in a graphical X Windows system environment using YaST. To run YaST, select Applications , SUSE Menu , System , YaST2 from within GNOME. You can also run the program by opening a terminal session, changing to the root user using the su - command, and then entering yast2 at the shell prompt. Warning If you aren't authenticated as root, you will be asked to provide the root user's password before YaST will start. If you run YaST from within GNOME, the screen shown in Figure 3.18 appears. Figure 3.18. The YaST Control Center. From within YaST, select Network/Basic and then select Network Card Configuration . The screen shown in Figure 3.19 is displayed. Figure 3.19. The YaST Network cards configuration screen. If you've just installed a new network board in the system, the unconfigured device will be displayed in the Network cards to configure field under Available are . To configure it, select Configure , and you will be presented with a series of screens that guide you through the process of assigning an IP address, subnet mask, default gateway address, and DNS server address to the interface. If you need to modify the parameters assigned to an existing interface, select Change under the Already configured devices field. When you do, the screen shown in Figure 3.20 is displayed. Figure 3.20. Modifying an existing interface in YaST. Notice that each of your interfaces is listed. The system shown in Figure 3.20 has only one network board, so only eth0 is listed. Identify the interface you want to modify and select it. Then select Edit. When you do, the screen shown in Figure 3.21 appears. Figure 3.21. Modifying the network address in YaST. If you want your system to be assigned an IP address dynamically from a DHCP server, mark Automatic address setup (via DHCP) . Warning If you intend to install Novell Nterprise Linux Services on your Linux server, you should not use a dynamic IP address. Many of the NNLS components require that you use a static IP address assignment . If you intend to use a static IP address assignment, mark Static address setup . Then enter an IP address and subnet mask in the respective fields. At this point, you must decide if you need to configure a DNS server address and a default router. If you are using a static IP address assignment, you should configure these parameters. Sometimes, the default router is also referred to as the default gateway , gateway router , or just router . If you are using a dynamic address assignment obtained from a DHCP server, you may or may not need to configure these addresses. Check to see if your DHCP server is configured with the appropriate DHCP options to deliver these parameters automatically. If so, you don't need to configure these parameters. However, sometimes a given DHCP server isn't configured to deliver these addresses. If your DHCP server is in this category, you will need to manually configure these parameters. Tip Most network administrators will configure their DHCP servers to deliver the DNS server and default router addresses automatically. It doesn't make much sense to deliver an IP address without these other two critical parameters . To configure the host name of the system and the DNS server address, click Host name and name server . When you do, the screen shown in Figure 3.22 appears. Figure 3.22. Modifying the DNS server address in YaST. In the Host Name field, enter the host name for your Linux system. In the Domain Name field, enter your organization's domain. In the Name server fields, enter the IP addresses of your organization's primary, secondary (optional), and tertiary (optional) DNS servers; then click Next . To configure the default router instead, click Routing . When you do, the screen shown in Figure 3.23 appears. Figure 3.23. Modifying the default gateway address in YaST. In the Default gateway field, enter the default gateway IP address for your network and then click Next . Note You'll notice that there are several other parameters in this screen. A full discussion of these is beyond the scope of this book. For more information, see the Linux Network Administrator's Guide at http://www.tldp.org/LDP/nag2/index.html . When you're satisfied with the configuration settings you've configured for the network interface, click Next and then click Finish . At this point, the interface will be disabled and the changes you configured applied. As this happens, the screen shown in Figure 3.24 is displayed. Figure 3.24. Implementing configuration changes in YaST. When the changes have been applied, the interface will be brought back up. A nice feature of Linux is the fact that you don't need to reboot the system after making these types of changes. If you've ever used an older version of Windows, you know that these operating systems require a full reboot for even a minor change to the networking configuration. Note Later versions of Windows, such as Windows 2000 and XP, don't require you to reboot the system after making changes to the networking configuration . You can now close the YaST Control Center by selecting Close . |
| < Day Day Up > |
EAN: 2147483647
Pages: 128