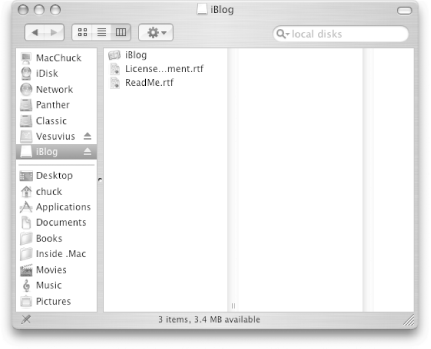
| The latest version of iBlog can be downloaded from Lifli Software's web site (http://www.lifli.com/Products/iBlog/download.htm). iBlog downloads to your Mac as a disk image (a .dmg file), and should automatically mount on your Desktop. After the disk image mounts, a Finder window will pop open , revealing its contents, as shown in Figure 8-1. Figure 8-1. After iBlog's disk image mounts, a Finder window pops open, revealing its contents. 
Once the disk image has mounted, next you'll need to install iBlog on your Mac. To do this, follow these steps: -
Open a new Finder window (File  New, or New, or  -N). This opens another Finder window, placing it on top of the Finder window that contains the contents of iBlog's disk image. -N). This opens another Finder window, placing it on top of the Finder window that contains the contents of iBlog's disk image. -
In the new Finder window, click on the Applications icon in the Finder's Sidebar, or use its keyboard shortcut, Shift-  -A. -A. -
Create a new folder called iBlog in the Applications folder. To do this, go to File  New Folder (Shift- New Folder (Shift-  -N). An "untitled" folder appears in the Applications directory. -N). An "untitled" folder appears in the Applications directory. -
Change the name of the folder from "untitled" to "iBlog"; this is where you're going to move the contents of iBlog's disk image. -
Scroll up in the Finder view and click on the iBlog folder. If your Finder isn't in Column View, you should switch to that view by selecting View  as Columns (or -3). You'll notice that iBlog's folder is empty. as Columns (or -3). You'll notice that iBlog's folder is empty. -
Now bring iBlog's disk image window to the front by selecting Window  iBlog from the Finders menu bar. Now a window similar to the one shown in Figure 8-1 will be on top. iBlog from the Finders menu bar. Now a window similar to the one shown in Figure 8-1 will be on top. -
Next, select and drag the contents of iBlog's disk image window into the iBlog folder you've created in the Applications folder. To do this, you can either drag-select all of the icons in iBlog's window or use Edit  Select All ( -A). All of the icons in window will be selected. Select All ( -A). All of the icons in window will be selected. -
Drag the icons from iBlog's disk image window and place them in the iBlog folder you've created in the Applications folder. A window will appear, informing you that the files are being copied to the Applications folder on your hard drive. -
Once the files have been copied into the iBlog folder, you can close the iBlog window and unmount the iBlog disk image from your Desktop by selecting File  Eject ( Eject (  -E). This automatically closes the iBlog window and unmounts the disk image all at the same time. -E). This automatically closes the iBlog window and unmounts the disk image all at the same time. Now you're ready to start learning how to use iBlog. If you're planning to write to your blog frequently, you should consider placing iBlog's icon in your Dock. To do this, simply select iBlog's icon in the Finder and drag it to someplace on the Dock. You could also just launch iBlog and then right-click on its Dock icon and select Keep In Dock from its contextual menu.  | It's worth noting that you don't have to copy all of the files from iBlog's disk image onto your Mac; you can just drag iBlog's icon into the Applications directory where it will live and function normally. It's always good practice to keep any associated files with an application, though. For example, iBlog comes with RTF versions of its license agreement and a README file. While you might not need these immediately, there may come a time when you might want to refer back to them for some reason. If you find that you never use these, you can always delete them, and then drag iBlog out of the folder and just drop it into the Applications folder. | |
|

 New, or